Read this article to know how to process payments in the Gopayment app. If you are using QuickBooks Payments then it will help your customers to pay the invoices by credit card or ACH bank transfer. This article provides you the deep learning of how to process payments in the GoPayment App, steps of the process are arranged with the images to offer you a better understanding. If having an issue related to it, contact our experts through the number +1-844-405-0904 for QuickBooks Payment support.
When you are using the go, you can easily use the GoPayment app to receive cash, check, and credit card payments whenever and wherever you need it. It is the same as a mobile app point of sale. You can also swipe a credit card or EMV chip card with the Bluetooth card reader. With Gopayment you can also receive payment from Apple Pay, Google Pay, and Samsung Pay. And even if you do not have a card reader, you can manually enter transactions very easily.

Now, let’s proceed and discuss the steps to process payments in the Gopayment app.
Table of Contents
Steps To Process Payments In The GoPayment App
Step 1: Sign up or connect an existing QuickBooks Payments account
First, sign up for your QuickBooks Payments, if you have not yet:
- Firstly you have to open the intuit account page to sign up.
- After clicking on the link you can see the option to create an account, click on this.
- Then the next is to follow the instructions that enter the first name, last name, and email id.
- After that, you will receive the verification mail that you need to verify it.
- After verification is done, you can sign in easily. Now you have to proceed further to connect your QuickBooks payments account.
Now you can log in with your credentials. After login, you can see your signup window displays three sections.
- The first one is a Business section, you have to click on start and enter the business details by filling out the forms. After completion, you have to select next.
- Second, you can see the owner/proprietor section again start and fill out all the details in the forms, and then click on Next.
- Thried one is in the payment deposit section, click on start. In this section, you can get a QuickBooks checking account as well as change the bank account for your customer’s payments. In case you change a different bank account then you have to select Add and search for your bank and sign in details of your bank and then select Connect.
- After finishing all the sections you should select Get set up.
(a). Steps to connect your existing account to QuickBooks Online
Follow the below steps to connect your existing account to QuickBooks Online if you have already signed up with QuickBooks Payments.
- First, log in to your QuickBooks Online with admin rights.
- Now, click on Settings ⚙ and then go to Account and Settings.
- Then the next step is to choose the payment and click on it.
- Click on the Connect or Link Merchant Service in the Existing Account section.
- On the current window, click on the QuickBooks Payment account that you need to connect. Later, click on Connect.
- Reexamine the account information and be sure it is correct. If everything sounds good, click on Connect.
- Now, log out and log in back into QuickBooks Online when the connection is completed.
Note: QuickBooks replaces your user ID with your QuickBooks Online users ID instantly from your QuickBooks payment account, when you connect your account, So you do not need to do anything, everything is taken care of by QuickBooks.
(b). Turn on payment options and & online invoices
After your account is connected, you have to turn on the payment option for processing the payments. You can also link the different accounts other than the current account. For this, you have to set up your account and then customers can pay invoices online. Follow the given instructions
- Firstly you should go to the settings ⚙.
- After that, you have to choose Account and settings, and select Sales.
- Now under invoice payments, you have to click on the edit option or pencil icon, then you have to select the payment option.
- Then the next step is to click on Save.
- After that, you have to click on Done.
Step 2: Order and connect a card reader
Now, after connecting the existing QuickBooks payment account you have to order the card reader and set it up.
Step 3: Process payments on the go
After setting up the card reader, you are ready to get paid. Go with the below steps depending on the kind of sale and the GoPayment app (Green or Blue) you have.
Note: You can pay for an open invoice or take advance payment with Green GoPayment App. But, if you do not have a blue GoPayment app, you cannot.
Follow these steps if you have the green GoPayment app

Make a new sale
If you are paying at the place, then it is good to create a sales receipt. Note: If you have previously sent them the invoice, Go with the steps in the following section:
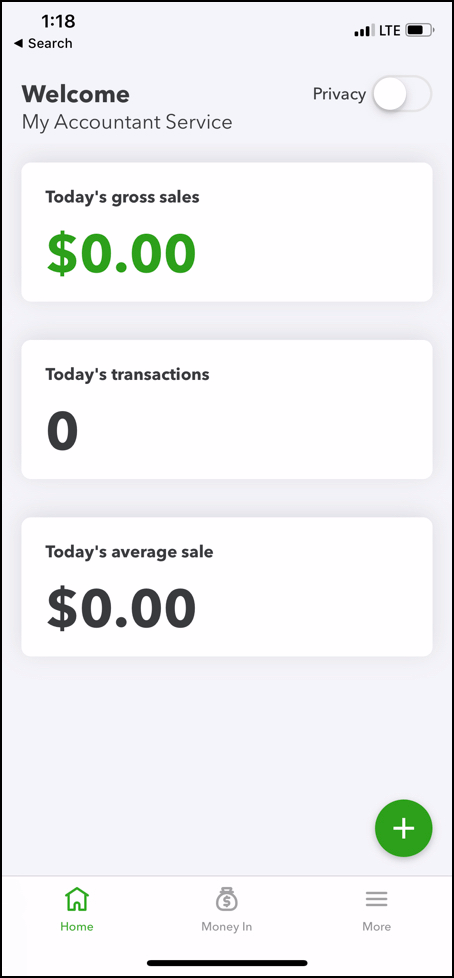
- Go to your GoPayment app, look for the Plus (+) click on it, and later click on New sale.
- Now insert the total sale amount. Or choose the Items tab to add specific products and services from your inventory.
- Go to the Review order and click on the Charge $ button.
- Now choose the payment process: Card reader, Key in a card, Cash, or Check, select anyone in which you are comfortable.
- If you want to choose a card reader, then go with the steps as per your type card type:
- Credit cards with EMV chips: Place the card in the chip slot facing down. The magnetic stripe must face the customer. Later click on the charge.
- Credit cards you swipe: Slide the card to the slot on the back of the reader. The magnetic stripe must face the customer. Then click on charge
- Apple Pay, Google Pay, and Samsung Pay: If you are using an all-in-one Bluetooth card reader, then you will process mobile payments very easily. You just need to guide your customers to tap their devices in front of the card reader. And later click on the charge.
- If in case, you do not have a card reader, then choose the Key in the card and manually insert all the information. Later, click on Charge.
- If you want to choose a card reader, then go with the steps as per your type card type:
- When you are completed with the form, click on the Tender Done.
- Now after finishing the transaction, click on the Send to email or text the receipt
Steps to take payment for an existing invoice
If you have already sent an invoice to a customer in QuickBooks Online, then your customer will pay for it online from the same email that you have sent. This is the very simplest method to get paid.
You also have the option to process payment for open invoices. The GoPayment app syncs automatically payments with invoices in QuickBooks Online.
- First, go to your GoPayment app and look for the Plus (+) and tap on it and click on the Invoice payment.
- Later, look for the customer, or you can also use the search field to find your customer.
- Now click on the existing invoice of the customer for which paying.
- Click on Charge and choose a payment method.
- If you want to choose a Card reader, then go with the steps as per your type card type:
- Credit cards with EMV chips: Place the card in the chip slot facing down. The magnetic stripe must face the customer. Later click on the charge.
- Credit cards you swipe: Slide the card to the slot on the back of the reader. The magnetic stripe must face the customer. Then click on charge
- Apple Pay, Google Pay, and Samsung Pay: If you are using an all-in-one Bluetooth card reader, then you will process mobile payments very easily. You need to guide your customers to tap their devices in front of the card reader. And later click on the charge.
- If in case, you do not have a card reader, then choose the Key in the card and manually insert all the information. Later, click on Charge.
- If you want to choose a Card reader, then go with the steps as per your type card type:
Take payment in advance
You can also receive customer payments before creating an invoice with the GoPayment app. QuickBooks saves online payments in the form of credit.
- Go to your GoPayment app and look for the Plus (+) option and click on it and choose Customer payment.
- Later, click on the customer or choose Plus (+) to add their information.
- Click on Add charge amount and insert the amount.
- Now, go to the Charge $ button.
- Now choose the payment process: Card reader, Key in a card, Cash, or Check, select anyone in which you are comfortable.
- If you want to choose a Card or reader, then go with the steps as per your type card type:
- Credit cards with EMV chips: Place the card in the chip slot facing down. The magnetic stripe must meet the customer. Later click on the charge.
- Credit cards you swipe: Slide the card to the slot on the back of the reader. The magnetic stripe must face the customer. Then click on charge
- Apple Pay, Google Pay, and Samsung Pay: If you are using an all-in-one Bluetooth card reader, then you will process mobile payments very easily. You just need to guide your customers to tap their devices in front of the card reader. And later click on the charge.
- If in case, you do not have a card reader, then choose Key in card and manually insert all the information. Later, click on Charge.
- If you want to choose a Card or reader, then go with the steps as per your type card type:
- When you are completed with the form, click on the Tender Done.
- Now after finishing the transaction, click on the Send to email or text the receipt
Follow these steps if you have the blue GoPayment app

Here are the steps to take a customer payment in person with a blue Gopayment app.
- First, go to your GoPayment app.
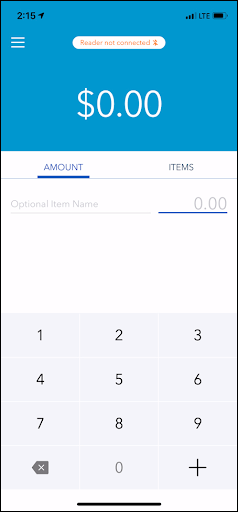
- Click on the Amount and insert the total sale amount. Or select the Items option to add products and services from your inventory.
- Click on the Taxable option to charge sales tax.
- If you want to add any note or discount, then go to the View details.
- Now, go to the Arrow symbol and the next amount to begin the sale.
- Use the customer’s credit card and swipe it. Or also choose Additional payment options that are Key in the card, Cash, or Check.
- If you want to choose a Card or reader, then go with the steps as per your type card type:
- Credit cards with EMV chips: Place the card in the chip slot facing down. The magnetic stripe must face the customer. Later click on the charge.
- Credit cards you swipe: Slide the card to the slot on the back of the reader. The magnetic stripe must face the customer. Then click on charge
- Apple Pay, Google Pay, and Samsung Pay: If you are using an all-in-one Bluetooth card reader, then you will process mobile payments very quickly. You need to guide your customers to tap their devices in front of the card reader. And later click on the charge.
- If in case, you do not have a card reader, then choose Key in card and manually insert all the information. Later, click on Charge.
- If you want to choose a Card or reader, then go with the steps as per your type card type:
- Now after finishing the transaction, click on the Send to email or text the receipt.
Step 4: Learn about deposit times for customer payments
After processing your payment, QuickBooks adds money to your bank account. It always works with the bank account you selected at the time of signing up for QuickBooks payments. The time taken while receive the money in your bank account will always depend on the product and payment plan.
Note: If it is the first time with your payments, your first payments may take a little longer when setting up your accounts. By proceeding forward, the customer processes payments much more quickly.
Hope, this article will be helpful to you to process payments in the Gopayment app. If in case you have any queries or issues then feel free to contact us by dialing our toll-free+1-844-405-0904 and get instant help for your query from our Intuit-certified ProAdvisors.
