Looking for an article to enter or delete transactions by batch in QuickBooks Desktop? In this article, we will discuss the easy steps for how to enter and delete transactions by batch in QuickBooks Desktop? Here in this article, you will learn the process and steps to enter & delete transactions by batch in QBD. Go through the article and understand the batch enter & batch delete feature along with the entries list and process. For more info contact our QuickBooks ProAdvisor toll-free: +1-844-405-0904
QuickBooks Desktop 2018 has many advanced features that make your work easier. Well, all the latest QuickBooks Desktop editions, as well as QuickBooks Desktop Enterprise 18.0 version allow batch entry of Checks/Cheques, Deposits, Credit Card Charges/Credits,Invoices, Credit Memos, Bills, and Bill Credits.
Many small and medium business owners take advantage of QuickBooks for their business purpose because it fulfills all criteria of the business. With this Software, you easy to manage QuickBooks Payroll, Accounting, Finance, and also Sales.
Enter and Delete transactions By Batch in QuickBooks Desktop features
We will share some features of Batch transactions with you,
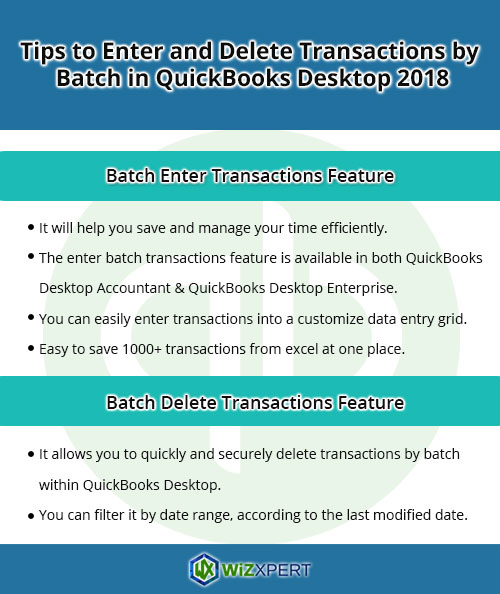
Batch Enter Transactions Feature:
- You can select an order to display the data of columns and that too from multiple data fields.
- Enter transactions into a customized data entry grid is easy.
- Save 1000+ transactions from excel in one place and paste also.
Batch Delete Transactions Features:
- You are able to avoid deleting a transaction that can actually affect another transaction because hide or show transactions that have other linked transactions.
- According to the last modified date we can filter by date range.
- The delete function is also good, a user can’t be confused with it. it helps to take the right decision because a cleared column is great to make sure the correct decision about whether actually to delete or not.
List of Entering and Delete Transactions by Batch in QuickBooks Desktop 2018:
- Checks
- Paychecks
- Sales Tax Payments
- Payee including Customers, jobs, Vendors, Employee, and other names
- Payroll Liability Payments
- Invoices and Credit Memos
- Bills and bill Credits
- Bank Transfers
- Inventory Adjustments
- Deposits
- General Journal Entries
- Transactions in a closed period
- Credit Card Charges/ Credits
How To enter batch invoices
- First, click on the Customers, and next, go to the Create Batch Invoices.
- Just check your terms, sales tax rate, and send method are all up-to-date for the customers that you are sending batch invoices to by choosing every customer:
- Now, give a double-click on the customer or also give a right-click and click on the Edit Customer
- Open the New Info tab and modify the essential information.
- Now, look for the desired customers by examining or you can also select/create a Billing Group (a billing group is a list of customers for creating a batch of invoices), then click on Next.
- Next, click on the desired line items and template.
- Insert a custom message if required, then click on Next.
- Examine the list of invoices to be generated, and next click on Create Invoices.
- Print or email as appropriate, and click on Close.
Steps to entering and deleting transactions by batch in QB Desktop
First you one important thing fix in your mind, you shouldback up your QBD company file before proceeding with the steps mentioned here. At any stage, if you feel difficulties or need to avail our QuickBooks support services, dial +1-844-405-0904.
To entering transaction by batch
- First of all, go to the Accountant menu and then click batch enter transactions.
- After that, choose the Transaction Type and Account.
- Now, open the spreadsheet carrying the transaction you want to record to QuickBooks Desktop.
- Categorize the columns in your spreadsheet to verify the arrangement of columns in the Batch Transaction Screen.
- After that, Press Ctrl+A from your keyboard then right-click on the screen and choose the Copy option from the drop-down dialogue box.
- At last, In the Batch Enter Transaction screen, right-click the first date field and select Paste.
Note: The name and account will display red color if they are currently not listed in the company file. Click the name or account and choose Quick Add or Set Up.
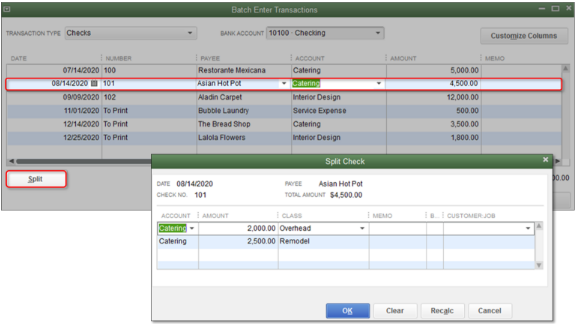
To add multiple split lines on my transaction
Split transactionsallow you to add a single or more secondary split line to a transaction.
- First of all, Choose the transaction that you want to add split lines.
- After that, click the Split button
- After that, type the required details for each split on a separate line.
- After that, click OK to return to the main batch Enter Transaction screen.
- At last, continue this step again for every transaction with multiple split lines.
To use the class in QuickBooks Desktop
- If You can modify your columns to add “Class” by entering the Batch Transaction screen.
- In the organization for “class” to remain associated with an item in a transaction, the item must be selected prior to selecting the class. This relates to all forms and transaction entries. If a Class is chosen earlier to an Item, the Class will be replaced when the item is chosen.
Then press on the Save Transaction and Yes on Confirm Account screen.
To deleting transaction by batch
Presently, only QBD Premier Accountant, QBD Enterprise Solutions 16.0, and QB Enterprise Accountant 2016, and the latest versions have the ability to delete transactions by batch. Discussed in this section are workarounds that you can use to accomplish the same task.
- QB Premier Accountant, QB Enterprise Solution 16.0, and QB Enterprise Accountant 2016 and newer.
- QB Desktop Pro or Premier 2015, QBs Enterprise Solution 15.0 and earlier:
- Press Ctrl+D to delete more quickly.
Note: First of all, you have to untick the alert when removing a transaction or unused detail item to remove the warning pop-up when pressing Ctrl+D (Edit > Preferences > General > My Preferences).
- You can also do this from the account register.
- Visit Intuit Marketplace for a third-party application that can remove your unwanted transactions at once. If you are attempting to replace all your transactions.