A journal entry is a report of transactions that reflect a company’s credit and debit balance. Journal entry is like a last resort to record all transactions. In this article, we will discuss the steps to, send, add, delete, edit, import, and create a journal entry in QuickBooks Desktop. Go through the complete article to get answers to all your questions. In case of any problem related to it, you can also contact our customer support team to resolve your QB queries by contacting us on our toll-free number +1-844-405-0904.
This is a very essential component of business accounting and you should do it only when you have a better understanding of accounting or if you want you can also take help from your accountant or can contact our QuickBooks Support Team.
Steps to Create a Journal Entry in QuickBooks Desktop
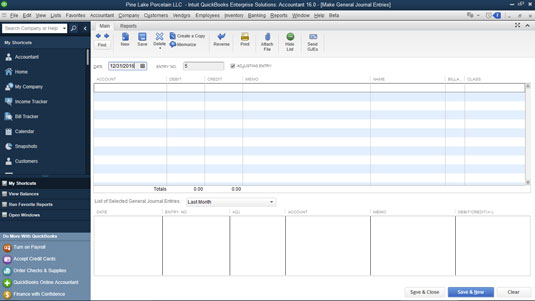
Go with the following steps to create a Journal Entry in QuickBooks Desktop
- Like traditional accounting systems, manually enter debit and credit.
- Transfer funds between income and expense accounts.
- You can transfer money to an income or expense account from an asset, liability or equity account
Steps to Add a Journal Entry in QuickBooks Desktop
Check out the below steps to add a Journal Entry in QuickBooks Desktop.
- Open QuickBooks Desktop, and click on the Company menu and choose Make General Journal Entries.
- Enter all the given fields to create your journal entry. Be sure, when you are done, your debits must be equal to your credits.
- Click on Save & Close.
Steps to Edit a journal entry In QuickBooks Desktop
Go with the following steps to edit a Journal Entry in QuickBooks Desktop
- Open QuickBooks Desktop, and click on the Company menu and choose Make General Journal Entries.
- Now, proceed further and look for Find and enter the Name, Date, Entry No., or Amount then click on Find.
- Give a Double-click on the journal entry option do all your updates. When you are completed with the above steps then click on Save & Close.
- Click on Yes to save all the changes.
Steps to Delete a journal entry
If you want to delete or void a journal entry, here are the steps below:
- Open QuickBooks Desktop, and click on the Company menu and choose Make General Journal Entries.
- Now, proceed further and look for Find and enter the Name, Date, Entry No, or Amount then click on Find.
- Give a Double-click on the journal, then click on Delete or Void, and select OK.
- Click on Save & Close.
Steps To Send General Journal Entries If There Are Existing Journal Entries
Here are the steps to send general journal entries if there are existing journal entries, follow the steps:
- Open QuickBooks, and look for the Accountant option and select to Send General Journal Entries.
- From the Date drop-down, select the date to separate the file of Journal Entries.
- Tick the box adjacent to the Journal Entries that you need to send.
- In Case, if you need to edit Journal Entries before sending then follow these steps:
- Click on the given link under the Account column.
- Later, in the Make General Journal Entries window you need to update the entry
- Click on Save & Close.
- In the case, If you need that your recipient will import all the Journal Entries then you need to untick the Allow recipient to select which GJEs to post to file
- If you want to send the Journal Entries to the recipient:
- Click on Email as Attachment to send all the Journal Entries instantly.
- Choose Save as File to save all the Journal Entries like.QBJ file. ( You use or send.QBJ file with an email attachment or also you can be transferred as portable media.)
- In Case, if you need to edit Journal Entries before sending then follow these steps:
Steps To Send General Journal Entries If There Are No Existing Journal Entries
Check out the below steps if you want to send journal entries if there are no existing journal entries:
- Open QuickBooks, and look for the Accountant option and select to Send General Journal Entries.
- Later, Insert a Journal Entry and click on Save.
- next , click on Send GJEs.
- In Case, If you need to edit the Journal Entry before sending, then follow these steps:
- Click on the given link under the Account column.
- Later, in the Make General Journal Entries window you need to update the entry
- Click on Save & Close.
- In the case, If you need that your recipient will imports all the Journal Entries then you need to untick the Allow recipient to select which GJEs to post to file.
- If you want to send the Journal Entries to the recipient:
- Click on Email as Attachment to send all the Journal Entries instantly.
- Choose Save as File to save all the Journal Entries like .QBJ file. ( You use or send .QBJ file with an email attachment or also you can transferred as portable media.).
- In Case, If you need to edit the Journal Entry before sending, then follow these steps:
Steps To Import General Journal Entries(.QBJ Files) in QuickBooks Desktop
Check out the below steps to import general journal entries in QuickBooks:
- Open QuickBooks Desktop, and go to the File menu and later click on Utilities.
- Now, click on Import and choose to General Journal Entries.
- Click on the downloaded .QBJ file and save this file on your computer where you can easily accesible.
- Select every Journal Entry to recheck all the info on the Add General Journal Entries in your File
- Remove the checkmark near to it, if you do not need to import a Journal Entry.
- Choose the Add GJEs option, If you do not find the checkboxes near to the Journal Entries.
- Now, go to the GJEs Import Summary window, Select OK.
Hope, this article will be helpful to you to create a journal entry in QuickBooks Desktop. If in case, you are facing any issue while performing the above steps then you can directly contact us by dialing our toll-free +1-844-405-0904 and get instant help from our Intuit certified ProAdvisor, and resolve your issue within a couple of times. You can also contact us for any accounting and bookkeeping-related issues, we will be very happy to help you out with your problem.