In this article learn to set up company preferences in QuickBooks Desktop. Here we are describing everything related to QuickBooks preferences, So be with us, and read the article for steps to setting up your company preferences. Go through the article to understand the whole process with real-time images. Still, you have any queries and want to know how to set up QuickBooks preferences, then Contact our QuickBooks Support Helpline toll-free:+1-844-405-0904
If you want to customize company preferences in QuickBooks to fit your personal style and business needs you can do it with the help of QuickBooks preferences. Preferences permit the user to choose how they want QuickBooks to manage things or to set own preferences. Preferences can be found by going to the top of the QuickBooks Main Page and selecting Edit, Preferences.
Steps To Setting Your Company preferences in QuickBooks
- Go to the QB Edit menu and click Preferences.
- After that, click on the preferences window, choose Reports and Graphs on the left side then click on My Preferences or Company Preferences option.
How to Set up QuickBooks Desktop My Preferences
My preferences set the direction you make QuickBooks work. In this tab, you choose the settings that will apply to your user account.
1. Graphs Only Preferences
- Graphs only preferences define how QuickBooks represents your graphical reports.
- Reports are presented in 3D color, by default.
- If you want you can also select to Draw Graphs in 2D to design graphs faster.
- You can also select use patterns to view black and white patterns instead of colors for discriminating bars, pie segments, and legend records.
- The modified report window opens automatically when creating a report.
- Choose this setting if you regularly change report content and/or attendance.
2. Reports and graphs preferences
- Prompt me to refresh: In QuickBooks, you will get a “Report needs to be refreshed” message when your data needs to be refreshed. It is up to you to refresh a report in QuickBooks Desktop
- Don’t refresh: If you require to display QuickBook’s most recent data, Select the Refresh option.
- If you want the reports to reflect recent changes or updates, select the Auto-Refresh option. QuickBooks Desktop automatically refreshes the report every time you make any changes to it. This option is the slowest of the three.
3. Prompt me to modify report options before opening a report
- When this option is selected, the modified report window automatically opens each time a report is created.
- Select this setting if you frequently change report content and /or attendance.
How to setup Company Preferences in QuickBooks
This tab you set default report preference for all users. here you can change the company only when you are the QuickBooks Administrator.
- Summary reports basis to define whether QuickBooks displays reports on Accrual or Cash basis. It uses most of the summary reports but never affects files that list independent transactions, 1099 reports or sales tax liability reports.
- The QuickBooks account receivable Aging Reports sets and counting the number of delay days on a company report that tracks unpaid invoices or bills. This preference affects all aging reports, accounts receivable and accounts payable graphs also. change this setting if you have invoices or bills that show the past due on aging reports even though they have not reached the due date yet.
- Age from due date: The overdue days appears on the invoice, statement or bill, that start from the due date that
- Age from transaction date: The overdue days start on the creation date of the invoice, statement or the date of when bill receiving.
- Format: If you click this button, then this button will open the Report Format Preferences window which authorizes you to customize Header or Footer & Fonts and Numbers on QuickBooks reports. You can modify the appearance of the report.
- Reports: Show items by defining how reports display the name of the items.
- Reports: If you need to display account numbers in your reports, click Name and Description or Name only.
- The Classify button: With the help of this button, you can reclassify accounts for the Statement of Cash Flows report.
How To Update Company Settings In QuickBooks
The Company Settings assists you to customize QuickBooks to run your business sleekly. Learn to update company settings in QuickBooks.
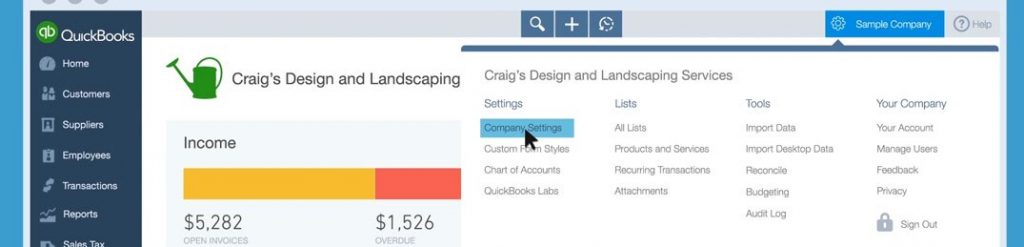
Step 1: Go to the Company Settings Menu
First, go to the home screen, select the gear icon, and choose the Company Settings tab under the column titled “Settings”.
Step 2: Enter/Change Contact Information
Open Settings and go to the Company bar. In the sub-menu named “Contact Information”, select the pencil icon on the right to edit your contact information.
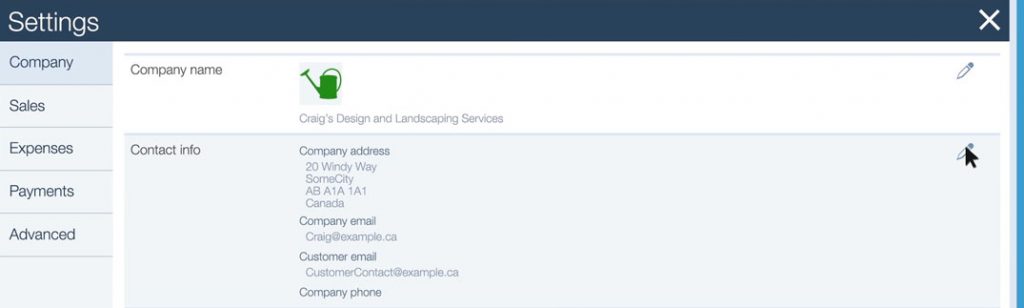
In the sub-menu description, edit your company’s contact information by typing in each box. Note that you can also add a customer address to let your customers know where to contact you or send payment to them.

If you desire to understand more further about a particular area then select the question mark next to it. Make sure to save your changes before proceeding.
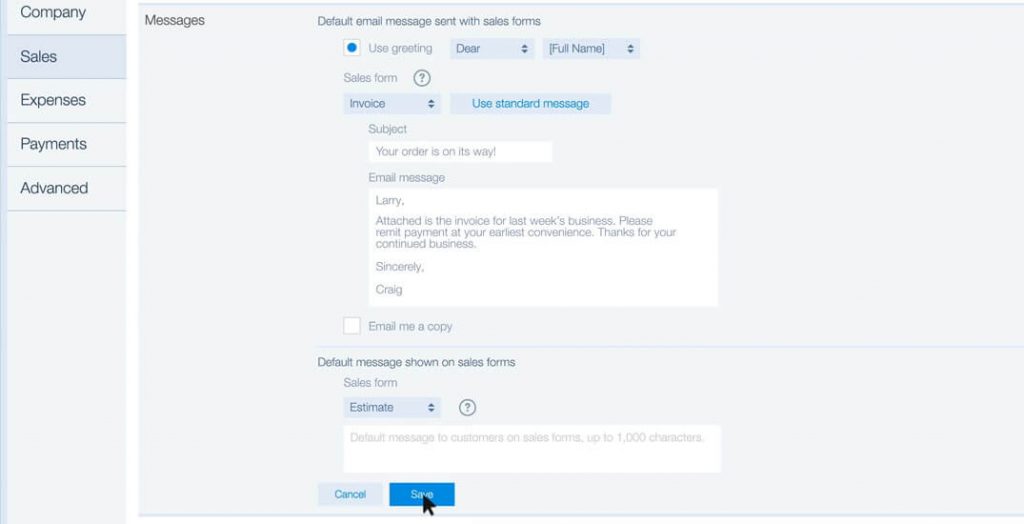
Step 3: Customize Your Sales Form Settings
Go to the sales bar then select the pencil icon to the right of the “Sales Form Content” sub-menu. Here you can add custom sales information. You can also customize and edit messages in the “Messages” section to your customers. Once you make your adjustments to your sales settings, be sure to click Save before proceeding.
Step 4: Customize Your Expense Settings
Choose theExpenses tab from the Settings. Go to the pencil icon that appears on the right side of the “Bills and Expenses” sub-menu to edit. Now you can edit expenses settings.

Step 5: Customize Your Sales Form
The Advanced tab provides different other options to adjust your settings. For example, automation helps you save time by cutting down on your data entry. If you want to edit your automation settings, go to the pencil icon that displays on the right side of the automation sub-menu.

To retrieve previously used information from QuickBooks, check the boxes here to automate automated processes such as pre-fill forms with previously entered content that you previously used and use it in the current format Add. You can also automate credit and bill payments for your customer invoices and more.
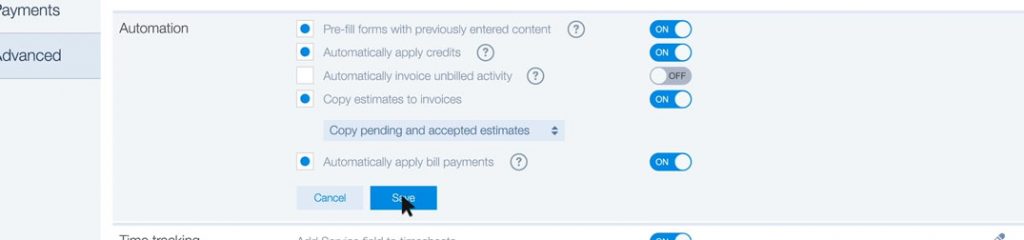
With precise settings, QuickBooks will put your professional care on cruise control. Tinker with your company setting until you are ready to go. When you have adjusted your settings to your liking, select save and you will be set.
Resolve issues with QuickBooks set report preferences
If your preferences are not working, your report templates are damaged. You can follow these steps:
- Back up the QuickBooks company file.
- Go the Edit menu and then click Preferences.
- Go to the left pane, select Reports & Graphs.
- Choose the Company Preferences tab and then click the Format button.
- In the Report Format Preferences window: click on the Header or Footer tab and then click Revert.
- Click on the Fonts & Numbers tab and then click Revert.
- Click OK.