Do you know what is QuickBooks 1099 e-file? Here in this article, we will cover the 1099 e-file process for QuickBooks Desktop. A 1099 form is a type of “information return”. You get a 1099 form in the email if you received certain types of earnings throughout the year. Generally, you will have to report the information from 1099 on your return. Continue reading this post to know everything about QuickBooks 1099 e file, go through the full article to get the complete information. If still issue not resolved contact QuickBooks support toll-free number+1-844-405-0904
Different types of 1099 forms:
Form Type
Description
Minimum Money Reported*
You Should Receive it by
1099-A
This form is for relinquishment or procurement of secured property only
Any amount
January 31
1099-B
This form is for broker and barter exchange transactions
Any amount
February 15
1099-C
Cancellation of Debt
$600
January 31
1099-CAP
Changes in Corporate Control and Capital Structure
$100 million
January 31
1099-DIV
Dividends and Distributions
$10 ($600 for liquidations)
January 31
1099-G
Certain Government Payments
$10
January 31
1099-H
Health Coverage Tax Credit (HCTC) Advance Payments
Any amount
January 31
1099-INT
Interest Income
$10 ($600 for any business-related interest)
January 31
1099-K
Merchant Card and Third-Party Network Payments
$20,000
January 31
1099-LTC
Long-Term Care and Accelerated Death Benefits
Any amount
January 31
1099-MISC
Miscellaneous Income
$600 for non-employee compensation ($10 for royalties and most other sources)
January 31
1099-OID
Original Issue Discount
$10
January 31
1099-PATR
This form is for Taxable Distributions Received From Cooperatives
$10
January 31
1099-Q
Payments From Qualified Education Programs
Any amount
January 31
1099-R
Distributions From Pensions, Annuities, Profit-Sharing or Retirement Plans, IRAs, etc.
$10
January 31
1099-S
Proceeds From Real Estate Transactions
$600
January 31
1099-SA
Distributions From an HSA, Archer MSA, or Medicare Advantage MSA
Any amount
January 31
RRB-1099
RRB(Railway requirement board) Statement
Any amount
January 31
SSA- 1099
Social Security Benefit Statement
Any amount
January 31
With a few easy steps, you can e-file your 1099-MISC forms instead of filling them manually. After going through the QB Desktop 1099 Wizard, QuickBooks Desktop will connect the Tax 1099 service and import your data.
Note: QuickBooks for Mac doesn’t have a built-in e-file function for 1099s. You can print 1096s and 1099s.
Pricing
For pricing information on e-filing or printing 1099 forms, refer to:
E-filing 1099 forms with Tax 1099: Pricing starts at $2.90 perform. For more information, see below for the Tax 1099 Pricing structure and calculator.
FORM TYPE
ESSENTIALe-File Pay as you go
E-FILE PLUS Compliance Everything Essential e-File has+TIN Match
ENTERPRISE e-File Everything+Rights Mgmt and Workflow Mgmt
COST
As low as $0.55/form
$149 annually+per e-File
$249 annually+ per e-FILE
1099, 1098, 1095, w2,w2C, 3921,3922, 5498
Price per Form (01-10)-$2.90, (11-100)-$1.90, (101-500)-$0.90 (501+)- $0.55
Same low pricing ✔
Same low pricing✔
CFSF ProgramStates
No Additional Cost
No Additional Cost
No Additional Cost
Non-CFSF States
$0.50 per Form
$0.50 per Form
$0.50 per Form
941, 944, 940, 945
Price per Form (01-10) – $4.99 (11-100) – $3.00 (101-500) -$1.99 (501+) -$0.99
Same low pricing✔
Same low pricing✔
1042-S, 480-6A,480-7A
Price per Form (01-100) -$5.00 (101-1000) – $3.50 (1001+) – $1.99
Same low pricing ✔
Same low pricing ✔
W-8, w-9
Bundle Price (01) – $1.00 (Up to 25) – $7.00 (Up to 200)-$45.00 (Up to 1000) -$95.00 (Up to 5000) $175.00
Same low pricing ✔
Same low pricing✔
Form 8809
$2.99 per Form
$2.99 per Form
$2.99 per Form
Tin match
$1.00 per request
250 Included additional $0.50 per request
250 included an additional $0.50 per request
Mailing
$1.50 per Form
$1.50 per Form
$1.50 per Form
Multiple Users
✔
✔
✔
Integrations
✔
✔
✔
Excel Import
✔
✔
✔
PDF Stored on Cloudfor 4 years
✔
✔
✔
E-mail PDF to Recipient
✔
✔
✔
Scheduled e-File
✔
✔
✔
Email, Phone and Chatsupport
✔
✔
✔
User Management
✔
✔
✔
Workflow Management
✔
✔
✔
Printing 1099 forms: QuickBooks Desktop 1099 forms and envelopes.
Setup
Follow the following tasks you need to complete to start using the Tax1099 E-File Service. These steps need to be taken by new users.
Step 1:Complete the QuickBooks Desktop 1099 Wizard.
First of all, on the Tax 1099 landing page, click Sign Up with Tax 1099.
After that, Enter the necessary information to sign up.
After that, click the Captcha checkbox. Once the set of images shows, choose the ones that are relevant then click Verify.
Click Let’s GO. This directs you to the Tax 1099 Dashboard.
Step 3: Download the Tax 1099 plugin.
Note: If you are using Hosting for your QuickBooks Desktop, you need to use the QuickBooks Web Connector option to import your data into Tax1099.
The Tax1099 plugin is important for you to sync data from QB Desktop to Tax1099.com
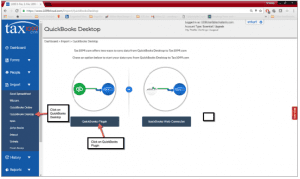
From the Tax1099 Dashboard side menu, click Import and select QuickBooks Desktop.
Click QuickBooks Plugin.
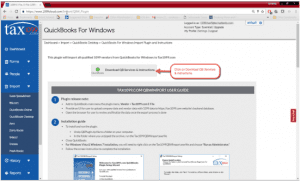
Click Download QuickBooks Services and Instructions.
Wait for the zip file to completely download.
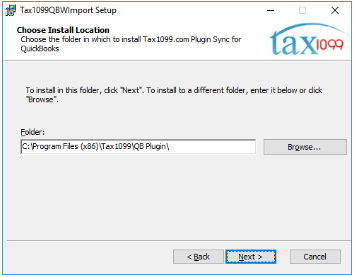
Unzip QBPlugin.zip file to a folder on your computer.
In the folder where you unzipped the archive, run the Tax1099QBWimport.exe file.
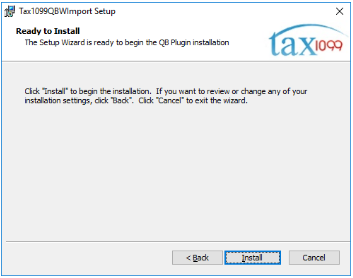
Step 4: Install the Tax1099 plugin
Review the requirements for the Tax1099 plugin installation.
Windows 7 or newer
Windows XP is NOT supported
Tax1099 best runs on Firefox or Google Chrome
Disable any antivirus/ network firewall before proceeding with the installation if you have any.
Run the Tax1099 plugin installer.
Close QuickBooks Desktop.
Navigate to the QBPlugin folder.
Right-click the .exe file and choose Run as Administrator.
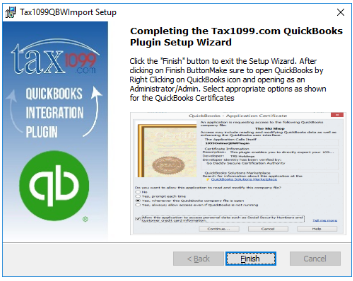
Follow the screen instruction to complete the installation. Grant access to the Tax1099 plugin.
First of all, reopen QuickBooks Desktop with Windows Admin permissions. You can perform this task by right-clicking the QuickBooks Desktop icon and choose Run as administrator.
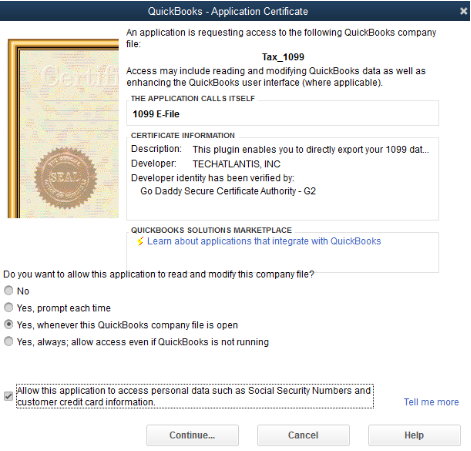
After that, sign in to your company file as an administrator user. An Application Certificate window occurs requesting access to your QuickBooks Desktop company file. After that, check the box Allow this application to access private data, such as SSN and consumer credit card data and click Continue.
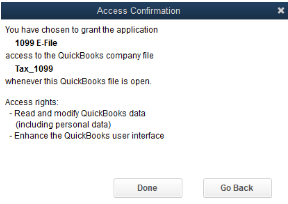
After that, click Done on the Access Confirmation. After that, close and reopen the QB At this point, all QuickBooks clients will be capable to utilize the plugin without signing into QB Desktop as Admin.
Turn on your antivirus/ network firewall if you have any.
QuickBooks 1099 E-file forms and billing
Step 1: Upload you 1099 data from QuickBooks to Tax1099.com
If you already installed the plugin, you are now capable to upload your 1099 data from QuickBooks Desktop. To begin uploading:
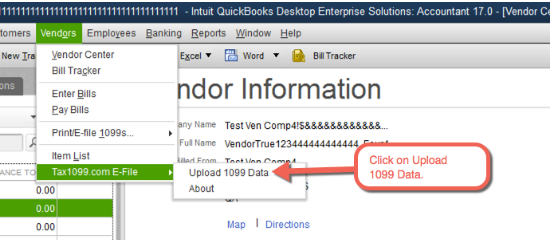
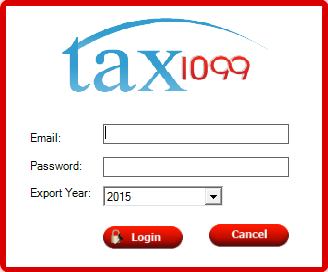
From the QuickBooks Vendors menu, select Tax1099.com E-File then clicks Upload 1099 Data.
Enter your Tax1099.com login information. Select the payment year that you want to export and click Login.
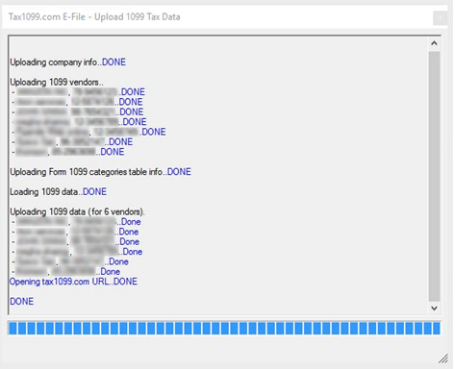
A dialog progress window is shown throughout the export process which shows the present export status. The window closes automatically after the upload. If it doesn’t, click the x button at the upper right.
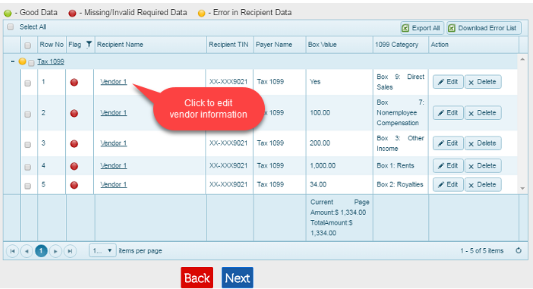
Step 2: Review and update vendor information in the Tax1099.com Dashboard
After uploading, you are taken to the Tax1099 Dashboard.
Changes made in Tax1099 do not flow back to QuickBooks Desktop.
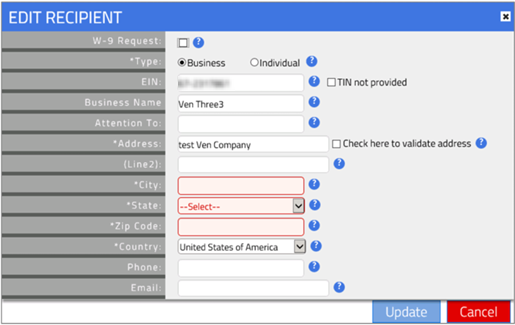
Fill in the necessary information and click Update.
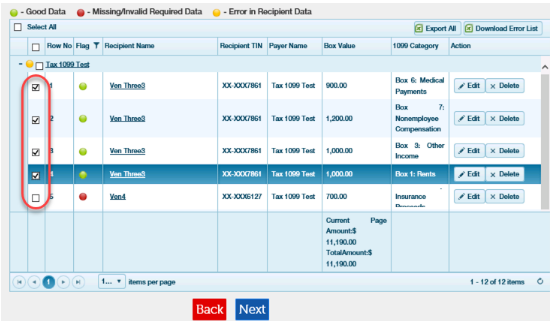
After updating the information, you are returned back to the Tax1099 Dashboard. Choose the vendors you need to upload to e-file by examining the box.
Click Next, when you are sure of your selection.
Tax1099 will check if there are still errors in the forms before uploading.
If there is an error, a pop-up message notifies you about it so it can be rectified before filing. Once the error is rectified, select the vendors again and click Next.
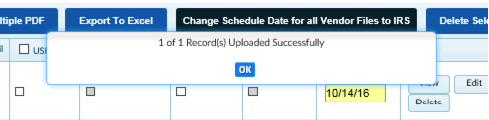
If there are no errors, an Uploaded Successfully pop-up message appears. Click OK.
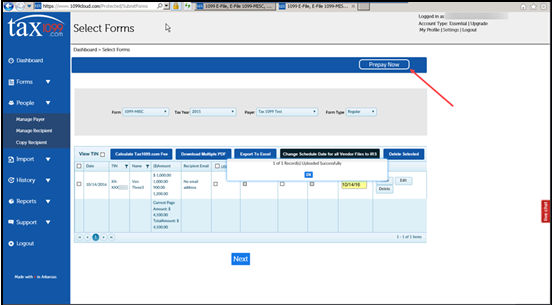
Prepay Now Option
Prepay Now is typically used by Accountants.
If you select Prepay Now, you can add funds to a Prepay account.
This permits you to debit your prepay account every time you file forms, or you have to enter your billing information each time you file your forms.
Note: There are additional steps that need to be taken by employers doing business in Wisconsin or paying contractors living in WI before proceeding to the next step. Click here to know more.
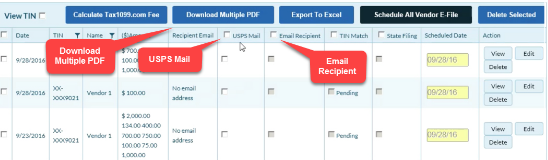
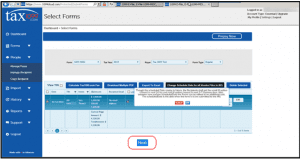
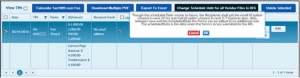
Step 3: Choose the method for distributing copies to the vendors
First of all, select the vendors by checking the box next to the Date
After that, choose how you like to send copies to the recipient/vendors by checking the box under USPS Mail or Email Recipient. You may also choose to Download Multiple PDF to deliver vendors their copies yourself. NOTE: There is a fee if the USPS Mail is choosing.
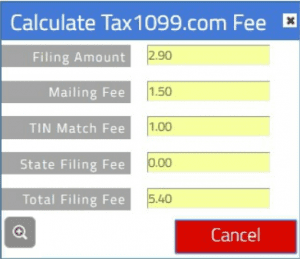
Step 4: Calculate fee and payment confirmation
At this point, you may select Nextto proceed or select Calculate Tax1099.com Fee to view the total filing fee. If you choose Calculate Tax1099.com Fee you have presented the screen below.
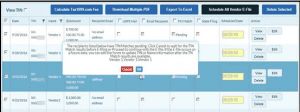
When you click Next, a few different pop-up messages may appear. If you choose TIN similar for any of your vendors and the TIN similar is incomplete for any of your vendors, the message below displays. You can either click Cancel and wait or click OK to continue with billing and e-filing.
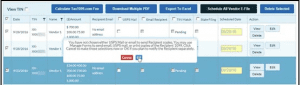
If you have not chosen USPS Mail or Email to send recipient copies, the message below appears. You can choose Cancel and select the procedure for sending the copies to the recipients or select OK to continue and notify the recipients’ yourselves.
If you changed the scheduled date for filing the IRS by clicking Schedule Date for all Vendor Files to IRS, the pop-up message below appears to notify you how recipient copies will be handled. Click OK to continue.
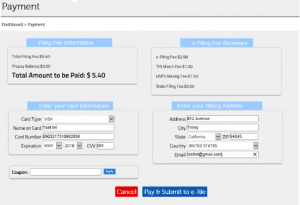
When you are finished with the options on the Select Forms page, you are taken to the Payment These boxes, assign you the total cost, Once all billing information has been entered, choose Pay & Submit to E-File.
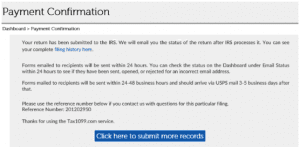
QuickBooks user may submit more records from this page by clicking the Click here to submit more record
Filing History
View your filing history
From the menu, select History.
Select Filing History to see all submissions and their current status.
From the Filing History page, select Click here on any of the forms previously filed.
You will be taken to the Manage Forms page which shows you the status of each form submitted.
View/print a submitted form
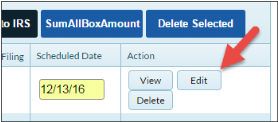
On the Manage Forms page, go to the Action column and select View/Print from the drop-down.
A pop-up window allowing you to choose which copies you would like to View/Print appears.
Click Submit.
You can then view, print or save copies of the form.
Wisconsin
Wisconsin 1099 Filing Requirements
Wisconsin has state-specific needs for boxes 16 & 17. Intuit products don’t currently support these boxes.
Box 16: Withholding amount of Wisconsin state taxes.
Box17: Wisconsin Tax ID.
If you choose to e-file your 1099s for Wisconsin:
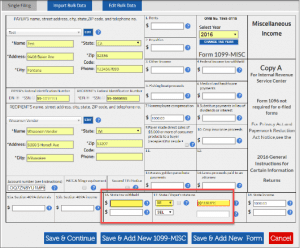
You can fill in these boxes in Tax1099 prior to e-filing. Tax 1099 permits you to enter your Box 16 and Box 17 information manually for Wisconsin contractors.
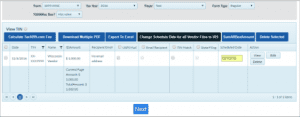
In the Select Forms Page, identify which of your contractors are from Wisconsin.
Under the Action column, click Edit.
Enter the complete information under Boxes 16 (State Tax Withheld) and 17 (State/ Payer’s state no).
Note: Clicking the State ID Field in Box 17 will prompt you the format that you need to follow when entering the ID.
Click Save & Continue and do the same for your other Wisconsin contractors.
Proceed to Step 3 of 4 in E-filing Forms and Billing.
If you decide to print and email your 1099s for Wisconsin:
After printing, you can include your information by hand in boxes 16 & 17. Be sure to write legibly using a black ink pen.
I hope you find this article useful to know about QuickBooks 1099 e file. For more information you can call us on the QuickBooks Enterprise Support Phone Number +1-844-405-0904.