Do you wish to import invoices into QuickBooks? If yes, then no problem! we are here with an article comprising of step by step guide to import invoices into QuickBooks. You can easily import invoices into QuickBooks from the spreadsheet by using the import your invoice feature. Here in this article, we will discuss in detail how to import invoices into QuickBooks as well as important things to consider. If you have an issue related to it then contact our QuickBooks ProAdvisor toll-free:+1-844-405-0904
Before you begin, make sure that your Excel spreadsheet is ready and in a format that is accepted by QuickBooks. If your file includes details of customers and/or products, they can be added to QuickBooks automatically, so you won’t have to create them manually.
Key points to remember before import invoices into QuickBooks
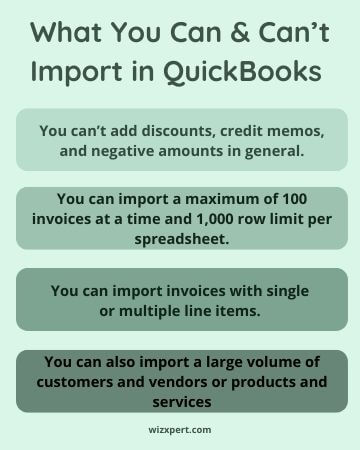
- Invoices can be imported as multiple line items or as the total value of each invoice. If no line item exists, QuickBooks will populate this field with a common item called ‘Sales’.
- Multi-Currency and Product categories must be supported.
- VAT codes are mapped so that there is no need to convert your VAT code to QuickBooks VAT code formats before importing.
- It is recommended that no more than 100 invoices be imported at the same time.
- If in case, no currency is specified while importing new customers then QuickBooks itself implies that the home currency is GBP.
- If you want to import line items with product categories then use colon separator between the product/service to enter the category. For eg: Category: Product / Service.
- When the invoice has multiple line items, make sure that the first line entry defines the invoice number, customer, invoice date, etc. Line items 2 followed by the same, only the invoice number is required as seen in the example csv file Is, specifically invoice 1001.
- To maintain invoice numbering in your CSV file, please make sure the custom transaction number is on. Follow these steps:
- First, go to the Account and Settings, choose the Gear icon at the top.
- Choose the Sales tab, go to the sales form content.
- then, go to the edit icon and modify Custom Transaction Numbers from Off to On using the checkbox and choose Save.
Now, all set to go import invoices into QuickBooks. Follow these steps:
- At the very top of the screen choose the Gear icon
- Choose Import Data, under Tools.
- Then, go to the Invoices or Bills from the list and click on the Browse button.
- Here Choose your Excel file which you want to import, select Open, and after choose to continue.
- If you want QuickBooks to be a contact and/or product/service item, select the applicable option, and choose Next.
- Map the header to your Excel file in the field in QuickBooks, then select Next.
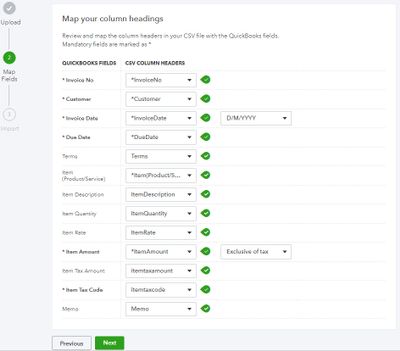
- If you are VAT registered, map your VAT code to QuickBooks, then choose Next.

- Now you will see a summary of your import. Adjust your data if you want then choose import
Steps To Import Data into QuickBooks (Standard Option)
- Open QuickBooks, navigate the File menu, and select “utilities” later select Import.
- Choose excel files from the import drop-down menu and select the no when required to add or edit multiple records.
- Go to the import wizard command and select the type of data. Now QuickBooks automatically open formatted excel sheet for your file.
- QuickBooks will open a formatted excel spreadsheet for your files.
Steps to Import Sales Receipts into QuickBooks
- Open QuickBooks, choose “customer” from the support section.
- Select to open the invoice that you need to mark and choose to apply for credit at the bottom of the window.
- Now, the journal entry window will be displayed on your screen, then you can apply it to the invoice.
- Always remember, QuickBooks will save the new invoice number and continue with the sequence automatically.
Steps to Mark Receipt for a Single Customer
You can also directly import your sales receipts from excel to your QuickBooks account.
- Open your QuickBooks account with the administrator permissions and open excel sheet.
- Select the files which hold the sales receipts that you need to import.
- Assure that the mapping of the column in the sales receipt must be the same as the identical fields in your QuickBooks.
- Choose import and it will import into your QuickBooks company files.
Hope you find this article helpful according to your needs. If in case you still have any queries or issues regarding the same or related to accounting or Bookkeeping, then feel free to reach us on +1-844-405-0904 and have a one-to-one talk with our intuit Certified ProAdvisors to get an instant solution.