Want to know, how to track job costing in QuickBooks Desktop? don’t worry, here we are with an article to guide you on how to track job costing. The article is written with care to deliver you step by step solution along with the images to show the procedural flow chart. So just follow the article and implement it to get your desired output. Still having any problem then contact us on:+1-844-405-0904
Before you learn the working of track job costing in QuickBooks Desktop it is important to understand the fact what actually job costing means. So in job costing, you can track the expenses of a job and later on compare those expenses to your company’s revenue. With the help of QuickBooks Desktop’s Job costing feature, you can easily calculate how much amount of money you make that job and how much money you have to spend on that job.
Setup Job Costing Tool in QuickBooks Desktop
Before you start setting up job costing in QuickBooks Desktop it is necessary to set up every item with minute details. Keep in mind that the accuracy of your job cost reports will be determined by how much detailed and precise information you have provided while creating an item.
Once you have finished setting up each item with enough details then you can carefully follow the steps mentioned below to set up an accurate record of your job costing in QuickBooks.
STEP 1: Set up a Customer: Job for each of your Job
You have to set up an individual job for each customer no matter if that particular customer has only one job. By doing this, it will be very convenient to keep track of the income and expenses as well on the basis of the job. And even in the future, if you have to add another job to the customer it will be very simple to keep tracking and bookkeeping also.
STEP 2: Assign all your expenses to the jobs
To make a complete picture out of the Job costing, you have to make sure that all of your expenses are linked with jobs. To do this, you only need to make sure whenever you are creating a bill, timesheet, or check just select a suitable job in the Customer: Job field.
- For Billable Time: The billable time is meant as the amount of time that has been spent or consumed by a job. To record the billable time you can either use a weekly timesheet or a single activity entry. It usually depends upon the hours spend on that job. After that, you need to assign these hours to a job or a customer. These entries will be automatically filled in the Billable column field on the form. (NOTE: Timesheets are non-posting entries i.e. you have to manually import the time to a bill or an invoice so that it can be included in the Companys’s Financial Reports or Job Profitability.)
- For Job-related purchases: There are some items that are purchased due to a job requirement or lent for subcontracted services. You have to record such types of purchases either using a bill, credit card charges, or check. To do this, you have to go to the Item tab and then enter each item or service that you have purchased. Always make sure to assign each item or service to the customer or a job.
- For Overhead Expenses: Before you assign any overhead expenses to a particular job first you need to know how to calculate and track overhead in QuickBooks. It is recommended to consult from your accountant before doing any such changes in your QuickBooks company file.
- For Mileage: To record the mileage in the QuickBooks you have to go to the Enter Vehicle Mileage window. If you wish to change the rate of the mileage (i.e. if you want to charge your customer more or less than the standard mileage) then you easily do this change from the invoice.
- For other Expenses: There are some other miscellaneous expenses like freight charges, shipping charges, or postage charges, etc. You also need to record such charges in QuickBooks. You can either use a bill, credit card charges, or a check to record such expenses in QuickBooks. To do this, go to the expenses tab and then enter each expense manually. Also, remember to assign every expense to the customer or job in the Customer: Job field.
STEP 3: Enter your Estimates in QuickBooks Desktop
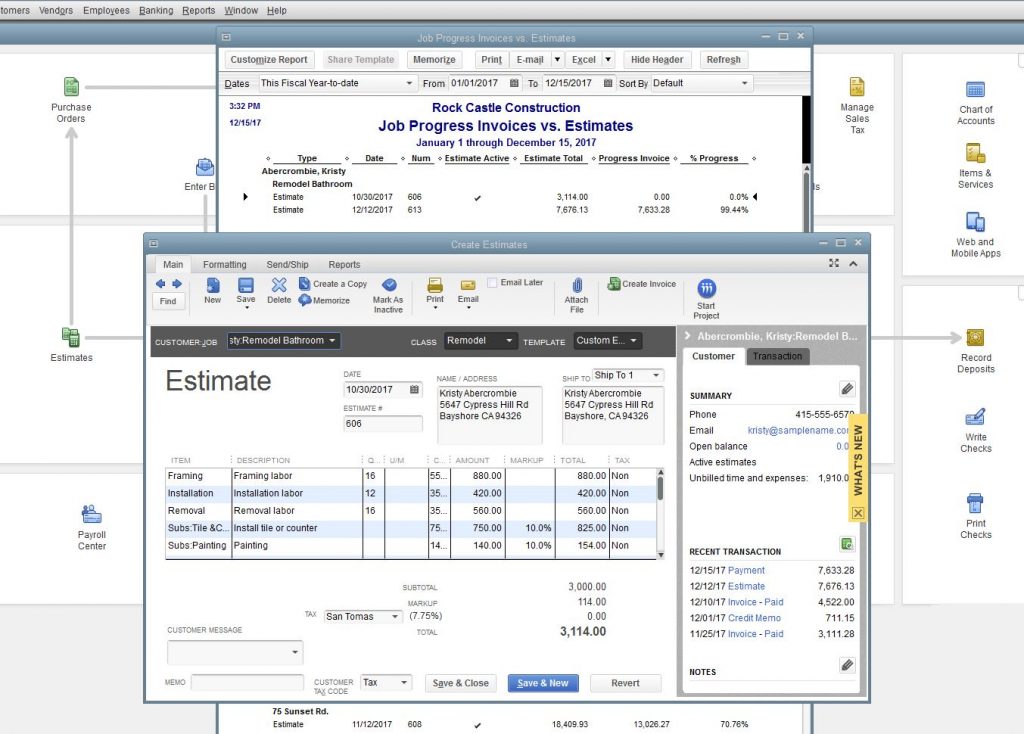
- You can choose to create an estimate either in the QuickBooks software or outside using any other application. Just remember that, if you choose to create outside QuickBooks on a spreadsheet or any other program, make sure you record summary estimates in QuickBooks.
- If you opt to create estimates on a program other than QuickBooks but you are creating invoices on the QuickBooks Desktop then you convert your estimates into the invoices by simply entering the invoice information into the Create Estimates window.
- You can also use the job costing reports in QuickBooks Desktop without recording the estimates in QuickBooks but doing so you won’t be able to use this feature to its full extent. To utilize the job cost reporting tool to the full extent, it is important to enter your estimates in QuickBooks as well, this will make sure that your project budget keeps on track. With the help of this, you can also analyze the accuracy of the estimates and make changes for future projects if needed.
NOTE: If you had entered the time on both estimates as well as bills or timesheets then you have to choose any one from them so that you can transfer it to the invoice. For example, You have to manually add time to an invoice, QuickBooks Desktop will not automatically pick the time from the estimates and also from the timesheet to add it to an invoice.
STEP 4: Create appropriate invoices
- When creating an invoice in the QuickBooks it is important to choose an appropriate job in the Customer: Job column.
- If you choose to create the invoices on any other program other than QuickBooks, you have to make sure to enter the summary of each invoice into the QuickBooks at least so that it can be included in the Company Financial Reports or Job Profitability Reports as well.
STEP 5: Run Job Costing Reports to see how your business is performing on a job-by-job basis
You can analyze the job reports to find out which job is profitable and which is not. It will help you in identifying which job is performing well on a financial basis so you can create estimates in the future according to it. You can also predict the upcoming issues and resolve them before they become too bigger to deal with.
To access the Job Reports
- First of all, go to the Reports menu.
- Then select the Jobs, Time, and Mileage option.
The job costing feature in the QuickBooks Contractor and Accountant version has much more to offer than the regular edition.
- Go to the Reports menu.
- Then, select the Industry Specific option and then select Contractors Report.
NOTE: If you want Advanced Reporting feature in QuickBooks Desktop Pro and Premier then you need to upgrade your existing QuickBooks version to QuickBooks Desktop Enterprise.
The Bottom Line
Here, we have discussed how to set up and track job costing in QuickBooks Desktop, if used well then this feature can help you in analyzing your business more accurately than ever. If you have any queries related to the job costing reports in QuickBooks or if you are having any issue with QuickBooks accounting software then you should contact our team of Intuit Certified QuickBooks ProAdvisor. For more information about the service, we provide call us on our 24/7 toll-free number +1-844-405-0904.