Want to know how to QuickBooks mac download and install QuickBooks Desktop for Mac 2024? In this article, we will learn how to download, install, and set up QuickBooks Desktop software for Mac, and the limitations of QuickBooks Mac. In the meantime, you can contact our QuickBooks ProAdvisor through the toll-free number +1-844-405-0904 for expert advice.
QuickBooks Desktop for Mac is the alternative version of QuickBooks Desktop Windows, for all Mac users or Apple operating system users. This accounting software is the best option, which prefers an on-premise accounting solution to one hosted on the cloud. In 2024, it was changed to QuickBooks Desktop Mac Plus. So read the following procedure to QuickBooks mac download the new subscription version of QuickBooks Desktop Mac.
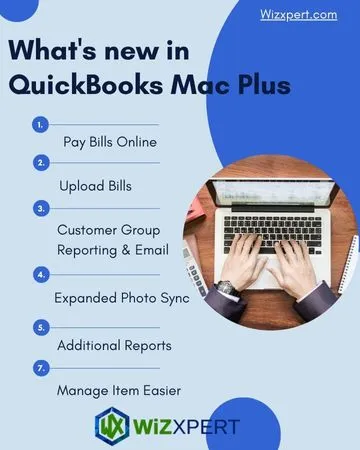
What’s New in QuickBooks Mac Plus 2024
In the year 2024, there will be some new features added to the QuickBooks Mac Plus that can save time and also help in running your business smoothly and efficiently.
Procedure to Install QuickBooks Desktop for Mac Plus 2024
How to Download QuickBooks Desktop Mac Plus 2024
Follow the procedure to QuickBooks Mac download and install QuickBooks Desktop for Mac:
STEP 1: Check the System Requirements for QuickBooks Mac Desktop version
First of all, you need to check the system requirements for the Desktop Mac version to ensure that, the requirements are compatible with the software or not.
STEP 2: Find the License and Product Number
I) Own a Digital Copy of the Software: The confirmation email that you have received via Intuit should have contained the License & Product Number.
II) Have a Physical Copy of the Software: You will find a scratch-off card in the package. Just scratch the label off & you’ll be able to license and Product Number printed on it.
STEP 3: Download QuickBooks Desktop for Mac
- First of all, QuickBooks for Mac download from the Intuit website.
- To do this, go to the QuickBooks Support Site and select your Mac version. Or you can also purchase QuickBooks Software for Mac CD from a retailer. If you purchased it, then you can use the CD installer.
Note: If you are trying to download the installer. And if you are facing difficulties with the process. You may need to clear the browser’s cache memory and cookies, or use other browsers.
How to Install & Set Up the Mac Version of QuickBooks Desktop
Here is the procedure to install and set up the recently downloaded QuickBooks software;
Step 1: Install the File on the Desktop
- If you downloaded the QuickBooks Desktop for Mac by following the above procedure, then save the file on your desktop, where you can access it easily.
- Then double-click on the QB executable file to run the installation process.
- When the extraction of the file is complete, click ‘Yes‘ to All.
- Then, click on the ‘Next‘ option to start the installation.
- Read and agree to the Software License Agreement.
- Enter your License and Product numbers and click Next.
- Then, select the type of installation for the computer.
- Express: With the help of Express, you can permit the installer to make the suggested choices for you. Including replacing your previous version of QuickBooks if you have one.
- Note: The Accountant Edition doesn’t replace older years by default.
- Custom and Network Options: Choose this option if you will be utilizing multiple versions of QuickBooks Desktop on the Desktop. Or if you will utilize QB to share data with other users on a network.
- Express: With the help of Express, you can permit the installer to make the suggested choices for you. Including replacing your previous version of QuickBooks if you have one.
- Now, select where you will be using QuickBooks. (Note: If you select Express in the previous step, then skip the next step only
- If you select Express in the previous step, then skip the next step only
- I’ll be using QuickBooks on Mac:
- Select this option if you are not using QuickBooks on Mac system. Or if you are installing it on a Mac that will be utilized for running QuickBooks. But it will not store the company file.
- I’ll be using QuickBooks on this computer, AND I’ll be storing our company files here. So it can be shared over our network: choose this option if you will be running QB. And storing/sharing the company file on the system from this machine.
- I will not be utilizing QuickBooks on QuickBooks Pro for Mac. I will be storing our Business file here. So it can be shared over the QB network. (A license is not required for this option) Choose this option if no one will be utilizing QB on this Mac. And it will be used as a file server to share the company files over the network.
- If you select Express in the previous step, then skip the next step only
- Now, click Next to install at the default directory. Or if you want to choose the older version, then you can simply browse the directory and choose the location, and then click Next to proceed.
- At last, click Install to continue. Or click Back. If you need to go back and review any of the previous screens.
- After that, if any QuickBooks processes were running during the installation. The installer may request that you restart your Mac. Otherwise, click Open QuickBooks to get.
- After completing the installation, activate QuickBooks. Now you’re all set.
STEP 2: Upgrade/Convert the QuickBooks Company File
If previously you were using an older version of QuickBooks Desktop Mac, and now you have upgraded to the latest version. Then you also need to upgrade your company file to the latest QuickBooks Desktop for Mac as well.
- First of all, open the QuickBooks company file in the newer version available.
- As soon as you open the company file, a message will prompt asking you to either upgrade or convert your company file. Select Upgrade here.
- Then, click on OK when asked for confirmation.
- To make sure that the company file is successfully upgraded, check out your balances, reports, and accounts.
Step 3: Set Up Multi-users in QuickBooks Mac Desktop (Optional)
If you have more than one client license. You may set up QuickBooks in multi-user mode. To guarantee that all users’ clients can access the file at the same time. To make it possible, follow these steps-
- First of all, open the multi-user folder.
- After that, drag the QuickBooks server icon to the application folder.
- Now, click on Authenticate to modify the application folder and then enter the Admin username and password, and then click OK.
- Now, launch QuickBooks and then open your company file.
Then, go to the file and select enable multi-user mode to share your company file.
Advantages and Limitations of QuickBooks Mac Desktop
Know the advantages and limitations of installing the QuickBooks Desktop Mac version.
Advantages
There are several advantages of using QuickBooks Mac desktop, such as
- User-friendly: QuickBooks Desktop for Mac is easy to install and set up, and navigate if you don’t have an accounting background. The interface of the QB Mac Desktop is very user-friendly.
- More features: QuickBooks Mac Desktop offers many advanced features for a one-time investment cost.
- Get help when you need it: If you need help setting up your business or you have questions, you can find a bookkeeper or accountant who is familiar with QuickBooks for Mac.
Limitations
- No Mobile Access to Data: Unlike QuickBooks Online, you can not access your data from mobile phones, but you need to have the software installed on your computer in QuickBooks for Mac Desktop.
- Limited Technical Support: When users purchase QuickBooks Desktop for Mac, unlimited tech support for 30 days, but afterward, they have to purchase a support plan to get QuickBooks support and help.
- Maximum three user licenses: QuickBooks for Mac comes with two user licenses, and the user can purchase two additional licenses only.
It was the complete guide to downloading and installing the QuickBooks Desktop for Mac. If you have any kind of queries or doubts related to the topic, then contact QuickBooks for Mac support through the toll-free number +1-844-405-0904 for a reliable solution.