Want to learn about the QuickBooks clean install tool to reinstall & rebuild the Damaged QuickBooks Desktop? Here we are with an article to describe the QuickBooks clean install tool and its working process. The article here is associated with different steps and steps are represented with the images to deliver a better understanding. Read the full article to make your knowledge updated and be able to do it on your own. Still, having an issue contact QuickBooks ProAdvisor toll-free: [QuickBooks]
Table of Contents
What is a Clean Install Tool
The QuickBooks Clean Install Tool is used to rebuild damaged QuickBooks desktop functions, just a simple re-install will not fix the problem here. To solve the problem, you have to rename the Desktop Un-Installed ‘QuickBooks Desktop for Windows, the installation file, and then reinstall the program. The whole process is called ‘clean install’ or ‘clean uninstall’ of QuickBooks.
A clean install fix helps you to deal with problems that prevent you from opening your company’s file, display, and template problems, and some other situations. It succeeds in the QuickBooks system files on your computer. Rest assured a clean install tool can not harm your accounting files like your company file or any other data you have.
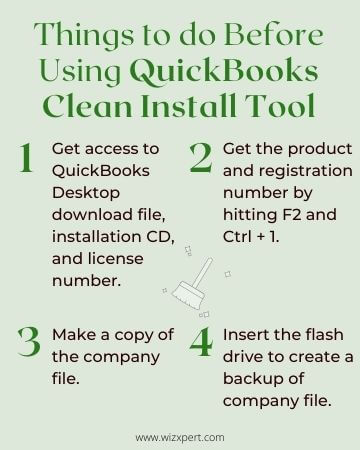
Important: Before performing the perform un-installation ‘process it is necessary to have a QuickBooks desktop download file or installation CD with the license number. Also for safety purposes, make a backup of your data file. You have to log in as a Windows Administrator before performing the next steps. Also, the systems (Computers) you are working on, should be available to be restarted.
When QuickBooks Removal Tool Must Be Used
Running the QuickBooks Removal Tool requires uninstalling QuickBooks completely. Some of the following common problems are encountered when encountering prompts that you must download and run the QuickBooks Clean Install Tool.
- An error is displayed when opening more than one company file.
- QuickBooks displays installation errors.
- Re-installing Simple QuickBooks did not help you get rid of common error codes

Steps To Download and Use of QuickBooks Clean Install Tool
To download and install the Clean Install tool you need to follow the given steps:
- Go to the official website of Intuit and download the Clean Install tool from here.
- Save the downloaded file where you can get it easily.
- After that open the QuickBooks_clean_install_tool.exe.
- Now Start the installation process.
- Next, you have to accept the license and agreement.
- Now click on Continue after selecting your version of QuickBooks Desktop.
- Then click on OK and follow the instructions.
- Finally, you have to restart your system.
Things to do before running QuickBooks Clean Install Tool
You have to keep some important things in mind before running the QB Clean Install Tool which is discussed below:
First, you need to collect all the QuickBooks product info:
- The first thing is to create a backup file of your company file to avoid any loss of data.
- Make sure that you have the download file of QuickBooks, the License number of QuickBooks, and the installation CD.
- Additionally, you have the product and registration number from the Product Information window. Use Ctrl +1 or F2 to open the window.
- You can also create a backup file to the flash drive.
- Other ways for creating a backup:
- Select the file to pick the restoration item.
- After that, select any of the local or online backups.
- Now follow the onscreen instructions after clicking Next.
- Download the QuickBooks installer according to your version.
- Keep your license number. If you have purchased the digital version, it must be on the original packaging or in the purchase confirmation email.
- Write carefully your product year and edition and back up your company file to preserve all your work.
Note: you can also get this information from the account management portal.
How to Use QuickBooks Clean Install Tool?
Step 1: Uninstall QuickBooks Desktop

- Launch the Start Menu window. Look for the “Control Panel” and click and open Control Panel.
- Go to the Programs and Features/Uninstall a Program.
- Here you have a long list of installed programs, pick the version of QuickBooks Desktop that you are facing issues with.
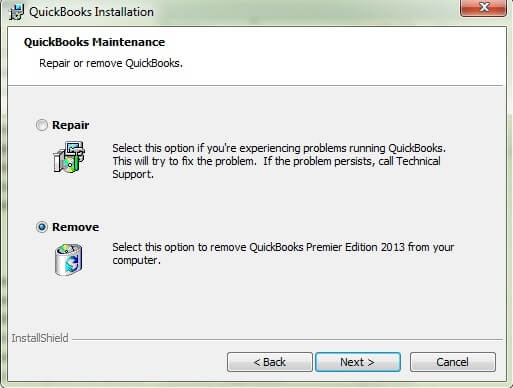
- After selecting that particular version, Choose Uninstall/Change and accept all the onscreen instructions. If in case, you do not view this option then you have to sign out from the current account and sign in back into Windows as an admin (or a user with admin rights).
Note: If you receive an error message while uninstalling QuickBooks, stop troubleshooting. There may be something else with your computer and you should contact an IT professional or Microsoft for help.
Step 2: Download And Install The QuickBooks Tools Hub
- Quit QuickBooks download Tool Hub, and save it in any folder from where you can find it easily (like downloads or desktop folders).
- Open the downloaded file QuickBooksToolHub.exe and install it by following the onscreen instructions. And also accept all the terms and conditions while installing.
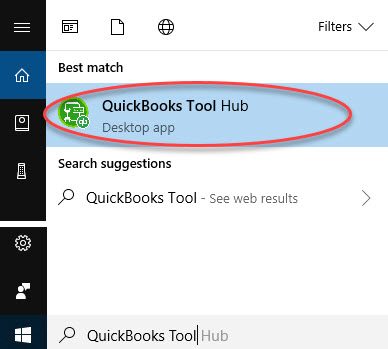
- After installing this tool, double-click on it and open it. If in case if you are not able to find out this tool then make a search in the Windows search bar for QuickBooks Tool Hub and choose the program.

Step 3: Run The QuickBooks Clean Install Tool

The Clean Install tool itself renames the old install folder. This enables QuickBooks to add new installation files later when you restore.
- Select Installation Issues in the QuickBooks Tools Hub
- Later, choose Clean Install Tool and click on OK.
- Choose the QuickBooks version and product version, and click on Continue.
- Now you see this message on your screen “Please install your copy of QuickBooks to the default location”, click OK.
When the clean install tool is finished, you are allowed to reinstall the QuickBooks desktop.
Note: This tool has not worked with QuickBooks 2020. You need to rename your folders manually.
Steps To Manually Rename QuickBooks Desktop Installations Folders
As we discussed earlier, this tool is not compatible with QuickBooks 2020. Follow these steps to rename manually folders.
- Launch the Start menu window look for “File Explorer” and open it
- Now, look and open the folder that keeps your QuickBooks company files. This is normally your QuickBooks folder, most probably you will find it in the following locations:
- C:\ProgramData\Intuit\QuickBooks (year)
- C:\Users\(current user)\AppData\Local\Intuit\QuickBooks (year)
- C:\Program Files\Intuit\QuickBooks (year)
- 64-bit version C:\Program Files (x86)\Intuit\QuickBooks (year)
- When you find your folder, right-click on the folder and choose Rename.
- Attach the postfix “old” at the end of your folder name. This will help to prevent QuickBooks from trying to open it when you reinstall.
- After following these steps, you are allowed to reinstall QuickBooks Desktop.
In case, if you get the error message while renaming the folder” The access denied while renaming the folder ”, then follow these steps to resolve it.
- Click ctrl+shift+Esc to open Task Manager. You can also search the task manager in the start menu search bar.
- Now, open the Processes tab.
- Choose the Name column header to order the list.
- Look for these processes in the processes tab QBDBMgrN.exe, QBDBMgr.exe, QBCFMonitorService.exe, Qbw32.exe, and end these listed processes.
- if you got the warning message: Terminating a process can cause undesired results” then select Yes.
After following these steps, you are allowed to reinstall QuickBooks Desktop.
The above are the steps to use the QuickBooks Clean install tool for QuickBooks Desktop. I hope you have completed performing these steps successfully. But in case, while performing the above steps if you face any problem or issue then just give us a call on +1-844-405-0904 and get instant solutions from our Intuit Certified Expert. We are just one call away from you.
Frequently Asked Questions (FAQs)
How long it takes to install QuickBooks?
If you’re not using QuickBooks currently, it could take up to 6 to 8 weeks to convert all your information and set up your QuickBooks accounting software to meet all your accounting requirements.
How do remove earlier iterations of the QuickBooks software?
You can uninstall the previous version of the QuickBooks application without any problem. To avoid having to reinstall your QuickBooks enterprise, you have to just keep your copy of QuickBooks up to date.
Do company files be deleted when removing QuickBooks?
No, removing QuickBooks from your computer doesn’t delete any of your files. Only the QB program will be deleted.
Can I set up QuickBooks on two computers?
If you have a single-user license of QuickBooks, you’re allowed to install the program on two computers maximum as long as you own both of them.
What if you see the “Access denied while renaming the folder” error?
1. Go to the Windows taskbar and right-click on it.
2. Then select the Task Manager.
3. Go to the Processes button.
4. Next, click on the picture name column heading.
5. After that, select QBDBMgern.exe, QBCFmonitorservice.exe, QBDBMr.exe, and qbw32.exe
6. Now you can see the warning message, just ignore it and press ‘Yes’.
What does the QuickBooks clean install tool do?
The QuickBooks Clean Install tool assists in fixing errors that arise during the installation of QuickBooks. To make space for new install files, it also helps in renaming the previous install files inside QuickBooks. Make sure you utilize it if reinstalling QuickBooks still does not resolve the problem after multiple tries.
