In this article, we discuss how to disable Merchant Services in QuickBooks MAC so that it doesn’t ask for credit card info when you enter an invoice. Well, we have come up with this article describing every essential step you need to know to perform this action. Go through the article ones to get answers to all your questions, and understand the process with the help of suitable images. Still, having an issue contact QuickBooks ProAdvisor toll-free: +1-844-405-0904
QuickBooks work smoothly on MAC and Windows operating systems but QuickBooks Desktop on MAC differs slightly from Windows systems. One of the issues in this is to disable Merchant Services. For this issue, you don’t waste your time call-up the accounting hub technical support for assistance with any operations you easy to resolve this problem in a house too with fewinstructions.
Before installing QuickBooks you must keep in mind these things
- On the off chance that one client introduces refreshes, you will in all likelihood locate that each client needs to introduce the refresh.
- At times the refresh procedure requires that a document is changed over. This may include making a reinforcement, getting every other person out of the program, and closing down your business forms for quite a while.
- The refresh process can require some serious energy once began.
- Now and then there are issues in updates, and you might need to hold up. Once in a while, there are errors in the updates that are a more serious issue than the ones being settled by the refresh.
The process of disabling merchant services in QuickBooks MAC.
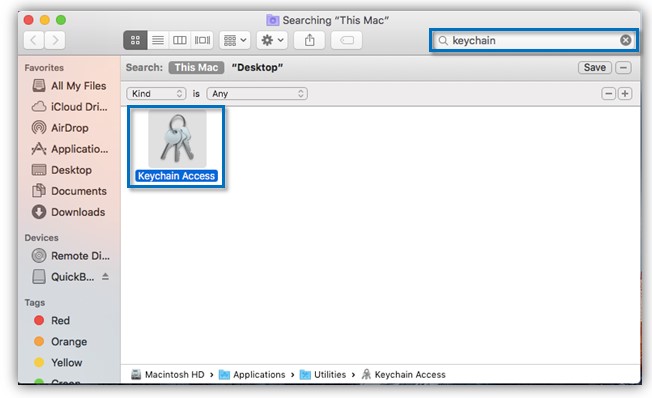
- Press the Command⌘ + F on your MAC.
- Explore Keychain and select Keychain Access.
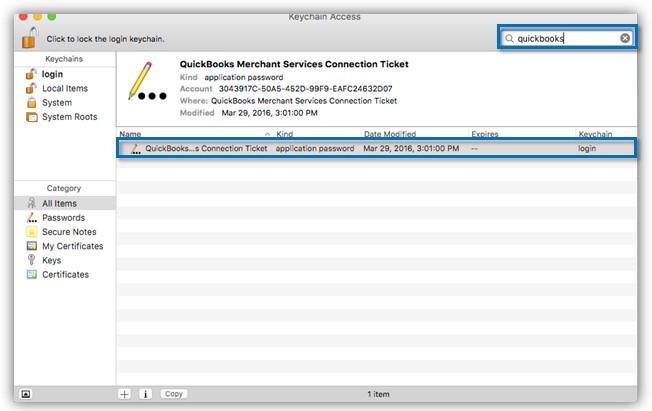
- Enter QuickBooks word in the search field, and tap on the Connection ticket(s) for the QuickBooks merchant service.
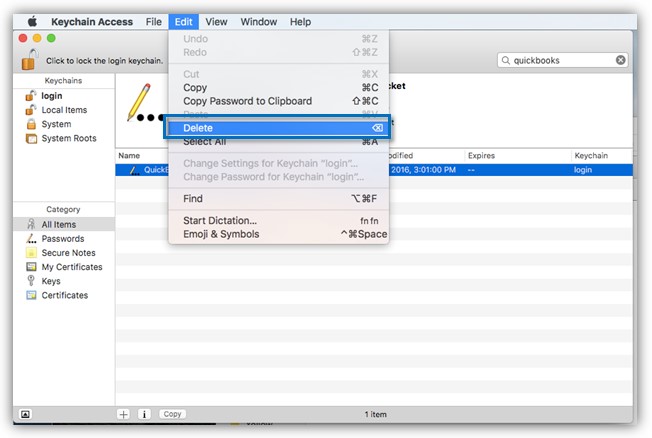
- Select Edit > Delete.
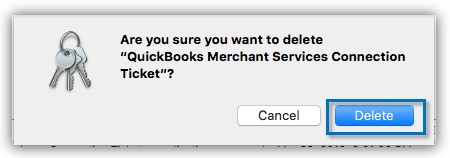
- A pop-up will inquire as to whether you are certain you need to delete the Connection ticket.
- And then a message will be displayed which will basically ask for the confirmation as displayed below:
- Congrats you have successfully disabled merchant services in QuickBooks MAC. To make sure you have successfully removed all merchant services log out of QuickBooks or restart MAC if needed.
NOTE: Usually, there are multiple keychains are listed for the different applications, it is the same as it is in the updates in Windows Programs & Features. So if you want to find the desired keychain from that list quickly then you just need to simply enter the name of the keychain in the search field.
A second method, How to Disable Merchant Services in QuickBooks MAC:
There is a feature known as the Automatic Update feature which is already integrated with QuickBooks for Mac and can also help you is disabling QuickBooks Merchant Services without any problem. The only thing you need to do is to download QuickBooks for Mac to simply use this feature to disable Merchant Service. Once QuickBooks Merchant Service is turned off, you’ll not be asked to enter credit card information while creatinginvoices or payments.
You can likewise refresh the keychain to settle e-receipt or e-payment issues. Eliminate and reconnect QuickBooks Installments to update your keychain. For this, you have to follow the given process.
Step 1. Remove the QuickBooks Invoice Keychain
- Firstly you have to Quit the QuickBooks.
- Now the second step is to choose the Finder and then click on Go.
- Then the next step is to select the Utilities and then click on Keychain Access.
- After that, select All Items.
- After doing the above steps QuickBooks_eInvoicing in search.
- Now search for your payments e-invoice keychain. You may see multiple keychains you have to work with your e-invoice which is like QuickBooks_eInvoicing_577604244511786429_F51354FE-674B-440A-8C99-4E21CED2A8D7.
- After that, you have to choose an entry and then click on Edit and Delete.
- After doing the aforementioned steps, you have to restart your computer.
Step 2. Reconnect your payments account to update
- Firstly, You have to open the QuickBooks and generate an e-invoice.
- You will be asked to log into your payments account.
Now you can sign in to create a new Key Chain, Now your Mac keychain is up to date.
The Bottom Line
Wizxpert believes that the above-discussed article helps you. If things have not gone as described above, you should immediately chat with our QuickBooks support team. They have years of experience in handling all these issues. To request their service, dial our 24/7 toll-free helpline number +1-844-405-0904.