Want to know QuickBooks Online tips, tricks & hacks 2024 that make your accounting easier? Here, we have come up with several QuickBooks Online tips and tricks that you should know while using QuickBooks Online. So, go through the complete article to know your answers, we hope that it will resolve all your queries. If you have any problem applying these tricks and hacks then contact our QuickBooks ProAdvisor toll-free: +1-844-405-0904
Seeking new tips with QuickBooks Online is just as exciting as seeing the money you saved when using it. For you to seek tricks that simplify and streamline the work for you, it is best to seek help from experts. If not, we have done all the work for you.
QuickBooks Online tips and tricks for beginners
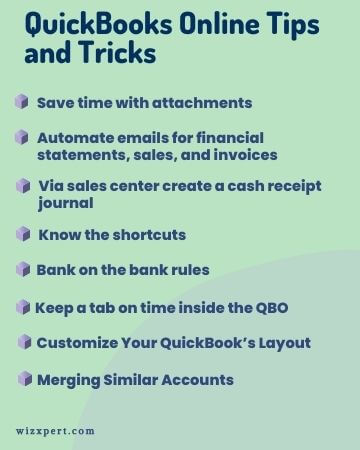
1. Save time with attachments
QuickBooks Online gives you permission to attach your documents which are generally in the form of transactions like credit memos, bills, credit card charges, and much more. You can also upload your document to the QuickBooks document center. There is a paperclip icon click on it choose the file and double-click on it to attach it, you can also attach multiple files. Usually, the clients send out W-9s to contractors. It can be attached directly to the vendor record in QuickBooks. This makes life a lot easier.
As attachments, you can even upload credit card or bank statements in your attachment folder. Once that’s done, the month-ends and year-ends would go a lot faster. You’ll have the documents in the formal reconciliation which both you and your accountants can access it. You should decide the naming convention, such as the name of the bank/DD/MM/YY. It would help in easier identification.
2. Automate emails for financial statements, sales, and invoices
Jiah, who offers online assignment help in Melbourne, says that when it is all automated, things get easier. You should set up a group of reports to be automatically emailed to you. For instance, you can have a collection report or a sales report and get it emailed every week to stay on top of the open invoices. You can also schedule your financial statements and have them emailed on a monthly basis.
Moreover, you can schedule recurring invoices and have them directly mailed to you as per the stated schedule. In case you are using QuickBooks payments, the customers can make payments online, and the money so paid along with the fees will be recorded automatically in QuickBooks. As a result of this, you can automate the entire sales process easily.
Other Useful Resources:
- How To Fix Unbalanced Balance Sheet (Out Of Balance Sheet)
- How to Create or Re-create the qbregistration.dat file
- An Introduction to QuickBooks Data Migration
3. Via the sales center create a cash receipt journal
Maira, who offers online assignment help services, says that having a cash receipts journal can help you review the money that you have received for a stated time period. The fact that it can all be done from the sales center without any modification in the report is extremely convenient for the users. In the sales transaction list, you should maintain a list or a journal of cash receipts. You can do this by clicking on the filter drop-down list, selecting the money received option, and changing the date.
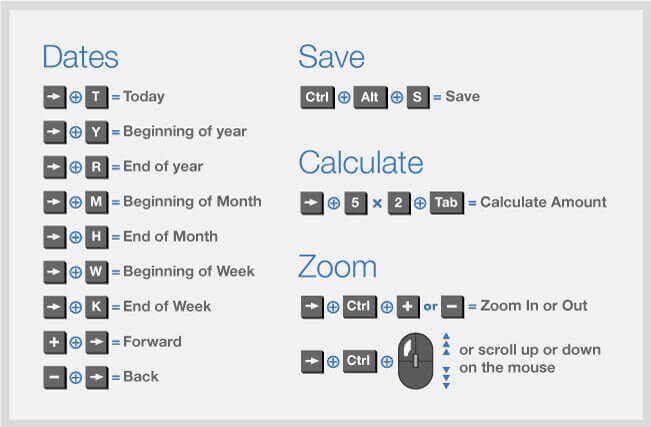
4. Know the shortcuts
When you use navigation hacks, such as tabbed browsing for multiple windows, opening in Google Chrome, keyboard shortcuts, and a bookmark bar, all of which save time. Need a cheat sheet? You can check some keyboard shortcuts and then use the same within QuickBooks.
5. Bank on the bank rules
Riya, who offers the best digital marketing course online, says that obligating with the bank rules helps save a lot of time. Further, you can set up bank rules for common expenses such as regular suppliers or vendors, utility payments, etc. Further, when you set up the bank rule to auto-add, you don’t have to review it.
6. Keep a tab on time inside the QBO
Has time tracking got you down? Fret no more. Inside the QBO, it is easy for you to review and approve the employee time. So, it is easier for you to export the time from your site to QuickBooks. With seamless integration, it is easier to approve multiple timesheets all at once.
It also makes it easier for you to create multiple timesheets inside QBO. Further, this integration works mutually. So, every change you make will be in sync with your sheet. As a result, you can easily approve and manage employee timesheets, create invoices in QuickBooks, and run payrolls all with ease directly via your QuickBooks account.
7. Customize Your QuickBooks Layout
Newer versions of QuickBooks have various user interfaces that are more customizable than prior versions. But, if you are enjoying using an older version and need to recreate that design or you just want to make an adjustment, you have followed this step: First, go to Edit, look for the Preferences, and choose Desktop View.
8. Merging Similar Accounts
Sometimes, you may find that your QuickBooks file is linked to many different accounts. This occurs when accounts are created by different employees for different tasks or when multiple customer accounts are created incorrectly.
Merging is the best option to make your final accounts easier. This can be finished by choosing an account name, and later passing it to another account for a merging. Right-click and then paste and name of the account you want to merge. When you choose Save, QuickBooks prompts on the screen if you need to merge the accounts. Choose Yes.
9. Reconcile an Account
- To reconcile, select “Tools” from the menu which is under the “Gear” icon.
- Choose the account you wish to reconcile by clicking the drop-down arrow next to “Accounts” on the menu.
- Based on the information on your bank statement, enter the “Ending balance” and “Ending date.”
- Check transactions off one at a time by comparing them to your bank statement.
- Apply filters to make it simpler to find transactions.
- Continue until the “Difference” field reads “0” and the Success! page appears.
10. Keep Track of accounts receivable and accounts payable
For accounts receivable
- On the left side of the screen, select the Sales tab.
- Select the Customers tab under Sales.
- You may easily view all of your past-due customers here.
- To send reminders to any of your past-due clients, click Overdue.
For accounts payable
- On the left side of the screen, select the Expenses tab.
- On the Expenses tab, select the Vendors button.
- You may view all the invoices you have to pay using this convenient tool.
- To pay any of your open bills, simply click Open Bills.
Hopefully, these eight QuickBooks Online tips and tricks will help you in the long run. But if you still have any issues and queries, please feel free to reach our Intuit-certified ProAdvisor and get Instant solutions for your Query. Dial toll-free +1-844-405-0904.