QuickBooks error code 31600 is an unexpected internal error in QuickBooks, which stops the user from working on QuickBooks and does not allow to use of its different features. This article is all about error codes. Here we will discuss, why this error code occurs, and how can we solve the 31600 error code in QuickBooks. In the meantime, you can drop a call to us +1-844-405-0904 for an expert solution.
Reasons & Solutions to the QuickBooks Error Code 31600
In order to fix the issue, we have to discuss both topics, the reasons, and the solutions to the issue. The reasons will help us to find the solution to the issue. Let’s know, what are the reasons behind the issue:
Why the QuickBooks Error 31600 Occurs
Read the following to know, actually, what causes the 31600 error to occur
- This happens when sending payroll through direct deposit
- Creating a backup
- Creating a portable file
- It is produced during a company file creation
- Trying to use the open company’s facility open
- Running verify or rebuilding properties
- Trying to save a transaction
- When opening any window in QuickBooks, this error occurs
- A company trying to close the file
- Try downloading payroll updates
How to Fix 31600 Error Code in QuickBooks
We have given all of the possible solutions for the QuickBooks error code 31600. Pick the solution, according to the reason for the unexpected 31600 error code.
Solution 1: Press your QuickBooks Desktop
At the very first, you need to press the desktop while you are initiating the QuickBooks.
- Go to the ‘Control Key’, press it, and hold it. Next, go to the ‘QuickBooks icon‘ and double-click on it.
- When you get the company window on your screen, then release the ‘Control Key‘
Go to the desktop while opening the company file
- First, you need to choose and click on the ‘Desired company file‘ and make sure not to make any changes in the company open window.
- Next, press and hold the ‘Alt key‘ on your keyboard and later click on ‘Open‘.
- When you have got the login screen on your desktop then hold down the Alt key and Fill in all your ‘login details‘.
- Here, you should keep in mind, that do not release the ‘Alt key‘ until and unless the file is accurately opened on your screen after that you are only advised to release the ‘Alt key‘ and next click on ‘OK‘.
- Once you are done with the above steps, then you will get a blank screen on QuickBooks.
- When you are able to highlight a ‘QuickBooks menu by your pointer, then surely your QuickBooks file will open.
Solution 2: Recognize how many users are affected
If you are still facing the issue then perform then recognize how many users are affected
- Go to the company menu, and click on the ‘Set up users‘ and ‘Password‘.
- Next, go to the ‘Set Up Users‘.
- When you are a QuickBooks user, then first, go to the ‘Company‘ and later click on ‘Users‘.
- Now, look for the ‘Set Up Users and Roles‘ and click on it.
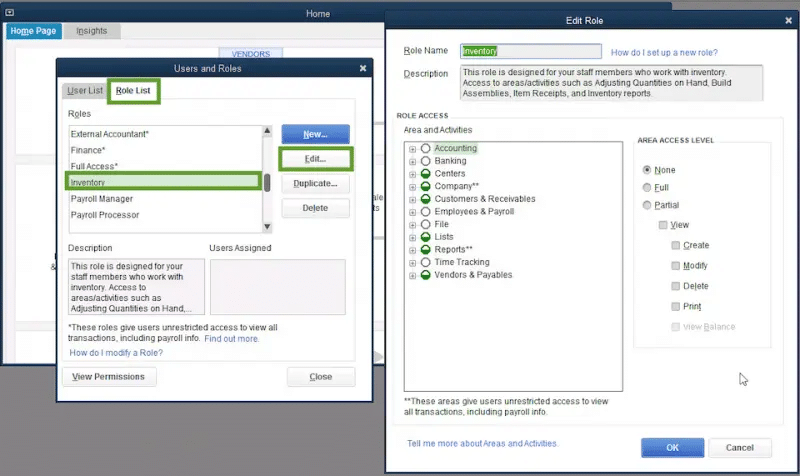
- When done, go to the ‘Add Users‘ and enter the ‘Username and Password‘.
- Next, go to the ‘Next‘ option and customize the ‘User‘ if required.
- Now click ‘Finish‘.
- Once done, sign in to the company file with the new ‘Login details‘.
Solution 3: Create a Windows Administrator
You can create a Windows administrator on your system
For Windows 10:
Follow the procedure, if you are a Windows 10 user:
- First, go to the ‘Start‘ button and look for the ‘Settings‘
- Next, click on the ‘Accounts‘ tab.
- Under Accounts click on the ‘Family and Other users‘
- Now, below the other users, you need to click on ‘Add‘ another user on the PC.
- Once completed with the above steps, you need to click on ‘I do not have sign-in information for this person‘.
- Next, click on the ‘Add a user without a Microsoft account‘.
- Now, click on the ‘New Account‘ and click on ‘Finish‘.
- Later, click on the newly made account.
- Next, go to ‘Account Type‘ and click on the ‘Administrator‘ and choose ‘OK‘.
For Windows 8.1
Follow the procedure if you are a Windows 8.1 user:
- Press and hold the Windows + R keys on your keyboard to open the run box.
- In the run box, type ‘Control Panel‘ and next go to the ‘OK‘ button.
- Now, look for ‘User Account‘ click on it, and click on ‘Manager another account‘.
- Next, click on the ‘Other accounts‘ and choose ‘Add an account‘.
- You have to choose ‘Sign in without a Microsoft Account‘.
- Click on the ‘Local account‘ and insert the ‘Username, Password, and Password prompt‘, and Click on the ‘Next‘ tab.
- Now, you will get back to the screen where you can manage other accounts screen.
- Click on the ‘Account‘ that you currently made and next choose ‘Edit‘
- Go to the drop-down option and click on ‘Admin‘
- At last, go with the ‘OK‘ button.
For Windows 8, 7, and Vista
If you are a user of Windows 8, 7, and Vista then
- Press and hold the Windows + R keys on your keyboard to open the run box.
- In the run box, type ‘Control Panel‘ and next go to the ‘OK‘ button.
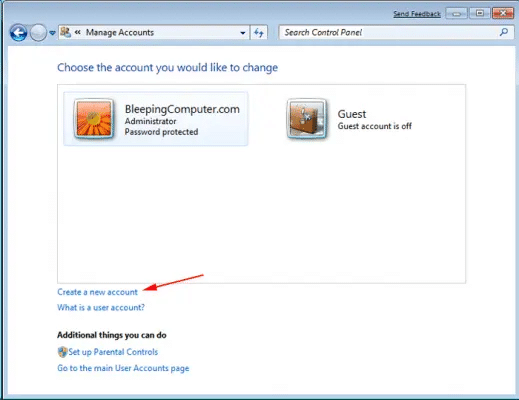
- Now, look for ‘User Account‘ click on it, and click on ‘Manager another account‘.
- Next, click on the ‘Create a New Account‘
- Now, give a name to ‘New account‘ to be created
- Next, click on the ‘Administrator‘ and click on ‘Create Account‘.
- At last, click on Done.!
Solution 4: Make a New Windows Server
You can make a new Windows server to fix this issue;
- At the very first, go to the ‘Server Manager‘.
- And next, click on ‘Tools‘
- Later, click on ‘Computer Management‘
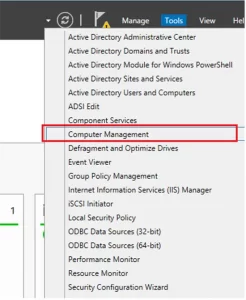
- Now, you need to increase ‘Local Users and groups‘
- Next, click on the ‘Groups‘
- Go to the ‘Administrator group‘ and right-click on it to open the Administrator properties windows.
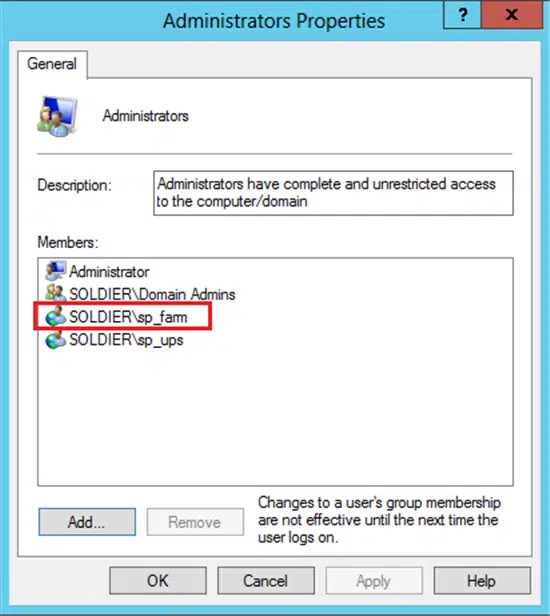
- Next, click on the ‘Add‘ option.
- Now, go to the User section and click on ‘Computers, Group Windows and Service Accounts.’
- Next, type the name of the accounts that you need to add to the local admin groups.
- At last, Click on ‘OK‘.
Solution 5: Check your Browser
There may be some problem in the browser, so check the below points on the browser:
- Firstly, you make sure that you are using either Google Chrome & Firefox for QuickBooks Online.
- Secondly clear all of your browser’s history and cache, then close your browser fully then log back into QuickBooks Online again.
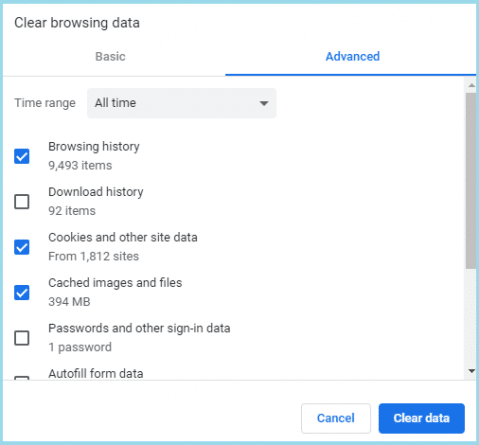
- Please press CTRL+SHIFT+DEL while in the browser and it will bring up the history menu. Make sure all boxes are ticked. Set your time for Google Chrome as” the beginning of time” and for Firefox, please set the time frame to “Everything”
Frequently Asked Questions
Q. How do I fix error code 31600 in QuickBooks?
A. Fixing the error code by following easy steps.
1. First, you have to create an Admin.
2. Then you have to create a new server.
3. After that, you need to inspect the browser.
4. You have also to check the affected users.
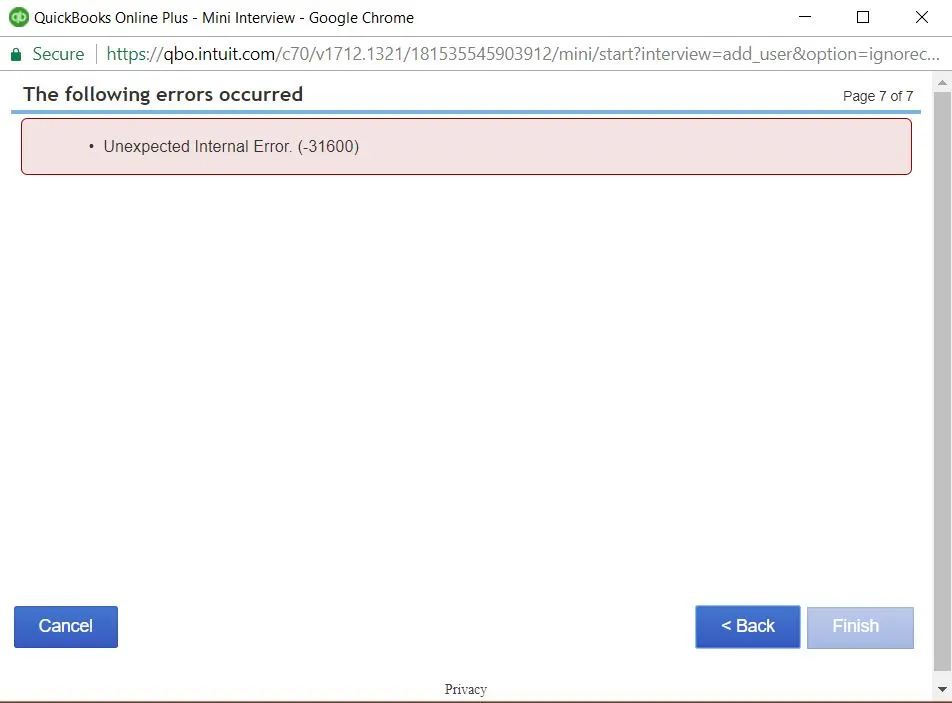
Q. What error message is related to the 31600 error in QuickBooks?
A. When you confront QuickBooks error 31600, you can see the error message stating “We’re sorry. QuickBooks encountered a problem. Error message: 31600.”
Q. Is it possible for a firewall or security program to prevent QuickBooks from connecting and causing Error 31600?
A. The answer is ‘Yes’. If the firewall misconfiguration can prevent network connectivity that is required by the QuickBooks then it may cause QuickBooks error 31600.
Q. What is QuickBooks error 31600?
A. When there is an issue with the database connectivity in QuickBooks then the error code 31600 appears. It prevents the user from being able to access the company files that are useful for operating QuickBooks.
This was all about the QuickBooks error code 316000. We hope, that now you have an idea of why the issue occurs unexpectedly, and how can we solve this issue by analyzing all the reasons for the problem. Still, if you need help to resolve this issue from the root then our QuickBooks ProAdvisor will assist you to solve the problem through a phone call +1-844-405-0904.