Do you want to pay automatically every week or every month? Recurring Payments lets you charge your customers automatically on a routine record that you set. In this article, we are to tell you to create recurring credit card payments in QuickBooks, follow the steps we have mentioned here, and create it on your own. For more details or if you need any QuickBooks payment help contact our QuickBooks ProAdvisor toll-free: +1-844-405-0904
If you want to connect repeating payments with QuickBooks, you can access your QuickBooks Customer and items lists to help you fill out the recurring payment system. You can also generate and pay invoices for each and every actual payment by QuickBooks automatically recurring payment system.
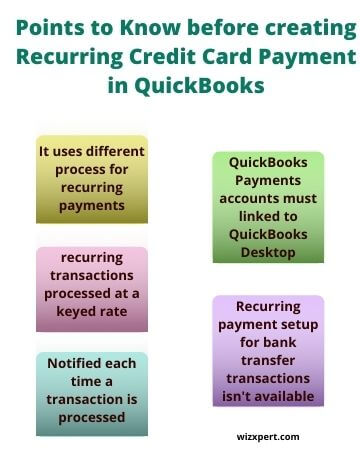
Note:
- For those who have Mac, accounts don’t access the QuickBooks recurring payment feature.
- For repeating payments uses QuickBooks online different processes.
- The payments for the repeating process is only available for credit card transactions. And also check transactions are not available at this time.
- No Recurring transactions are swiped, they processed Non-Qual or Mid-Qual rate (example. rewards and cooperate cards would process at the Non-Qual rate).
- In every transaction get a notification to your primary contact email for completed or else.
Steps to follow make Recurring Credit Card Payment:
Follow the given steps to create the Recurring Credit Card Payment.
Step 1: Get recurring payments started
It’s not depending on you, that you ever use QuickBooks.
- QuickBooks Desktop recurring payments connecting process.
- Login QuickBooks and go through the customer menu, choose Credit Card Activities and click Set Up Recurring Payments.
- Standalone Recurring Payments connecting process.
- Sign in to the Merchant Service Center.
Step 2: Create the recurring payments.
- Go to the menu, select Processing Tools
- Click Create a Recurring Payment
- Next, click on Create New.
Note: Before you set up a recurring payment, you must be signed authorization from the Authorization Form link, where on the Create recurring payment page to download PDF file that contains the terms and conditions of the recurring payments. Fill the form and submit it to complete your creation of recurring payments
Step 3: Click on create a new and existing customer.
- To create a new customer: Click on Add New and fill all the mandatory fields. If you have select the recurring charges connect to QuickBooks then don’t use Add New i9t may not download or record properly. Add first the customer to the Quickbooks accounting software then go through Existing Customers.
- To make payments to an existing customer: To click on Manage Recurring Payments and type name in the customer field, click the name to select it. If you have connected to the QuickBooks, the customer lists show directly from the QuickBooks customer lists. If not, comes your name in the list then running a list of customers you have entered while creating recurring payments.
- Warning: In QuickBooks never choose a customer assigned a foreign currency. So many problems occur like accounting. Because of recurring payments currently only available in US Dollars and also an only customer, not a job, it can be used to set up a recurring payment.
Step 4: Enter a valid name for the recurring payment.
For your identification, it’s important to enter a valid name for the recurring payment. So, you and your customer see and use that name to understands the charge. The name also appears on email notifications when each payment complete. Items will not appear in the email receipt the customer service but the items will be listed on the QuickBooks invoice and you have a chance setup options in a minute.
Step 5: Schedule payments set up.
Control the set schedule for a recurring payment if you want, that is the Start Date, End Date and the Frequency that the resolve payment dates forward going.
- Frequency. It is the process, you have to give that you want to payment made in which date regularly each month. For example, if you want to make a bill each month like the 1st of August, you pay on the 1st of each month.
- Start Date. Choose that date when you want to pay. The date must be tomorrow or later (up to a year from today).
- End Date. You can also choose the date which you want to end the payments. this is your last bill date. If you don’t want to choose the end date, leave this field blank.
Other Useful Articles:
Step 6: Choose an invoicing option.
Your company QuickBooks file can access through Recurring Payments. Access your QuickBooks customer invoice and lists and even recurring payments posts automatically updates to QuickBooks, also you can do.
You can also create a recurring payment on the regular schedule for that you charge your customers automatically. But what about the books? Possibly needs to recorded on invoices and payments for every transaction. They handle these things in two ways.
1. Auto-generation of Recurring Charges for every invoice of payments:
If you want that the auto-generation of your QuickBooks invoicing and recording for each payment. And also calculate the charge of an amount that you have to list in your QuickBooks items, click on the radio button in the Itemized list. Enter the item name in the particular search box and click on the item that you searched and add to the total.
There is also the facility for includes the added amount the taxes QuickBooks automatically calculates. Also, you can add a new item that not comes in the search engine pieces of information that appears. If you want to edit in your list, open QuickBooks to make changes that you want to in your items.
2. Manually already have created or create an invoice for every payment.
If you want to manually created when you are already not created an invoice for every payment, go to the radio button and click, but if you want to choose this option, you can not able to select items on that particular window. And each payment field can only put in the total in amount, Including all the taxes any applicable. If you want to watch your record of these payments go to the Make Merchant Service in your QuickBooks Deposits Screen.
Step 7: Enter Credit Card Informations.
- Go to the payment fields and fill all pieces of information that are required for those particular files.
- If you are billing a commercial card, click the This is a commercial card checkbox and enter the Sales tax amount and the Customer accounting code.
Step 8: Notify the customer (Optional).
If you want to get notifications by email that you have to set up a recurring charge, place a checkmark in the Notify, my customer, that I set up this recurring payment checkbox. If you don’t see this option, it’s likely because you turned off all customer emails.
Note that every time an actual payment complements, you and your customer both get an email notification automatically. If you don’t want to send a confirmation email for each payment, you can turn off all customer emails.
If done, click Next.
Step 9: Review and save the recurring payment setup.
Always review your recurring payment setup carefully, you have entered all the terms of authorization form signed make sure by your customer.
If you want to changes in your profile, click Edit, To save, click Submit
NOTE: When you open to using QuickBooks Desktop and a change or new information is added to the customer or items list, be sure to close and re-open QuickBooks to synchronize the data with our systems. Typically Recurring charges occur at midnight of the transaction date a few hours later may take place.
Thanks for giving us your valuable time. you can visit us anytime soon if you have any other queries in your mind. you are always welcome here to visit us. if you want to discuss more this topic, you can talk to a QuickBooks expert or if you are facing any issue while using QuickBooks, just contact QuickBooks support at toll-free +1-844-405-0904.