Going to use the QuickBooks credit card payment process for the fastest payment transaction? We will help you to go a little step forward, by discussing the importing process of credit cards in QuickBooks. In this article, we will talk, how to import credit cards in QuickBooks Online, the benefits of the transaction process, some tricks, and tips. Meanwhile, you can save your time and effort by consulting with the QuickBooks experts through this number +1-844-405-0904.
Table of Contents
Things to Consider while Importing Credit Card Transaction
Here are some of the tips, and tricks, that will help you to import the credit card transaction easily into QuickBooks Online. Have a look;
- When you are downloading a file from your credit card company. You will need to add a column for the QuickBooks account number or name and populate this column pre-import. If you have any account numbers just provide the lowest subaccount number in your import file and enable the option for your account numbers at the bottom of the web page. If you are using account names include all accounts and sub-accounts separated by a column in your import file.
- Sometimes there is a “Pay” column in a file that is downloaded from the credit card company contains extra info like merchant id. You can modify this column pre-import so it can easily resemble the vendor name.
- You can give the credit card account from the QuickBooks as a default value shown on the screen when you import credit card transactions into QuickBooks Online. There is no need to add new value to your import file in QuickBooks.
If you have any problem locating your bank account with QuickBooks Online or you want to download 90 days of credit card transactions then you can import your credit card transaction in Excel Format called CSV and QBO file.
Benefits of Credit card Processing in QuickBooks Online

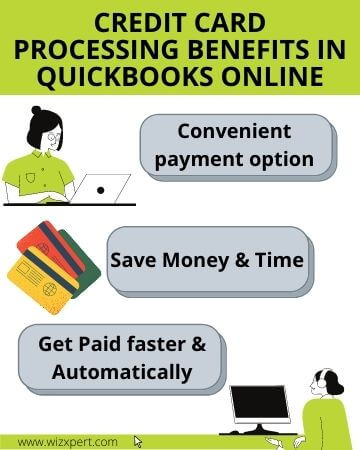
Grow your Business: Offers a convenient payment option for an easier payment process. And helps to grow the business by building trust with the customers.
Get Paid faster & Automatically: The payment can be approved or transferred within the two-three business days. It allows the users to set up the recurring sales receipts to collect the payment automatically. Because of this, you will not be reminded by your customer that you have to pay.
Save Money & Time: With the credit card payment process, you can save up to $1,000. And can save your valuable time, with the auto-entered facility. Because, QuickBooks Online payment service is the only merchant account service, which is fully integrated with QuickBooks Online.
How to Import Credit Card transaction Automatically
If you want to import or enter a credit card in QuickBooks Online automatically, then follow the below-given procedure;
Step 1: Locate & Access the Credit Card Account
Follow the steps to access the credit card;
- First of all, log in to QuickBooks Online.
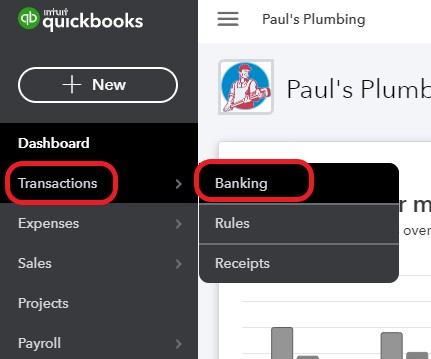
- From the QuickBooks Online dashboard, select the ‘Transaction’ menu, and then the ‘Banking’ option.

- QuickBooks will show you a few instructions, with an option of ‘Connect Account’, if it is your first account you are connecting to QuickBooks. Click on the ‘Connect Account’ option.

- If you already have the experience of connecting an account to QuickBooks then QuickBooks will directly take you to the ‘Banking Center’.
- Click on the ‘Add Account’ option from the top-right corner.
- Type the credit card company name in the search bar, and click on it, if the company shows in the list.
- After that, click on the ‘Continue’ option to go to the login page of the bank account.
- Login to the bank account, and confirm that you want to share banking information with QuickBooks.
- Choose the ‘Appropriate’ option, and you will be taken back to the QuickBooks.
Step 2: Link Credit Card Account to Chart of Account
You have agreed to share your financial information with QuickBooks. Now you can link the credit card account to the chart of account. Follow the step to add it;
- Select the bank account, you want to link with QuickBooks Online.
- If the bank account is not in the list then click on the ‘Add New’ option to create a new account.
- Add the account to the chart of accounts.
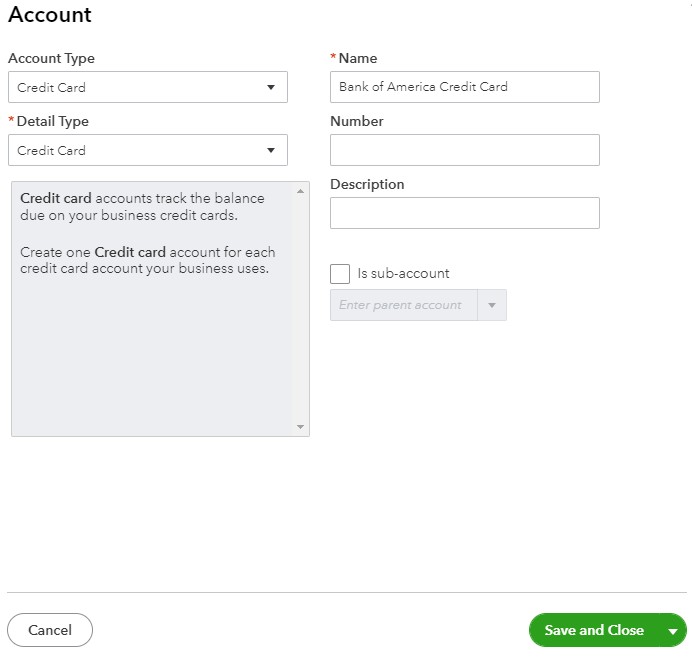
- Fill out the details in the ‘Account’ form like, ‘Account Type’, ‘Detail Type’, ‘Name’, ‘Number’, ‘Description’.
- Then click on the ‘Save and Close’ option.

Step 3: Select Date Range
This is the important step, after linking the account to the chart of account. Here you need to make a schedule for the transaction to start importing. You can edit, and default date according to your need. If in case, you are not allowed to change the date range far then you need to transfer the older transactions through the QBO, and CSV file.
Step 4: Review Downloaded Transactions
In the last step, you need to review the downloaded transactions. You will be directly taken to the banking center, after connecting to the bank account. In the banking center, review the below;
- Transaction Review: In the banking center, you can see the blue color box with the credit bank account name. There you can see numbers, colored with orange, it shows, how many transactions, you have imported, and not yet reviewed, and classified.
- Review tab: Go to the ‘For Review’ tab, and see the review list of all imported transactions, that are waiting for review.
How to Import Credit Card Transaction Manually Using CSV File
If you want to import the credit card manually, then here is the procedure to import the transactions in QuickBooks Online;
Step 1: Download a Transfer File
In the first step, you need to download a transfer file. And mainly the credit card transaction can be imported in QuickBooks Online in the file types;
- CSV: The CSV file is used to export data for a multi-purpose, which can be edited with Excel.
- QBO: The QuickBooks Web connect files are shortly known as QBO files, which are used to export info from credit card accounts to QuickBooks Online.
- OFX: OFX is a kind of text file, which is basically used to export financial data.
- TXT: The TXT file is also used to import data, but it needs some editing. You need to convert the file to Excel, and then to the CSV file to access it.
- QFX: This acts as a financial exchange file to export data to Quicken, as well as QuickBooks Online.
Decide in which format, you will transfer your file. We will suggest you use the CSV format. Now follow the procedure to download a transfer file from the credit card company;
- First of all, log in to the credit card account, and choose the option to download the account transactions.
- Choose any of the file formats (QFX, TXT, CSV, OFX, QBO).
- Download the file, and keep it in a place, where you can easily access it.
Step 2: Upload the Transfer File in QuickBooks
Now upload the download transfer file in QuickBooks.
- Go to the ‘Banking Center’.
- Click on the ‘Update’ drop-down beside the ‘Add Account’ option.
- Now choose the ‘File Upload’ option, and click on the ‘Browse’ option to select the downloaded transfer file from the credit card account.
- Click on the ‘Next’ option.
Step 3: Choose QuickBooks Account
Select a QuickBooks account to record the imported bank transactions;
- Go to the ‘Chart of Accounts’, and select an account from the accounts list.
- Click on the ‘Next’ green button to proceed to the next step.
If you have no account then you can create a new QuickBooks account and can follow the same above two steps.
Step 4: Map Columns to QuickBooks Fields
Step 4, and 5 is only for the CSV, and TXT formatted transfer file, so if your transfer file is in QBO, QBX, or OFX form then skip these 2 steps, and directly jump to the last step.
Open your transfer file in excel and determine, exactly, what data is exported. And now map the columns to QuickBooks fields;
- Checkmark on the ‘First row in file is header now’.
- Go to the QuickBooks Online field, and fill out the Date, Description, and Amount fields.
- After arranging, or mapping everything, click on the ‘Next’ option.
Step 5: Select Transaction for Import
Choose the transaction, that you want to import, by following the below procedure;
- Click on the transaction from the file, you want to import.
- It will be good to select all of the transactions because all of the transactions need reconciliation. And reconciliation can’t be done without importing all of the transactions.
- Reconciling the credit card account from QuickBooks to credit card statements is necessary to manage the book accurately.
- Select all of the transactions, and click on the ‘Next’ option.
The import process is completed successfully.
Step 6: Return to Banking Center
- Click on the transactions, and return to the ‘Banking Center’.
- Now, you can see your bank account in the upper left corner with the transactions awaiting review.
- If you can’t find it then refresh the browser, and see the updates.
Frequently Asked Questions
Can I link a credit card to QuickBooks Online?
Yes, you can link a credit card in QuickBooks Online. And can make the payment process easier with the QuickBooks credit card payment method.
How to categorize credit card expenses in QuickBooks Online?
Login to QuickBooks Online.
And visit the ‘Banking’ menu.
Select the ‘Banking’ tab from the menu.
Choose the credit card account, and search for the payment.
After that, click on the ‘Pay down credit card’ button to select the ‘Transfer account’ drop-down menu.
Now, select the account that you want to send the transaction to.
At last, click on the ‘Confirm’ option.
How to upload credit card charges in QuickBooks Online
Open the created invoice.
Select the ‘Bank Deposit’, under the ‘Other’ section.
Mark the invoice payment you received, in the ‘Select the payments included in this deposit’ section.
Click on the ‘Add funds to this deposit’ option, and enter the name, whom you have received.
Now add an expense account for the processing fee.
Go to the ‘Amount’ field, and enter a negative fee amount.
After that, click on the ‘Save and Close’ option.
Is a credit card payment an expense in QuickBooks Online?
With the use of QuickBooks credit card payment, you can get paid faster. But QuickBooks charges a processing fee for the payment transaction through the credit card. This fee can be shown as a business expense, but the payment transaction can’t be an expense in QuickBooks Online.
How do I record credit card transactions in QuickBooks online?
In QuickBooks, you can record credit card transactions in multiple ways so you can maintain accurate financial reports and track your expenses. You can record your transactions from the following methods:
1. Pay down a credit card
2. Make a payment after reconciling your credit card
3. Use banking download
Although this article will help you to import credit card transactions easily, still you can take technical QuickBooks support by dropping a call through this toll-free number +1-844-405-0904. The certified QuickBooks ProAdvisors will guide you to import the credit card transaction easily and can provide solutions for any kind of queries related to the QuickBooks.
