Want to create a refund receipt in QuickBooks Online? Here we are to provide you all the information related to creating a refund receipt in QuickBooks Online. In this article, the details of the solution are provided to you with real-time images that make a better understanding of the subject matter. read the whole article you will get different methods with simple steps to solve this issue. If the problem still continues you may contact us at our QuickBooks ProAdvisor to consult you. +1-844-405-0904
This is really very unusual for a company, no matter how capable it is to receive requests for refunds from any customer. As the owner of a business, you may know that, if any customer is dissatisfied or not happy with your product or service can complain or demand a refund anytime. Hence you need to know how to create a refund receipt in QuickBooks Online. In this article, we will describe how to issue a refund receipt.
Steps to Create Refund Receipt in Quickbooks Online
Open a Refund Receipt
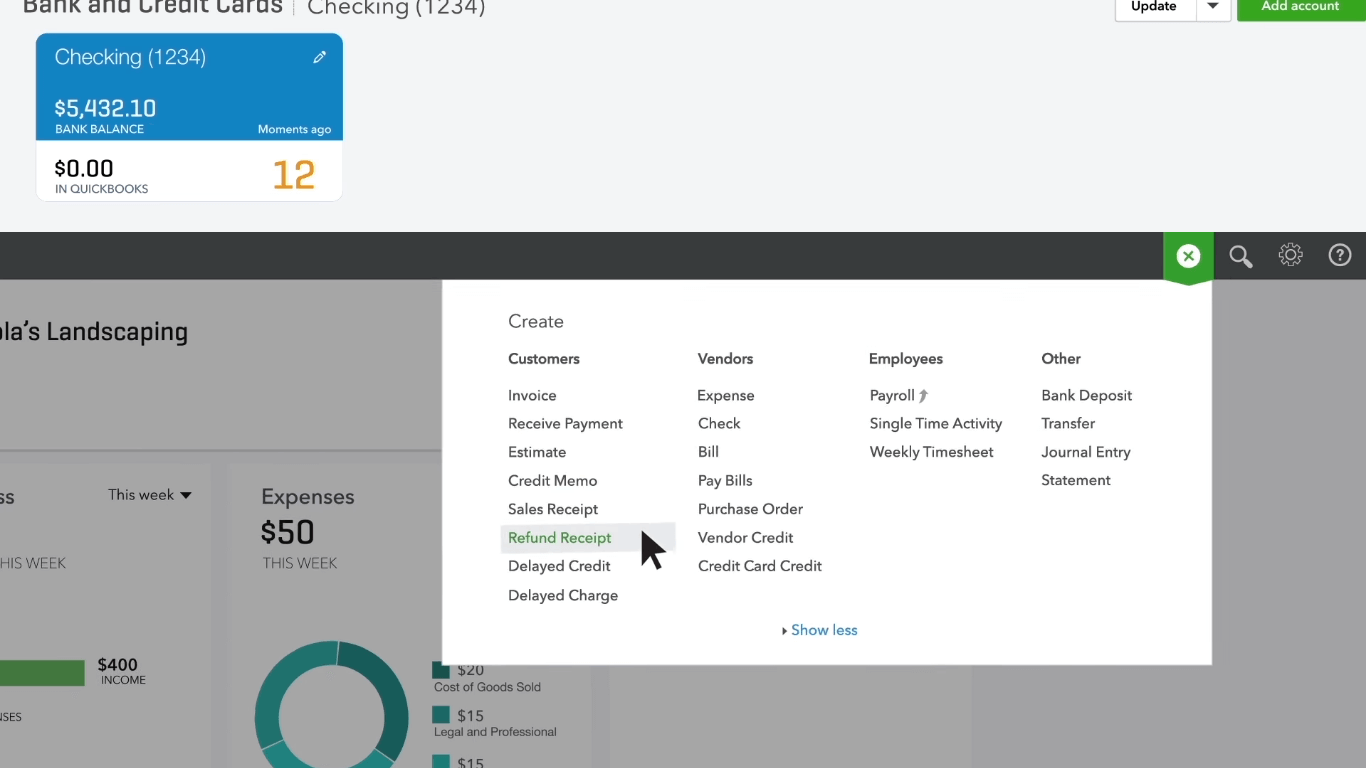
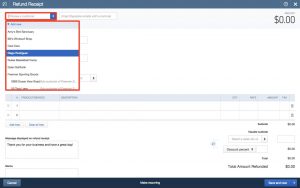
Choose a Customer
From the drop-down suggestions menu. Choose a customer.
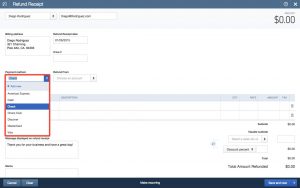
Select a Payment Method
Below in customer information, choose a Payment Method from the suggestions menu.
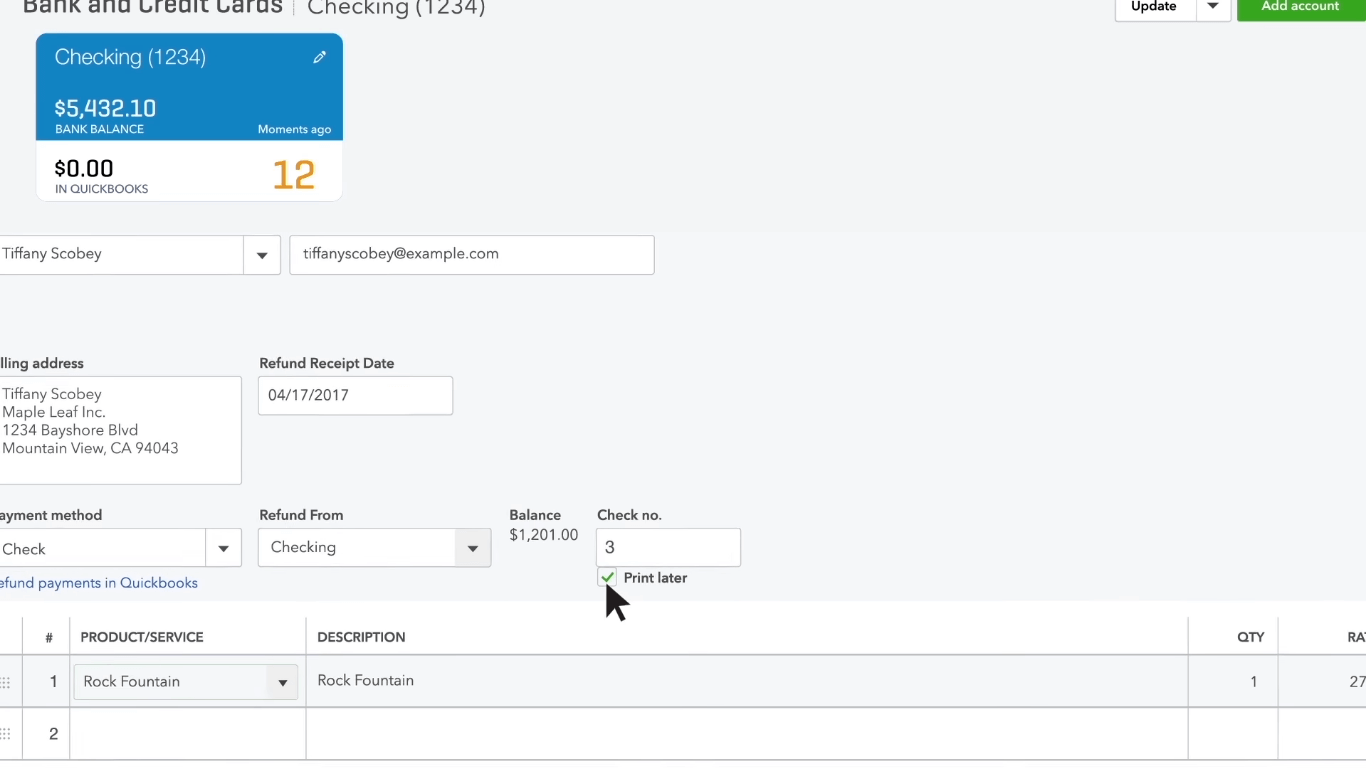
Choose the account you want the refund
Now choose which account you want the refund. To come from will choose the checking account to choose the product or service. You’re giving this customer the refund to check the amount. Make sure it’s the amount of refund you want to give this customer. So Choose a customer + Select a payment method + Choose an account + Designate the product or service for Refund + Finalize refund receipt
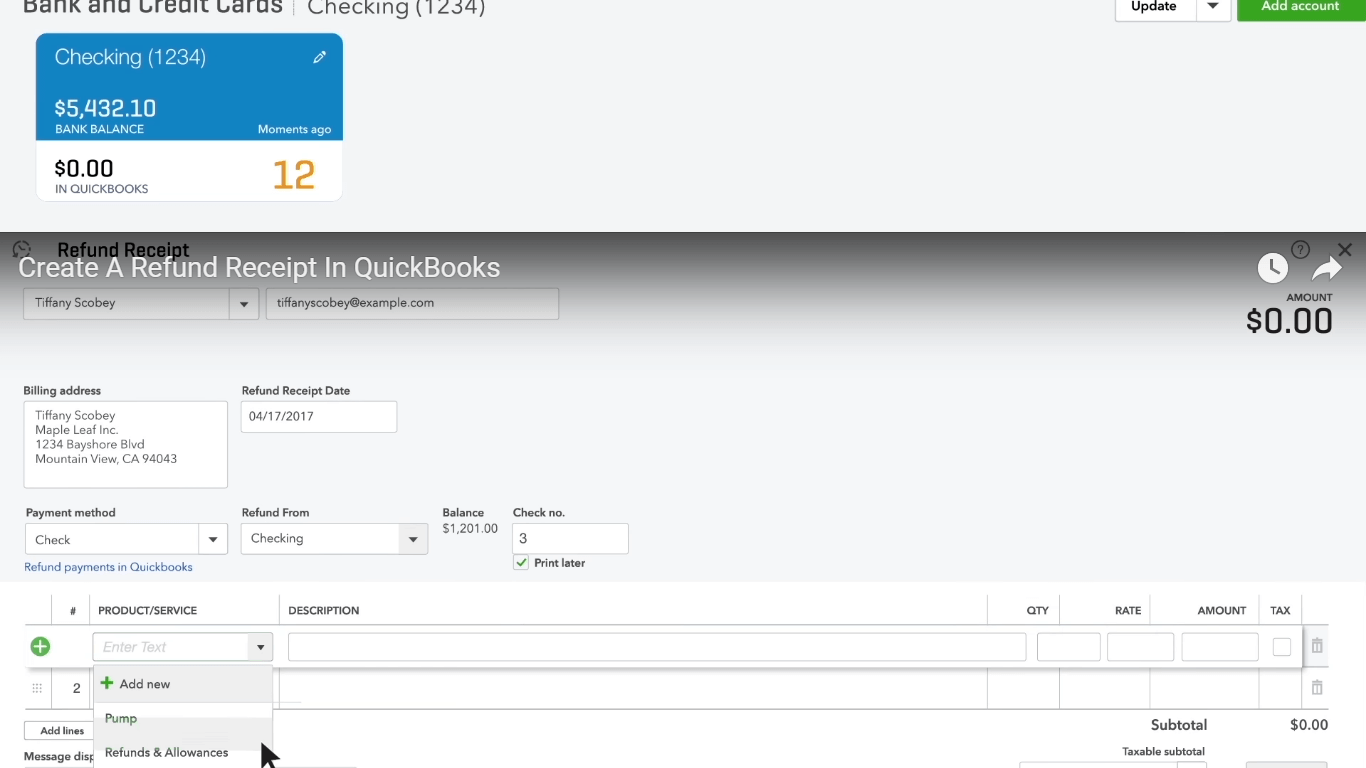
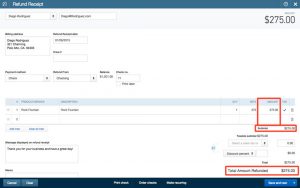
Designate the Product or Service for Refund
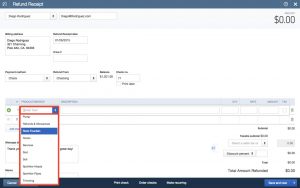
Check the Finalize Refund Receipt
Make sure the amount of refund is correct, that you want to issue to the customer. Check the Amount column to ensure.
Choose Print Options
When you’re finished with the refund receipt. Click print now or print later to print it out or enter the check number. If you wrote this refund check by hand then click Save and close
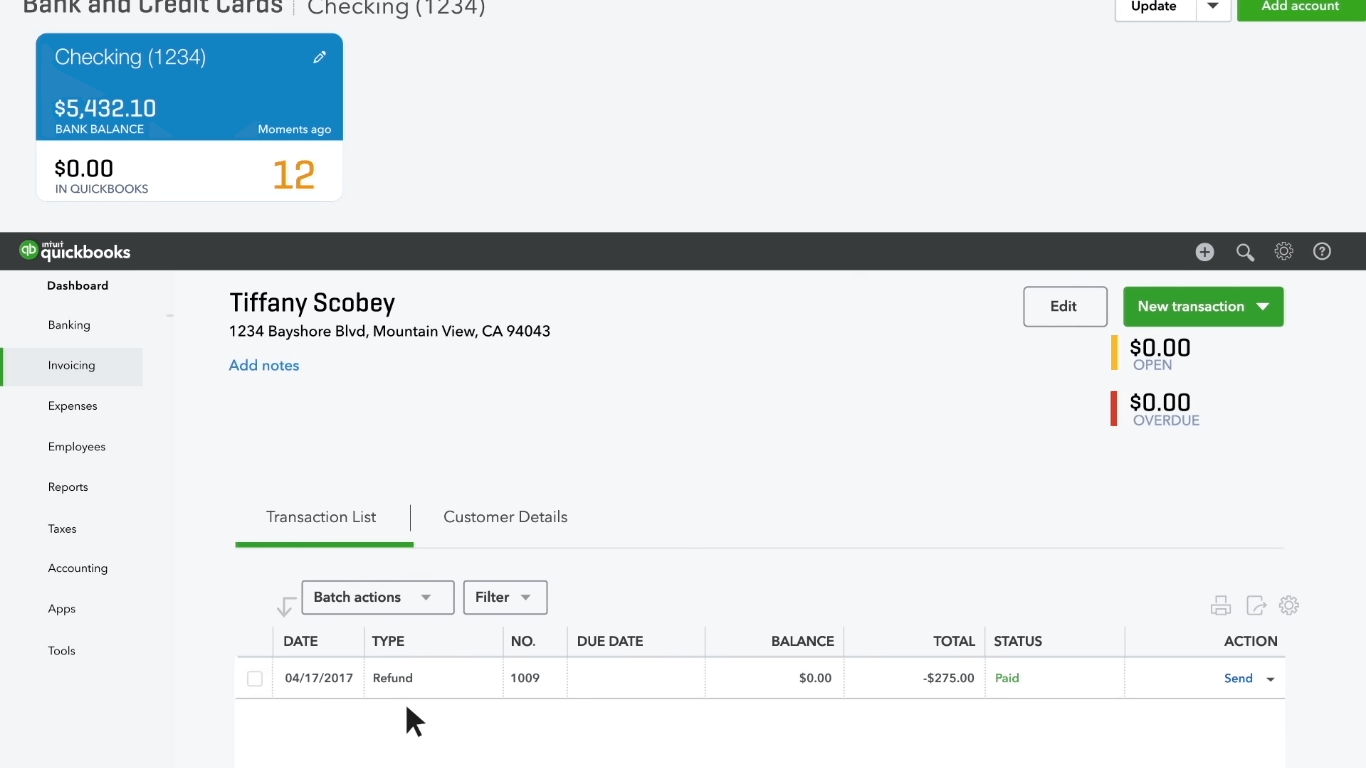
Choose customer list for a refund
To see where this refund went go to your customer list. And also choose the customer you refunded look at the list of transactions for this customer. You’ll see the refund QuickBooks automatically add the refund to your customer’s records.
Now it’s your turn. Try creating a refund receipt. So you’ll be prepared if you ever have to give a refund. And Wizxpert is always with you for any kind of assistance regarding Bookkeeping and Accounting. Contact Our Intuit Certified QuickBooks ProAdvisor for instant help anywhere in the USA. Thanks for visiting us.