Here, we will discuss how to reactive, inactive, and delete accounts in a chart of accounts in QuickBooks Online. It is always good practice to keep your charts of accounts and online banking pages manageable and well arranged. If in case, you do not intend to use an account further, deactivate it. This actually removes it. QuickBooks usually hides the account from lists and menus but also keeps a record of previous transactions in your reports. So, go through the complete article and get your query resolved; if having an issue then contact our QuickBooks ProAdvisor through Toll-Free No: +1-844-405-0904
If you have $ 0 left in the account you created, you can delete it. However, it can be difficult to delete the accounts you’ve used for some time. As accounts trust each other to stay balanced, deleting data from one changes the others. We are here to guide you on what you can do so that you can make the most competent choice.

Steps to Reactive, InActive And Delete Accounts In Chart Of Accounts in QuickBooks Online
Disconnect a bank account from online banking
Instead of removing accounts connected to online banking, we suggest you disconnect it. This easily prevents QuickBooks from downloading new transactions. QuickBooks keeps transactions you have already classified and eliminates those that still require to be re-examined.
Important: if you are facing any kind of bank connection error then do not disconnect an account. Because by doing this, you may download duplicate transactions or duplicate opening balance entries while reconnecting it.
- Open QuickBooks, click on the Banking menu or Transactions menu.
- Now, click on the blue tile for your bank account.
- Later, click on the pencil ✎ symbol to edit the account, then go to the Edit account info.
- Click on the Disconnect this account on save check box.
- At last, go to the Save and close this window.
If the connected account is not updated or in the middle of an update, you will not get the disconnect option. So, in this situation, you have to wait a few minutes for the update to complete before attempting to disconnect.
Steps to Make an account inactive
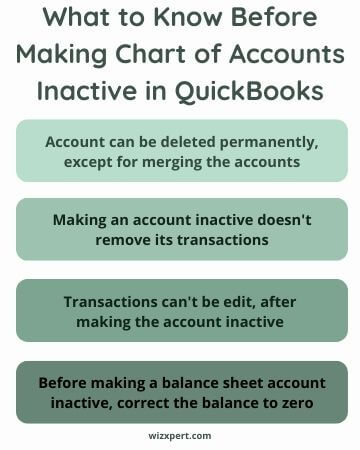
Deactivating an account is like more or less delete it. If your account has a balance and you want to deactivate it, then QuickBooks generates a journal entry. It takes the remaining amount to another account so that it does not disappear from your books. Your current transactions in the account do not disappear and remain on your financial report.
Once you deactivate an account, it is very difficult to undo. If you decide to use the account again, QuickBooks will not withdraw the balance in the account. Journal entries also remain on your books.
Note: Before you begin, we advised you to contact your accountant. Be sure, Before making the account inactive, this change is appropriate for you. If you do not have an accountant, then visit, find a ProAdvisor and get in touch with the Expert team.
Important: QuickBooks uses some accounts as default accounts. For example, your sales tax account is a default account. Since product features depend on default accounts, you cannot delete them.
You also need additional steps before you delete some types of accounts:
- If the products or services use the account you need to delete, then you have to change the account they are linking to. You can also create products and services that deactivate the account.
- If the income account you need to remove has pending charges, then you have to invoice your customers for bill expenses, time, or fees. You can then delete the account.
- If recurring transactions are associated with the account, then you must unlink that transaction from the account.
- If there are subaccounts of the account you want to delete, move the subaccounts elsewhere on your chart of accounts. You cannot delete accounts with subaccounts.
Now, go with the following steps, when you are ready to make an account inactive:
- Open QuickBooks, click on the Settings ⚙ and look for the Chart of Accounts and click on it.
- Now, look for the account you need to delete.
- Click on the Action ▼ dropdown and choose to Make inactive.
The above-discussed steps hide the account from menus and your chart of accounts.
Tip: While running the report, you will still view the deactivatedd accounts and their transactions. QuickBooks covers them to keep everything organized. You can also customize some reports to hide inactive accounts, but this may affect accuracy.
Check out the below steps to see your inactive accounts:
- Go to the Settings ⚙ and look for the Chart of accounts.
- At the top of the list, click on the Gear symbol ⚙
- Now, click the Include inactive checkbox.
Steps to make an account active again
Go with the following steps, if you want to make the account active again.
- Go to the Settings ⚙ and look for the Chart of accounts.
- Now, click on the Gear icon ⚙ on the top of the Action column. Later, click on Include inactive.
- Look for the account that you need to use again and click on Make active.
As we above discussed, before deleting your account, discuss it with your accountants. Hope, you like this article to read and easily understand the steps on how to active, inactive, and delete accounts in the chart of accounts in QuickBooks Online. Feel free to contact our Intuit Certified Proadvisor by dialling our toll-free +1-844-405-0904.
