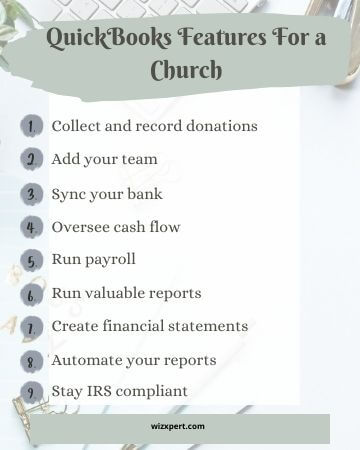
If you want to use QuickBooks accounting software for Non-profit organizations such as Church, then you must clearly know the accounting requirements for managing a Church in QuickBooks accounting software.
First, you have to set up your QuickBooks account in such a manner so that you can handle the functioning of a church in QuickBooks accounting software easily. You can manage donations in your church, record tithes, and offerings. You can also calculate and file taxes for the church with the help of QuickBooks accounting software. Today in this article we will help you to set up QuickBooks for a church. So, you must read the article till the end. This will make sure that you set up QuickBooks for the church in a proper way.

Points to Remember Before Setting Up QuickBooks for Church
Setting up and using QuickBooks accounting software for a church is a tricky process. You must keep in mind some points and facts before you start the setup of QuickBooks accounting software for the church. Let us have a look at those points
- You should set up separate asset account accounts for each and every fund.
- You must have a checking sub account for each fund of that church.
- Sub accounts should be set up for each and every income and expenses that you will need across the funds of the church.
- You must set up payroll liability sub accounts if you use different funds of the church to pay your employees.
- These workarounds should be kept in mind before starting your set up of QuickBooks for a church because sometimes it can get messier and confusing to set up QuickBooks accounting software for a church.
Procedure to Set up QuickBooks for a Church
Now let us have a look at the steps on how to set up QuickBooks accounting software for a church
- First of all you have to enter your company information and company type.
- While entering your company information, you have to select Outside non profit as a type for your business and also for your industry.
- Then you have to click on the gear icon on your screen and click on “Company settings” to turn on classes by clicking on it.
- Then you have to scroll down the company settings window and open “Category settings”.
- Then you have to select “Track classes” and “Warn me”, to get information about any unassigned transactions by a class.
- Then you have to click on “Save”.
- Then you have to add a new class. Click on the gear icon and then click on “All lists” and then you have to click on “Classes and new”.
- Then you have to give a name to the class and then click on “Save”. In this way a new class is added up for each program and fund.
- Then you have to create a pledge in order to track the donations that you received from all the donors.
- You have to click on the “+ tab” and then click on the “Plus” option.
- Then you have to enter the details of the Donors and also enter their pledge. You should use the class list for entering the details and pledge to a fund or program. Then you have to click on “Save and send”.
- Then you have to enter the email address of the donors besides his/her name and then you have to press enter to save and send.
- If any donor makes a donation right away then you have to open the receipt section by clicking on the “+” plus sign on your screen. There you have to enter all the details of the donor and also the details of the donations and then assign a class to it.
- If you want to send statements to the donor about his/her donations, then you have to click on the gear tab and go to “Company settings”, then click on “Sales” and open the “Messages” section.
- Then you have to select a statement for the “Sales form” and then you have to add a customized email , then click on “Ok” to send the statements to the donor.
- Now if you want to create a transaction statement with received and pleasures, then you have to open the statement section by clicking on the “+” plus sign and then click on “Transaction statement”. Then you have to add a date for a particular time period that you want on the transaction statement.
- Then you have to click on “Save and Send” to complete the creation of a transaction statement.
- Now if you want to track the money spent, then you have to click on the “+” plus sign and open the Expensive section to add a multi line and then assign a class to each and every expenditure of the church.
- Now to get an overview and a complete summary of the finances of the church, you have to click on “Reports”.
- Now you have to go to the “Customize” section in the reports tab and then click on “Lists”. Then you have to go to the “Classes” section and enter the journal and admin.
- Then you have to click on “Run report” to complete or finish the process.
Final Words
We hope that now you can set up your QuickBooks accounting software for a church easily by yourself. You can use QuickBooks accounting software to manage the donations of different donors and you can also record the tithes and offerings to handle and manage your church in a more efficient way. Just follow all the steps carefully and read the entire article carefully without skipping a single to set up QuickBooks accounting software for a church easily. You can drop a call to us +1-844-405-0904 if you need any help from Wizxpert through the QuickBooks experts.
