Is your windows firewall blocking internet access to run QuickBooks Software? Want to set up firewall ports & internet security for QuickBooks Desktop? Read this article to solve this issue. You’ll learn how to update QuickBooks firewall ports to the latest version or manually configure the firewall & Internet security settings of the QuickBooks Desktop. Go through the article and get your queries resolved. For more details contact our QuickBooks ProAdvisor toll-free: +1-844-405-0904
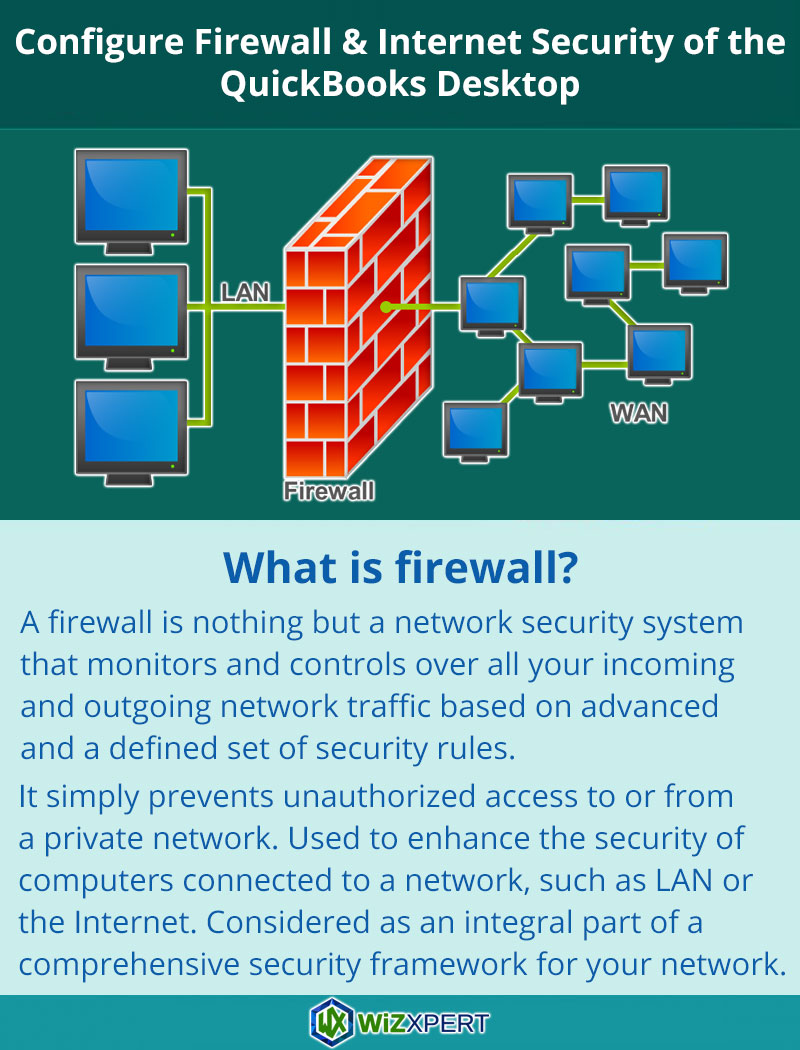
A firewall is an important application that prevents you from various threats, viruses, malware, and unwanted programs. But what if it blocks your internet access required to run specific QuickBooks software or any company file.
In case, if you are suffering from such issues, you will get complete information regarding how to configure QuickBooks firewall ports & internet security. This specific problem can be ideally solved by updating the firewall to the latest updated version or manually setting the configuration of your antivirus/security software. The user has also the option of taking QuickBooks support from our certified Intuit ProAdvisors.
If your Windows firewall is blocking internet access for particular QuickBooks programs or files, you might get the error message. But you do not need to worry, we will show you here all the steps on how to set up your firewall, and if you want to manually configure your firewall settings.
Important: We recommend you to download QuickBooks Tool Hub and run QuickBooks File Doctor before you begin with the steps because QuickBooks File Doctor lets you open your ports automatically.
Steps to Configure QuickBooks Firewall Ports and Antivirus security settings
Step 1: Update & Configure firewall manually
First, check that the QuickBooks is in the latest version. If it is not in the latest version then update the QuickBooks.
If QuickBooks File Doctor did not work for you for resolving the firewall issue, then you can set the things manually.
Add Firewall port exception for QuickBooks
If you are using various versions (years) of QuickBooks Desktop on the same computer, then go with the below steps for everyversion of QuickBooks:
- Go to the Windows Start menu.
- In the search bar, enter the “Windows Firewall” and click on Windows Firewall and open it.
- Next, go to the Advanced Settings.
- Give a right-click on the Inbound Rules (after that, you’ll create Outbound Rules). And next click on the New Rule.
- Click on Port and then choose Next.
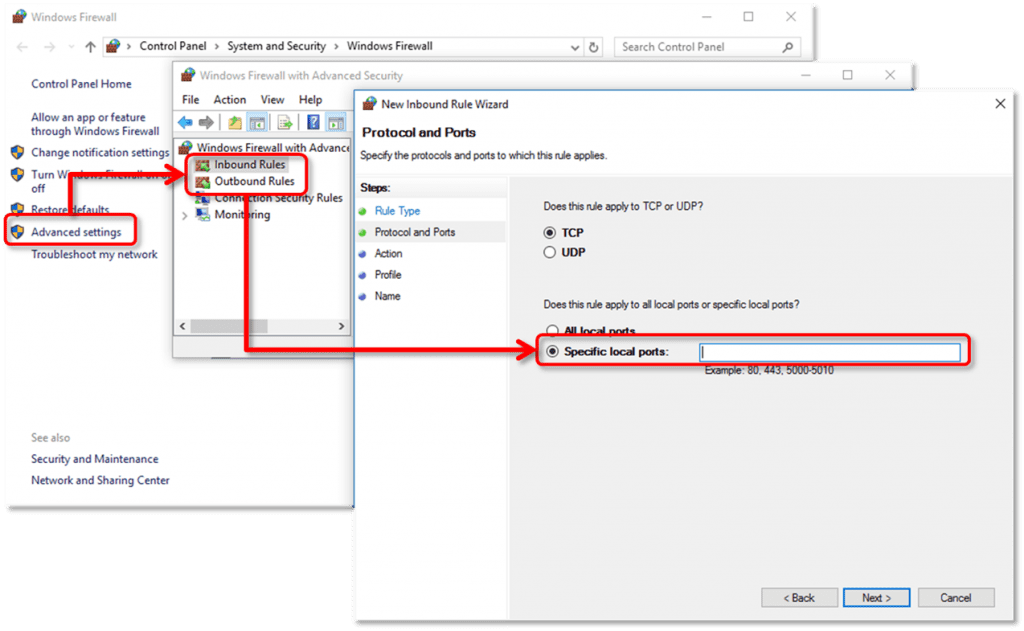
- Be sure, here you need to select TCP.
- In the particular local ports field, insert the particular ports needed for your QuickBooks year version:
- QuickBooks Desktop 2020: 8019, XXXXX.
- QuickBooks Desktop 2019: 8019, XXXXX.
- QuickBooks Desktop 2018: 8019, 56728, 55378-55382.
- QuickBooks Desktop 2017: 8019, 56727, 55373-55377.
Important: QuickBooks Desktop 2019, 2020, 2021 and upcoming versions use dynamic ports. These are particular firewall ports (not a range) specified during installation. This assures that QuickBooks Desktop gets particular use of a given port.
The format of the port for QuickBooks Desktop 2019 and later versions is 8019, XXXXX. XXXXX is the dynamic port number.
Here are the steps to get the dynamic port number:
- First, go to the Windows Start menu.
- In the search bar, type “QuickBooks Database Server Manager” and click on QuickBooks Database Server Manager and open it.
- Next, click on the Port Monitor tab.
- Look for your QuickBooks version.
- Write down your Port Number. You will need to use this for your firewall port exception.
Keep in mind, you can change the specified port number by clicking on the New. Next, look for the Scan Folder tab and click on Scan Now. This will reset your firewall permissions. You can only upgrade ports for Desktop 2019 and later versions. You cannot upgrade ports for earlier versions of QuickBooks. Because QuickBooks Desktop 2018 and older versions use static ports. Their port numbers are set by default you can’t change them.
- After entering the Port no according to your QuickBooks Version, then click on Next.
- Then choose to Allow the Connection and later click on Next.
- If asked, be sure that all the profiles should be marked. And click on Next.
- Now you need to create a rule. Give it a name like “QBPorts(year).”
- When you are finished, click on Finish.
To create outbound rules, you need to repeat the steps above. Next, go with all the same steps, except selecting Outbound Rules on step 4.
Go to the QuickBooks Desktop and switch to multi-user mode. You can also open QuickBooks on your network from one of the host computers. If you still facing the same issues or error messages, then proceed to Step 2.
Create Windows firewall exceptions for QuickBooks programs
QuickBooks are using the executable files (.exe) to perform various tasks.
Go with the below steps to create exceptions for each file on the table:
- Go to the Windows Start menu.
- In the search bar, type “Windows Firewall” and click on the Windows Firewall, and open it.
- Next, click on the Advanced Settings.
- Now, give a right-click on the Inbound Rules (later on, you’ll create Outbound Rules). Then later click on New Rule.
- Click on Program and then go to the Next.
- Go to the Program Path and later click on Browse.
- Now, you need to look for and click one of the executable files on the chart above. And later click on Next.
- Click on Allow the Connection and later click on Next.
- If asked, be sure that all the profiles should be marked. And click on Next.
- Now, you need to generate a rule and later give it a name like “QBFirewallException(name.exe).”
To create outbound rules, you need to repeat the steps above. Next, go with all the same steps, except selecting Outbound Rules on step 4.
| Executable files | Location |
| AutoBackupExe.exe | C:\Program Files\Intuit\QUICKBOOKS YEAR |
| Dbmlsync.exe | C:\Program Files\Intuit\QUICKBOOKS YEAR |
| DBManagerExe.exe | C:\Program Files\Intuit\QUICKBOOKS YEAR |
| FileManagement.exe | C:\Program Files\Intuit\QUICKBOOKS YEAR |
| FileMovementExe.exe | C:\Program Files\Intuit\QUICKBOOKS YEAR |
| QuickBooksMessaging.exe | C:\Program Files\Intuit\QUICKBOOKS YEAR |
| QBW32.exe | C:\Program Files\Intuit\QUICKBOOKS YEAR |
| QBDBMgrN.exe | C:\Program Files\Intuit\QUICKBOOKS YEAR |
| QBServerUtilityMgr.exe | C:\Program Files\Common Files\Intuit\QuickBooks |
| QBCFMonitorService.exe | C:\Program Files\Common Files\Intuit\QuickBooks |
| QBLaunch.exe | C:\Program Files\Common Files\Intuit\QuickBooks |
| QBUpdate.exe | C:\Program Files\Common Files\Intuit\QuickBooks\QBUpdate |
| IntuitSyncManager.exe | C:\Program Files\Common Files\Intuit\Sync |
| OnlineBackup.exe | C:\Program Files\QuickBooks Online Backup |
Note: If you can notice Program Files (x86), it means you are using a 64-bit Operating system.
Go to the QuickBooks Desktop and switch to multi-user mode. If you are still facing the same issues or error messages, then proceed to the next section and set your antivirus settings.
Set your anti-virus or firewall programs
If you installed your firewall but still facing the same issues, then you need to check your antivirus settings. Make sure QuickBooks has common permissions, so it is not blocked. Steps vary from program to program.
Add QuickBooks ports exception on your antivirus or firewall
If you still see errors or have problems opening your file on a network or in multi-user mode, then you need to add port exceptions for these particulars.
Be sure that TCP is chosen and insert the ports that are required for your QuickBooks version (year). You can set the port numbers in “Step 1: Configure firewall manually.”
Always, keep in mind, if you are using multiple versions (years) of QuickBooks Desktop, then you have to add every year’s ports.
| Executable files | Location |
| AutoBackupExe.exe | C:\Program Files\Intuit\QUICKBOOKS YEAR |
| Dbmlsync.exe | C:\Program Files\Intuit\QUICKBOOKS YEAR |
| DBManagerExe.exe | C:\Program Files\Intuit\QUICKBOOKS YEAR |
| FileManagement.exe | C:\Program Files\Intuit\QUICKBOOKS YEAR |
| FileMovementExe.exe | C:\Program Files\Intuit\QUICKBOOKS YEAR |
| QuickBooksMessaging.exe | C:\Program Files\Intuit\QUICKBOOKS YEAR |
| QBW32.exe | C:\Program Files\Intuit\QUICKBOOKS YEAR |
| QBDBMgrN.exe | C:\Program Files\Intuit\QUICKBOOKS YEAR |
| QBServerUtilityMgr.exe | C:\Program Files\Common Files\Intuit\QuickBooks |
| QBCFMonitorService.exe | C:\Program Files\Common Files\Intuit\QuickBooks |
| QBLaunch.exe | C:\Program Files\Common Files\Intuit\QuickBooks |
| QBUpdate.exe | C:\Program Files\Common Files\Intuit\QuickBooks\QBUpdate |
| IntuitSyncManager.exe | C:\Program Files\Common Files\Intuit\Sync |
| OnlineBackup.exe | C:\Program Files\QuickBooks Online Backup |
Step 2: Restart your computer
Some programs require you to restart your computer to save changes. After configuring the firewall, restart your computer and reopen QuickBooks.
Hope you have been able to configure QuickBooks firewall ports & Internet Security. In any case, if you are unable to do so; don’t hesitate to avail our QuickBooks enterprise support service. Dial toll-free +1-844-405-0904.