Do you want to cut the time spent on the payroll? Simply use the Time Clock Kiosk feature in QuickBooks Time. Don’t know how to start, Don’t worry. We are here with another article to show you how can you set up, clock in, take a break, and clock out in Time Kiosk. Go through the article and learn all about QuickBooks Time Clock. If you want expert guidance, contact our QuickBooks ProAdvisor by dialing the toll-free number +1-844-405-0904.
QuickBooks has a number of features that ease the employer’s work and reduce their payroll time. QuickBooks Time Clock is one of them. It tracks the working hours, clocks in and out in seconds, tracks location with the GPS tracker, and detailed reporting. If you are also willing to use a digital clock for your business, QuickBooks Time Kiosk can help you. No matter if it is in a warehouse, on a construction site, or at an event, you can track on-site attendance with QuickBooks Time Clock.
QuickBooks Time Kiosk is a digital time tracking tool that works as a traditional wall-mounted punch clock. Without any expensive hardware or setup, use this app on any internet-enabled device and link it to your existing QuickBooks account. All you need do is open the Kiosk and keep running.
Table of Contents
QuickBooks Time Clock Features
QuickBooks has many key features that give accuracy and many benefits to the employees and employers. Let’s discuss QuickBooks Time Clock features in detail.
- Device Compatibility: It is very easy to set up QuickBooks Time Kiosk. Employees can punch time clocks on any desktop, tablet, or laptop with an internet connection.
- Photo Capture: Employees can easily track time by entering a secure four-digit pin. You can enable photo capture to control time theft and buddy punching.
- GPS Tracker: With the help of GPS Tracker, you can add a location to each time clock so the manager knows the exact location of each timesheet.
- Quick Clock-in and Clock-out: Employees working in one location can track the time from one device, so they can clock in and clock out in seconds.
- Easy Integration: Employees can review and submit timesheets to their employers directly from the Time Kiosk.
- Detailed Reporting: Data can be categorized by job, employee, task, group, or project for job costing and resource allocation.
System Requirements for the QuickBooks Time Kiosk
It’s good to check system requirements before installing the app. Let’s check out them:
Device
- Tablet screen: 1024 px by 768 px-size in landscape mode.
- The device has wi-fi or a cellular internet connection.
- iPad: iOS 8.0+
- Android: OS 6.0+
Browser
The kiosk works on the new versions of Chrome, Firefox, and Safari on the Desktop, Mobile, and Tablet.
If you use Photo Capture, choose one of the following browsers.
- Chrome 45+
- Firefox 33+
- Microsoft Edge
Set up QuickBooks Time Kiosk on Android
Learn how to track employees’ hours with the Time Kiosk to do your work easier. The steps are given below for the Android devices:
Step 1: Install the Kiosk Feature in QuickBooks Time
Get the device authorization code by installing the Kiosk. Follow the steps:
- Open QuickBooks Time, select Feature Add-ons and then Manage Add-ons.
- Go to Kiosk and click Install.
- Click Add Device then select Other Device and note down the Authorization code.
Step 2: Install the QuickBooks Time Kiosk App
Follow the steps to install the QuickBooks Time Kiosk app from the google play.
- Go to google play, install and open the app.
- Enter the QuickBooks Time web address of the company or company identifier. Click Next.
- Find your web address or company identifier in the Company settings, then click company details.
- Press Company info and search for Company Website or Company Identifier.
- Enter the device authorization code.
- Click Authorize.
Step 3: Set Kiosk Preferences
Go back to the desktop, and click Done on the authorization code window. Select the authorization code under the Kiosk name. After that, you can follow the below steps.
- Type a new name under Kiosk Name.
- To limit which users can clock in/out on the kiosk, select All team members under Team members and make your selections.
- To enable/disable photo capture, select Yes or No under Require Photo on Clock in/out.
- Set your Device Language and Record Location.
- Select Show or Hide under Team Member List and Team Member Working Status.
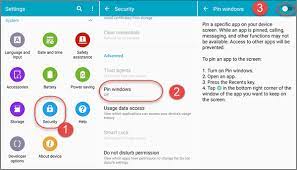
Step 4: Limit Your Device to Use Time Clock Kiosk
Note: Only android version 5 or higher allows screen locking in the Time Kiosk. Using a device’s built-in system for screen locking is a good choice to protect the app. Sometimes using a third-party app for screen locking can create problems.
- Go to the Settings of your device, then click General.
- Select Security and click Pin windows.
- Toggle On from the top right.
Step 5: Set Team Member PINs
At the time of the first login, they can pick their name and set their pin. If you want to set their pin, go through the following steps.
- Go to the My Team and select their name.
- In the PIN box, enter a four-digit number and select Save.
Set up QuickBooks Time Kiosk on iOS
After meeting up the system requirements, you need to follow the same steps we discussed for android devices. Only Step 4 is changed for iOS. Follow the below steps instead of step 4 in iOS.
Before starting make sure that the device is connected to the internet.
Set up guided access
- Go to the Settings and then General.
- Select Display and Brightness, click Auto-Lock, and set it to Never.
- Go back to Settings and select General.
- Click Accessibility and toggle on the Guided Access.
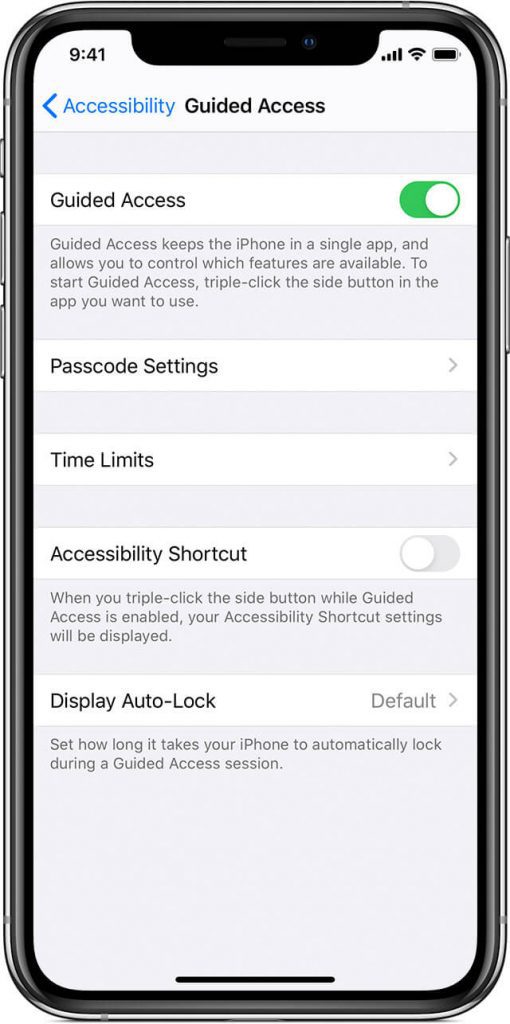
- Select Passcode Setting, then Set Guided Access Passcode, and enter a passcode twice.
Enable for time clock kiosk
- Go to the Settings and select General.
- Search for Guided Access and turn it on.
- With the Time Clock Kiosk app open, quickly triple-tap the Home button.
- Tap Start from the top right corner.
To exit guided access
- Quickly triple-click the Home button.
- Enter the Guided Access passcode.
Clock In and Out via QuickBooks Time Clock Kiosk
After setting up the time kiosk, you need to follow some steps to clock in and out. The steps are here.
Sign in
- Enter your name in the search bar and select it from the list.
- On the greeting screen, enter the pin that was provided to you by your account administrator.
Clock in
After signing in, you need to do one of the following:
- If no jobs or customers display, select Clock in.
- If you want to clock into a specific job/ customer, click Select Job/ Customer, choose anyone and click Clock In.
- If you are required to clock into your last job/customer, select Clock In to [job].
- If necessary add notes or fill out any other fields. For this select Wait, I’m not done.
How to Take a Break
To take a break you need to sign in. after that follow the given steps.
- After signing in, click Take Break, and if shown select a break style.
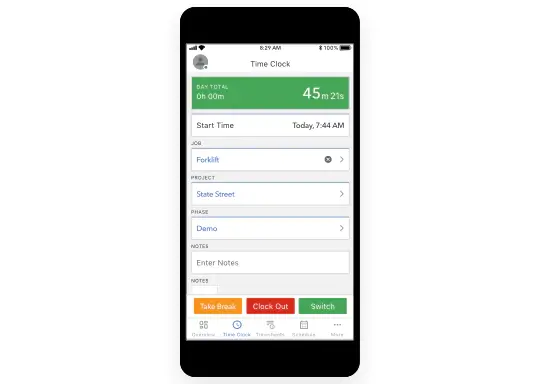
- If the “Have a good break” window appears, you are done.
How to Clock Out
- After signing in, fill out the notes or other fields if necessary.
- Select Clock Out.
- If the “Goodbye” window displays, you are done.
We have covered the complete process from setting up to the clock out. Now you are ready to enjoy QuickBooks Time Clock Kiosk. If you have any queries or find any issues during the process, feel free to contact our QuickBooks ProAdvisor. You can get instant help from our expert by dialing our toll-free number +1-844-405-0904.