Want to fix folder permission error in QuickBooks desktop? Don’t worry, This article is to aid you with several methods to resolve this error, Different methods are listed here to give the best way to solve the issue. Reading the full article will provide you the complete troubleshooting aid, and you get rid of folder permission errors in QuickBooks. If the problem continues then let us know, our QuickBooks ProAdvisor will help you. +1-844-405-0904
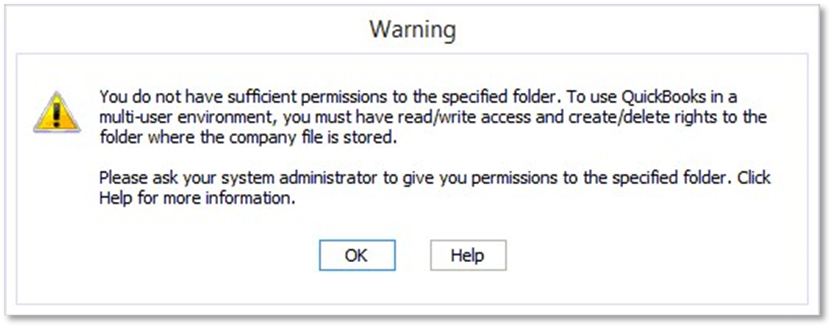
This article will guide you on how you can resolve the permission error when setting up folder permissions in QuickBooks Desktop. At times QuickBooks shows the error message “You do not have enough permissions for the specified folder”. Stay with this page till last to know the solutions to fix permission errors in the QuickBooks folder. You will see the given message when a permission error arises.
Causes of Folder Permission Error
Before fixing the Folder permission error you should know the root cause that why this error arises. Here is a list of some root causes due to this problem.
- If your files are stored in a restricted location then QuickBooks can’t fetch them and shows the permission error message.
- Sometimes it may happen that you forget to set folder permission or don’t set it up correctly.
- It also causes a problem when the folder is damaged where your company files are saved so keep remembering that your folder should not be damaged.
- It is also caused if your files are saved in a protected location like in the C:// drive or in the program files.
Steps to fix folder permission error in QuickBooks Desktop
If you confront the folder permission error while using QuickBooks Desktop error then you should follow the given tips. Intuit recommends more than one solution that you can try to resolve the issue of folder permission error.
Solution 1: Use the QuickBooks File Doctor Tool
The QuickBooks File Doctor tool repairs internal damage and fixes the problem. Download and run the tool to fix the error.
Solution 2: Run QuickBooks as an administrator
- Close all running QuickBooks programs.
- Right-click on the QuickBooks Desktop icon and select Properties
- Go to the Compatibility tab, and choose to launch this program as an administrator.
- Click Apply and then OK.
Solution 3: Change your company file location to the default location
- Close the QuickBooks Desktop.
- Go to the location where your company’s file is located.
- Once you locate your company’s file, copy the file (with extension .qbw).
- Browse to a default location for your file, and paste the file in that location, Path: C: // Users / Public / Public Documents / QuickBooks / Company Files
- Try to access your company’s file from the default location.
Solution 4: Generate a new folder for your company file
- Use the same directory to generate a new folder.
- Copy your company files to the new folder you created.
- You will need to set folder permissions to share your company’s files.
- Proceed to the QuickBooks File list and choose Open or Restore a Company.
- Click on Open a Company document and then hit Next.
- Choose a company file from the new folder.
- Click on Open.
Solution 5: Test and set folder permissions and fix folder permission error
- Go to the Microsoft Word program or open notepad on your computer.
- Once you open the program (word or notepad). Type “Test”.
- Save the file to the same location where your company file is stored.
- If you don’t face any error while saving the file to the exact location, it indicates that your folder has the correct permissions.
If you encounter an error, you may need to check your folder’s permission settings.
How to fix folder sharing?
When sharing a folder in a multi-user environment, you require to give the appropriate permissions and set the access level of users on the network to access company files.
Follow the instruction to learn how to set up folder permissions.
Share existing folder
- Proceed to the folder you like to share then click on Properties.
- Select to share this folder from the sharing tab. If you like then change the name of the shared folder.
- Set permissions for every user to access your folder from the Security tab or by selecting the Permissions button.
- After setting permissions, click Apply, and then click OK.
You can also generate a new shared folder using the Shared Folder Wizard.
- Launch into the run window by pressing Windows + R on your keyboard.
- Enter shrpubw.exe in the search field and click OK.
- The wizard will guide you with instructions. Follow the instructions to share your folder
If you want to stop sharing a folder, follow the steps below:
- Proceed to the folder for which you want to stop sharing.
You can choose one of the following:
- Either right-click on the folder and choose> Remove Access, Grant Access
- Or select the folder, then select the share tab, and in the section choose Remove access with share.
- Close the file explorer.
Last Thought
In this article, we discussed fixing folder permission errors in QuickBooks Desktop, hope we clarify all of the above points. If the above troubleshooting steps do not help you to fix the folder permission errors in QuickBooks Desktop then contact our QuickBooks support team for quick remote support.