Are you looking to fix error 1303? Don’t wonder anymore, we are right here to aid you in fixing the error 1303. The error 1303 occurs when you installing QuickBooks. The installer has insufficient authority to access the directory, like a path to the directory. Here we discuss the steps to fix this error you can follow the instruction to solve this problem and learn the causes of the error as well. you can get help from our QuickBooks ProAdvisors to save your time and effort contact us toll-free +1-844-405-0904
What is QuickBooks error 1303
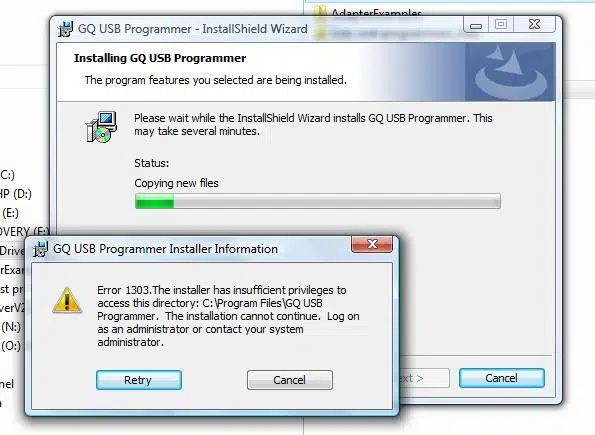
You may confront QuickBooks error 1303 while opening a company file or installing QuickBooks. There are many factors like damaged files, antivirus software, and incorrect file permission, which means the users who installed have not full authority to access the path of a directory. So you need to log on as an administrator for complete installation. If you confront this error then you can see the error message that flashes on the screen given below:
This error 1303 may irritate you till it fixes completely. So, follow the steps given in this blog carefully to resolve this issue.
Cause for the Error 1303
- If the computer system does not have enough space in its driver to save the installer files.
- Because of technical error has arisen with QB installation
- Settings for Windows file sharing are not configured properly
- In case, the system group or the noted directory does not have full control privileges
- The user doesn’t install Quickbooks properly
- If full access to the system is not available to the user.
- If there is technology failure then this error 1303 occurred.
- If there is any damaged file of the QuickBooks.
- The setting of the file sharing is incorrect.
Symptoms of QuickBooks Error 1303
- You may notice that many features of the QuickBooks have restricted you or not working properly.
- Sometimes QuickBooks may also create problems to open.
- An error message popped up on your screen.
- There is a possibility that your system lags while working.
Now, In this section, we know the solution and method to fix the problem.
How to fix QuickBooks error 1303
There is 2 possible method to a solution for changing authority setting for the system and every group.
- A utility has been created that resets system groups and all group permissions settings to Windows default settings.
- Manually change the permissions for the system in full control and folder C: \ Documents and Settings \ All Groups for All Users.
Note for Vista Window: Due to differences in file structures and permissions, the utility will not work on Windows Vista. If you are facing this issue in Windows Vista, please manually adjust the permissions.
Solution 1: Download and install the QuickBooks Tools Hub
QuickBooks Tools Hub helps tofix common errors. QuickBooks needs to be shut down to use the tool hub. Fix Install QuickBooks Desktop View Errors to Run and Use theQuickBooks Install Diagnostic Tool.
Note: The speed of the repair depends on your internet speed and your computer’s performance.
Solution 2: Manually resolve the issue
This manual solution is very helpful if the tool did not work for you, follow these steps as given below:
Step 1: Edit the permissions for the appropriate folders
Manually change permissions for complete control of the system and all groups for the folder C:\Documents and Settings\All Users.
- First, open the run box on your screen just by pressing and holding Windows + R simultaneously.
- Now, go to the Open field insert the path C:\ProgramData\COMMON FILES\, and click OK. On your screen, a window opens and shows the folder contents.
- Later, go to the Folder window, select Organize then click on Properties.
If you are using Windows 10 then click on Properties on the top ribbon of the folder window. - Go to the Properties window, and click on the Security tab.
- Next, click on the Advanced button.
- Click the Edit button.
- Scroll down the list of permission entries and double-click on the System User.
- Click on the checkbox for the Full Control row in the Allow column and later select OK.
- Repeat steps 1 to 8 with the Everyone group (if it exists).
- Check the checkbox labeled Replace all existing built-in permissions on all descendants with built-in permissions from this object.
- Select OK in both the Advanced Security Settings window and the COMMON FILES Properties window again.
- Now,Install QuickBooks Desktop.
Step 2: Turn off Simple File Sharing
- First, open the run box on your screen just by pressing and holding Windows + R simultaneously.
- Now, you need to copy and paste RunDll32.exe shell32.dll, Options_RunDLL 0 in the run box, and click on Enter.
- Go to the View tab, and scroll to the bottom of the Advanced Settings list.
- Make sure to clear the Use simple file sharing (recommended) checkbox.
- Click on OK and continue with the QuickBooks Desktop installation.
Step 3: Run Utility
- You have to tap on permissionsFix.bat.
- Next, save the file and open it.
- Now you can see the DOS window will open.
- Next, you need to type “Y” for resetting the window.
- Now you have to Run the file.
- After doing all the steps given above, you need to click on OK and then close the DOS window.
Step: 4 Use of Diagnostic tool
- The Diagnostic tool is one of the important tools that have the feature of diagnosing if there is any internal error. This tool helps to know what types of errors you are facing that interrupt your workflow. You can follow the steps to use the diagnostic tool:
- First, you need to install through the QuickBooks tool.exe file.
- Then you need to save it on the desktop.
- To open the QuickBooks Diagnostic tool, double-click on it.
- Then you have to click on RUN.
- Now you can see the options, just select “Having problem in Installing QuickBooks”.
- Then click on the OK button.
- The diagnostic tool runs itself to find and fix the errors.
Step 5: Delete Existing Account
- If you created a new account then you need to delete the existing account. For this, follow the steps:
- Firstly, you have to choose a Transaction.
- Then next click on the Banking tab.
- Next, you need to choose the account that you want to disconnect.
- Click on the account to delete.
- Then next you have to hit on Edit account info.
- After that, click on the disconnect checkbox and then save.
- Now tap on the save button after completing the process.
- After doing all the steps above you need to restart your system.
Information Instruction:
I hope this will help you to fix QuickBooks Error 1303, if not then get help from Intuit-certified professionals, dial our toll-free QuickBooks Support Number +1-844-405-0904.