If you are currently using QuickBooks Self-Employed and want to Switch from QuickBooks Self-Employed to QuickBooks Online then you are on the right page, read this article to get your issue resolved. you can easily switch from QB’s Self-Employed to Online. But you have to do it manually because there is no automatic switching option available in the market. Don,t worry, this article will guide you through the step-by-step process of migration. Follow the steps mentioned in this article to switch your QB account. For any query or help contact our QuickBooks ProAdvisor toll-free: +1-844-405-0904
Note: Intuit experts team is continuously working on an automatic migration process, where you will be able to automatically switch from QuickBooks Self-Employed to QuickBooks Online. It will release soon and will be trying to let you know soon after release.
Steps to Manually Switch from QuickBooks Self-Employed to QuickBooks Online
1. Export your QB’s Self-Employed Data
This is the First step towards Switch from QuickBooks Self-Employed to QuickBooks Online.
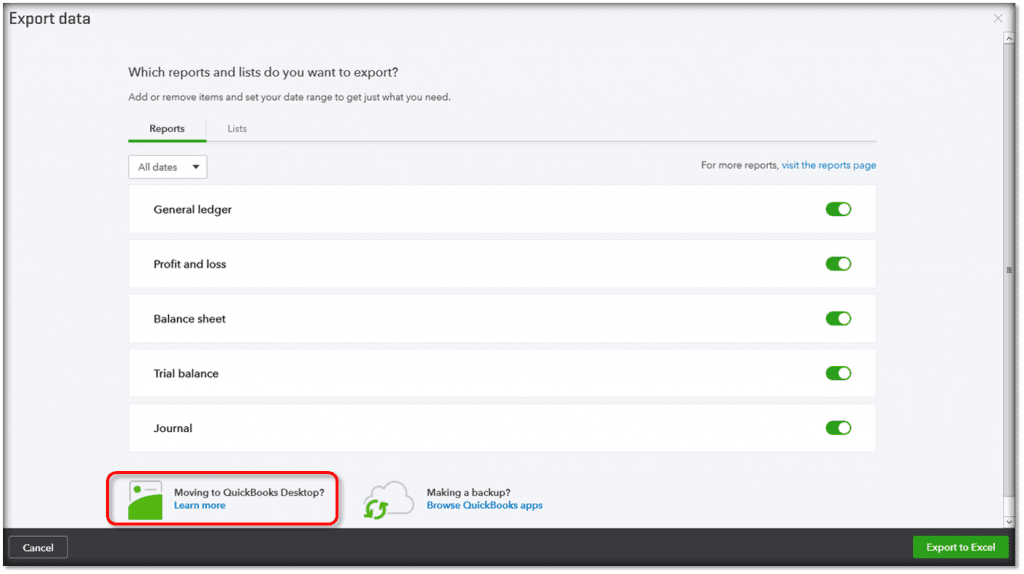
- First, download all your data from QBSE before you unsubscribe.
- Start QBSE, go to the Reports menu.
- Under the tax detail section, select the tax year and download all reports that you have in QuickBooks.
- Also, download all transactions in .csv file that you need to move in QB Online.
2. Sign up to QB Online and Import all the data
- As you are new to QB Online you first need to signup to QB Online, After signing in you can easily transfer your data and after you can unsubscribe from the QB Self-Employed account.
- If you want to connect the same bank and credit card account that you used in QBSE then you don’t need to move any transactions, it automatically fetches all the transaction details.
- But if you want to connect with other bank and credit card accounts then you have to import all the downloaded .csv file to QB Online. To upload follow the following steps:
- Sign in to your QuickBooks Online account.
- Under Settings and select Import Data.
- Now, Choose Bank Data.
- After getting your information from your bank section, select Browse.
- Here, find and select your transaction .csv file that you downloaded earlier for upload, then select Next.
- In the QuickBooks Account ▼ drop-down menu, select the account on which you want to move the transactions.
- Match your statement fields from the .csv file with the ones in QuickBooks Online, then select Next.
- Now, pick all the transactions you want to move to QuickBooks Online, select Next.
- Now if you’re sure to import, select Let’s go.
Related Read: How to Update Billing and Subscription Info in QuickBooks Self-Employed
3. Unsubscribe your QuickBooks Self-Employed account
Make sure, recheck all your data in QB Online then only unsubscribe QBSE. Follow the following steps for unsubscriptions based on where you purchased QuickBooks Self-Employed.
Important: Direct uninstalling QuickBooks Self-Employed from your device like mobile, laptop, and tablet don’t cancel your QB self employed subscription. For unsubscribing follow the following steps:
On Purchasing directly from QuickBooks or Intuit
- Open QB Self-Employed in any web browser on your laptop or desktop. You can not cancel your subscription directly from the QuickBooks mobile app.
- Select your Business name next to Settings ⚙, then choose Billing info.
- Here you got an option of ‘cancel your account’ click on it and follow all the onscreen actions.
On Purchasing from the Apple App Store (iOS)
- Open Settings on your iPhone or iPad.
- Go to Itunes & App Store.
- Then, sign in to your Apple account, then select your Apple ID< Select View Apple ID< Under Active < select Manage
- Now, select QuickBooks Self-Employed and then choose Cancel Subscription.
On Purchasing from the Google Play Store (Android)
- Open Google Play on your smartphone or tablet.
- Sign in to your Google account.
- Go to the Menu ☰ icon.
- Under the subscriptions section, choose QuickBooks Self-Employed.
- Select Cancel and follow all the onscreen steps.
Frequently Asked Question
Does QuickBooks Self-Employed sync with Quickbooks Online?
As we already discussed in the introduction part, you can’t automatically convert the data from QuickBooks Self-Employed into another QuickBooks product. First, you have to download a .csv file for your transactions and upload it to QuickBooks Online.
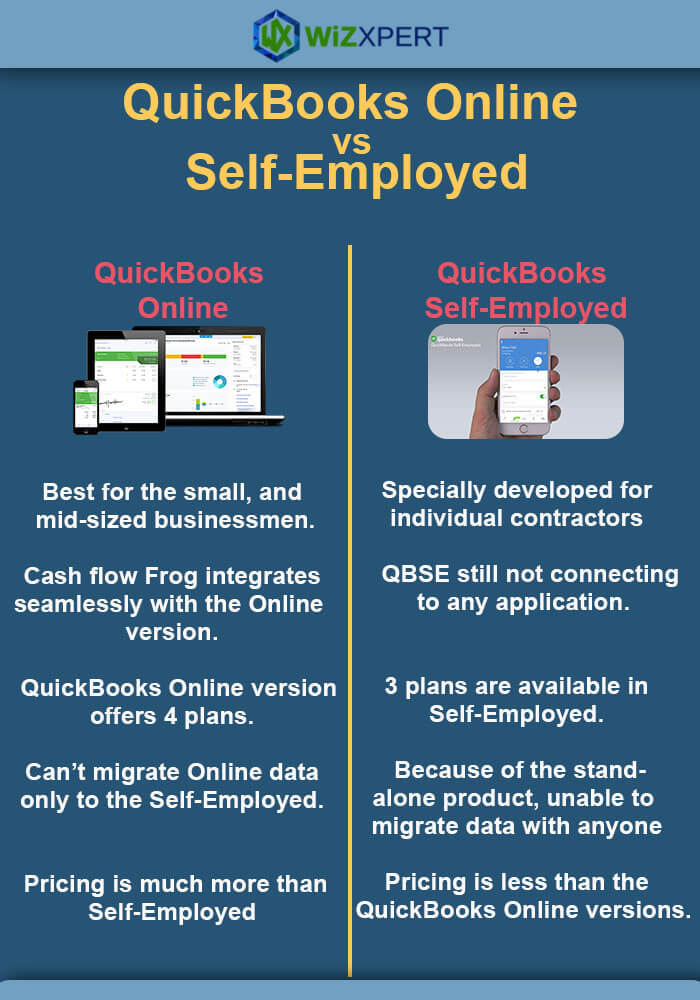
What is the difference between QuickBooks Online and QuickBooks Self-Employed?
You can find a lot of differences in the below-given infographic:
When should I need to upgrade QB Self-Employed to QB Online?
Previously you are working as a freelancer or contractor, and now you are growing with your business Quickbooks and you need more advanced reporting. Maybe, in this case, you need to upgrade QB Self-Employed to QB Online.
Difference between QuickBooks Self-Employed to QuickBooks Online?
QB Self-Employed is used by freelancers, contractors, and self-employed individuals to manage the finances and tax reports. Whereas QB Online is designed for a small business where a max of 25 users can work at a time. Both are cloud-based products of QuickBooks.
Now, going to bind up this topic with the three main steps to switch from QuickBooks Self-Employed to QuickBooks Online.
Hope this article will be helpful and you easily migrate all your transaction to QB Online. For any further queries, directly contact our ProAdvisor experts or you can directly reach us on +1-844-405-0904.