Want to grow up your eCommerce with Amazon using QuickBooks Commerce? Then connect Amazon seller central to QuickBooks Commerce. In this article, we will know, how to integrate the Amazon seller central account into QuickBooks commerce. In the meanwhile, you can take support from the experts by dropping a call through the toll-free number+1-844-405-0904.
This integration process will help you to manage stock levels on Amazon, retrieve sales orders, and process them efficiently once you connect your Amazon Seller Central account to QuickBooks Commerce. Let’s know, how to connect Amazon into QuickBooks Commerce;
Steps to Set Up Amazon Seller Central to QuickBooks Commerce
The standard QuickBooks Amazon integration only takes away some of the challenges that come with managing your eCommerce finances as an Amazon seller. If you want to connect the Amazon Seller central to QuickBooks Commerce then you have to follow the below 3 steps;
Step 1: Connect the Amazon to QuickBooks
First of all, you need to connect Amazon to the QuickBooks by following the below procedure;
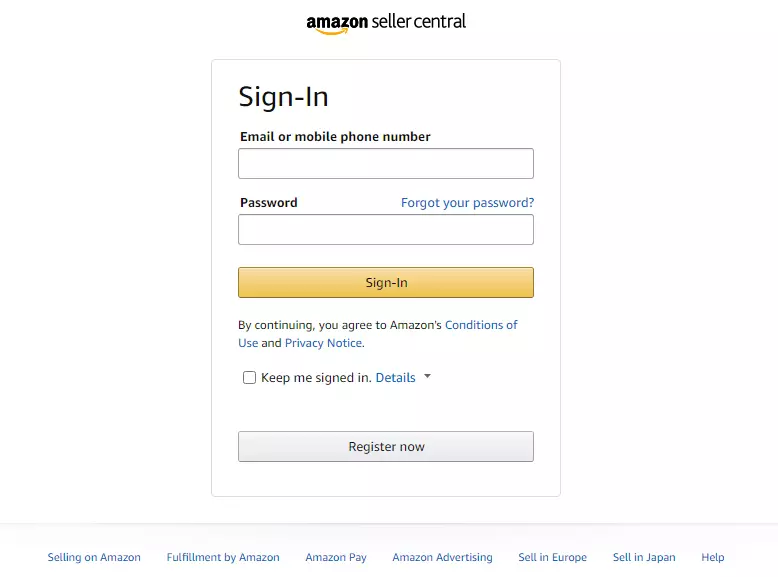
- First, Sign in to Amazon Seller Central.
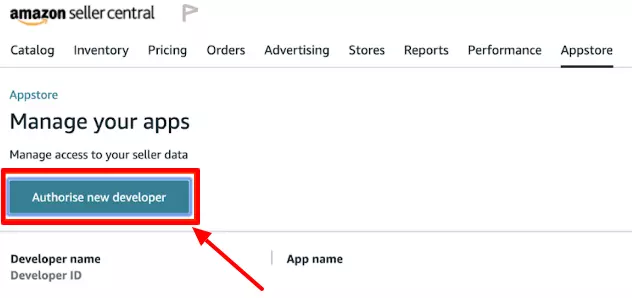
- Click on the Settings and choose User Permissions.
- Then visit the Third-party developer and apps section, click on Visit Manage Your Apps.
- Next click on Authorize new developer.
- And start adding the developer name and ID according to your marketplace info:
| Country | Developer Name | Developer ID |
|---|---|---|
| Amazon US, CA, MX, BR | QuickBooks Commerce | 7950-6528-3889 |
| Amazon UK, IT, DE, ES, FR, NL, AE, EG, IN, SA, TR | QuickBooks Commerce | 6146-4536-6656 |
| Amazon AU, SG, AP | QuickBooks Commerce | 4302-6550-8529 |
- Click on the ‘Next’ option.
- And checkbox, in case you consider the Amazon MWS License Agreement.
- Now click on Next
- Then you can save your Merchant Token, Marketplace ID, and MWS Authorization Token for further process.
Step 2: Connect QuickBooks to Amazon
Note: If you have an Amazon Seller Central account that you also want to integrate be sure to set it up first.
- First, Sign in or Sign Up to QuickBooks Commerce.
- Go to Browse Apps and Click on Amazon.
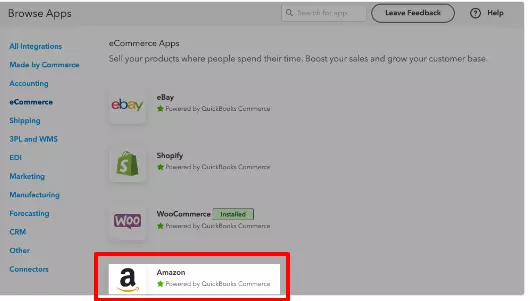
- Click on Install Amazon.
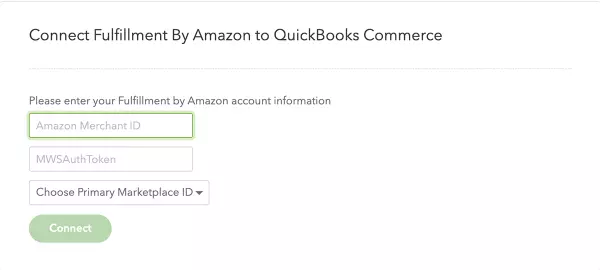
- Fill the form with the saved information which is needed like: Merchant Token/ID and MWS Authorisation Token.
- Choose Primary Marketplace ID from the dropdown menu.
- Then you have to Set up your Amazon stock locations. You can choose from 2 options: Existing locations (i.e. All Locations) or Create New.
- Select the price list you want to sync with Amazon.
- Then confirm if you want to import your products from Amazon.
- Confirm if you want to import your products from Amazon now or at a later stage, and then click on Continue.
- As soon as your products are paired, you will receive an email notification. So click on Next to continue setting up.
Now that your Amazon Seller Central account is connected to QuickBooks Commerce, you will manage stock levels and process sales orders.
Step 3: Process Sales Order in QuickBooks
Now that you have simply connected Seller Central with QuickBooks add Amazon FBA to QuickBooks.
- Go to ‘App Store‘.
- Click on Fulfilment by Amazon.
- You have to enter your Amazon credentials the same as your Amazon Seller Central integration.
- Amazon FBA is installed on your QuickBooks. You can easily import amazon sales into QuickBooks and sync QuickBooks inventory to amazon now.
So these are the procedure for connecting Amazon Central Seller to QuickBooks Commerce. Maintain all the steps properly.
Feel free to contact our certified QuickBooks ProAdvisors through the toll-free number +1-844-405-0904, if you have any kind of queries or doubts regarding this topic.