Want to set up a chart of Accounts in QuickBooks Online? Read the article to get the solution of your search query, in this article the steps to set up a chart of accounts are mentioned along with the process to delete an account from the chart of accounts in QB. So, go through the article and get all your queries resolved, and learn to set up a chart of accounts for QBO. If you need any suggestions or help contact our QuickBooks ProAdvisor toll-free: +1-844-405-0904
To set up and optimize the Chart of Accounts in QuickBooks Online you must follow these given steps. You can also take help from our QuickBooks Support team at toll-free +1-844-405-0904 to save your time and effort by talking to Intuit certified ProAdvisors.
We all know that Chart of Accounts is the backbone of your QuickBooks accounting system and all transactions that you type into QuickBooks are categorized behind the scenes using the chart of accounts so that financial statements, like your Profit and Loss statement or income Statement, can be generated.
There are four primary segments: resources, liabilities, pay, and costs. Value is additionally an area, yet it’s not one you will effectively oversee. Value is what’s leftover after the entireties of your business exercises, in addition to and short, Barbarian XL, have been appropriately recorded.
Resources and salary are great. Liabilities and costs are not incredible but rather not in every case terrible. Numerous individuals consider costs and credits as an essential insidiousness; however, the thought is to cause just those liabilities and costs that will serve the great. At the end of the day, think about your liabilities and costs as speculation — a venture whose reason for existing is to siphon up your benefits and pay.
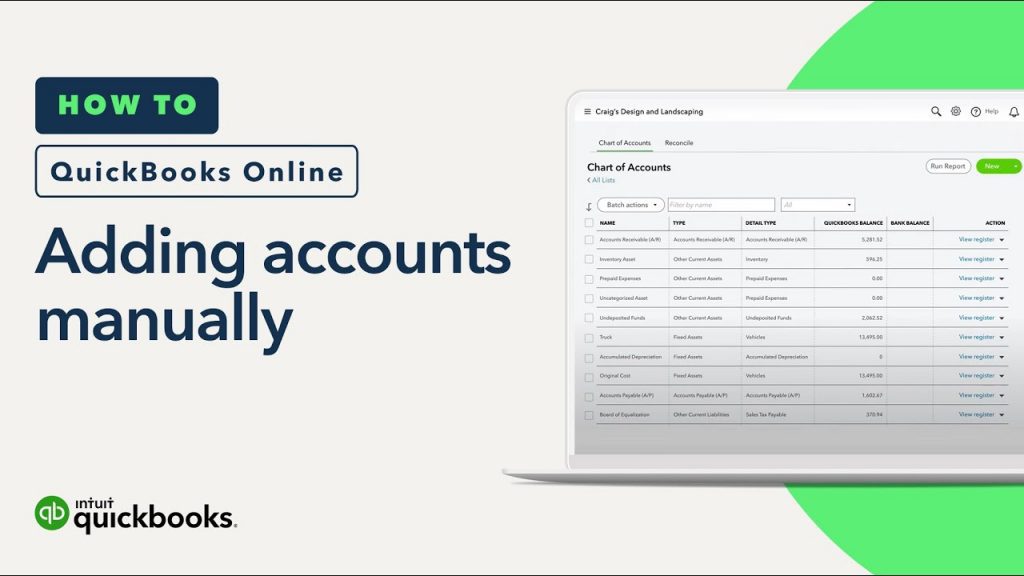
Add A New Account To Chart Of Accounts List In QuickBooks Online:
- First of all, Click on the Gear icon to the left of your company name and then click on Chart of Accounts is listed below your Company column as indicated below.
- Click the New Button in the upper right hand.
- Further Complete each of the fields like as Category Type, Detail Type, Detail Type Explanation, Name, Description.
- Category Type: In this Box, you have to select sales of Product income if you sell products or service/fee income if you sell services.
- Type Explanation: In this Box, you have to select the option according to Category type. Detail Type is very helpful if you are not sure about how to categorize a new account.
- Detail Type Explanation: This Box helps you to provide a complete explanation of the detail type selected.
- Name: In this box, you have to enter the name of the account that will appear on your chart of account list.
- Description: In this box, you can put any additional description of this account. If you don’t have anything to add then you can put the same information here that you entered in the Name field
- And then Save the New Account.
Delete An Account From Chart Of Accounts In QuickBooks
- First of all, Click on the Gear icon to the left of your company name and the chart of accounts is listed below the Your Company column.
- Once you have the chart of accounts list on your screen, scroll down to the account that you would like to delete.
- Click on the Drop Down arrow in the far right column next to that account and select Delete.
- you will get the option “Are you sure you want to delete this?” and then click Yes.
Modify An Account From The Chart Of Accounts List In QuickBooks Online
- First of all, Click on the Gear icon to the left of your company name and the chart of accounts is listed below the Your Company column.
- Scroll down to the account and click the drop arrow next to Run Report and then click edit.
- The following window will open where you can make changes to the Account Name and Account Description.
- After that, click on save.
Setup Chart Whatever’s Important For You:
- Inventory & supplies
- Shipping & receiving
- Accounts receivable
- Accounts payable
- Vehicles & equipment
- Buildings & depreciation
- Marketing & promotions
- Payroll & employees
QuickBooks Online makes it simple by including a drop-down rundown of your records from the Chart of Accounts on every exchange screen. In only a couple of snaps, you can order each commercial exchange. After reading this article, we hope, now you are able to set up a Chart of Accounts in QuickBooks Online.
Technical Help&Support
Our live experts are always there to help and enable you to determine your mistake. QB client can get in touch with us through our QuickBooks Support Phone Number +1-844-405-0904.Our 24*7 QB team is dependably there for you. Simply dial our assistance telephone number to chat with one of our specialists.