Stuck with QuickBooks Desktop installation error? Need solutions on how to resolve the error? Read this informative article where we have explained full details about the error and a step-by-step process on how to download and install the Diagnostic Tool. Later, we’ll tell you how to fix QuickBooks installation errors using QB Diagnostic Tool. Go through the complete article and get your query resolved, for any suggestion or help contact our QuickBooks ProAdvisor toll-free :+1-844-405-0904
QuickBooks Install Diagnostic Tool is the tool that is designed to diagnose and fix the errors occurring while installing QuickBooks Desktop.
As you know, the QuickBooks Desktop application requires many Microsoft core components for the proper functioning of the application. If anyone of the files is missing or not working properly then it will affect your QuickBooks software and your work.
It can fix issues with .NET Framework, C++, and MSXML. QuickBooks desktop uses some of the Microsoft core components and when one or more components stop functioning normally or become unstable, the operating system pops up the errors. Downloading and installing QuickBooks Install Diagnostic Tool can fix a lot of issues that you may encounter while installing this accounting software.
Table of Contents
Download and install the QuickBooks Diagnostic Tool
Go with the below to download and install the diagnostic tool.
- First, follow the link download the QuickBooks Diagnostic Tool, and save the set-up file in your system where you can easily access it.
- After the downloading finishes, you will view the ‘QBInstall_tool_v2.exe’ on your screen.
- Next, you need to shut down all running apps, that recently running simultaneously in the system.
- Now, give Double-click on ‘QBInstall_tool_v2.exe file’ & run the file in your system by following the on-screen instructions.
- Next, restart your system after the diagnose.
- Be sure that you have a good ‘Internet Connection’ for an easy and fast installation
- Quit all the background apps working/running on your system
- The QuickBooks install diagnostic tool will automatically detect and fix the error. But often a system reboot is required. Designed to automatically detect and fix errors, however, in many scenarios, you may need to ‘reboot’.
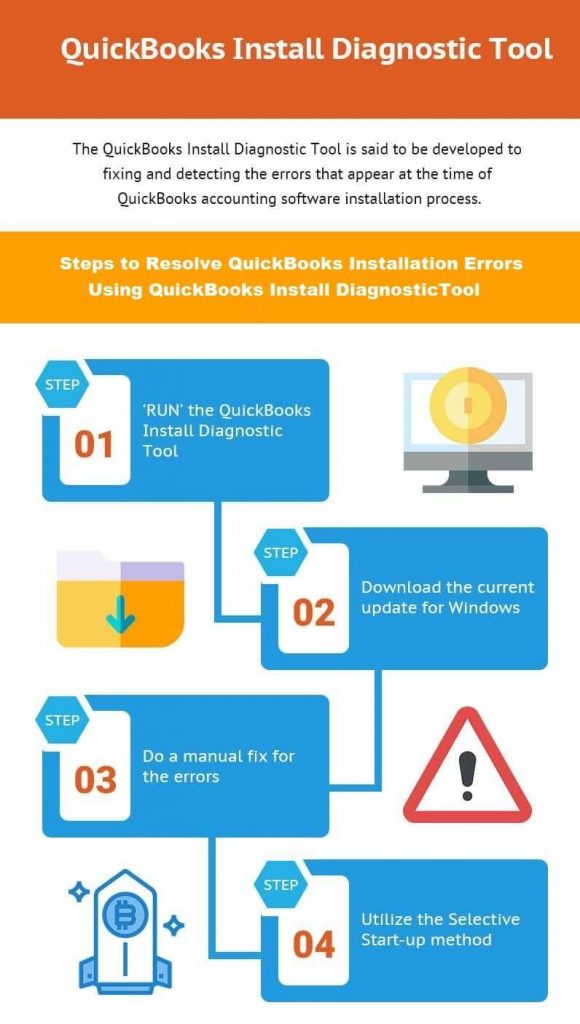
How to Fix QuickBooks Installation Errors Using Quickbooks Desktop Install Diagnostic Tool
Are you having trouble while installing QuickBooks Desktop? So, learn how to fix all the installation errors with the help of the QuickBooks Desktop install diagnostic tool. There are some errors that you may face while QuickBooks installation.
- Error 1402
- Error 1603
- Error 1935
- Error 1722
- Another error you get a message that “QuickBooks has stopped working” when you try to open it.
- Errors related to damaged MSXML and C++
- Microsoft .NET Framework errors
QuickBooks Install Diagnostic Tool is useful in troubleshooting various installation errors. It fixes multiple errors and issues to give an error-free and smooth QuickBooks installation.
Step 1: Download the QuickBooks Tools Hub
The QuickBooks Tools Hub helps you to fix common QuickBooks error codes.
Note: QuickBooks should be closed while using Tools Hub.
- Download the QuickBooks Tools Hub file.
- Save that file at a particular location where you can find the file easily. For example: In your Windows Desktop.
- Then open the QuickBooksToolsHub.exe file you downloaded.
- Follow the on-screen instructions to install it. Click to agree on all the terms and conditions.
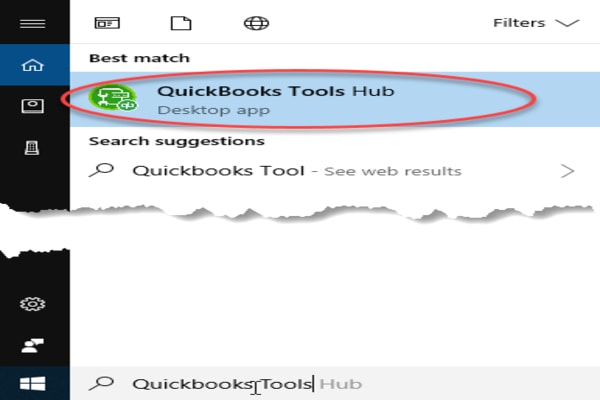
- After completing the installation, double-click on QuickBooks Tools Hub to open it.
Note: If you are not able to find out the icon then search QuickBooks tools hub in the Windows and open that program.
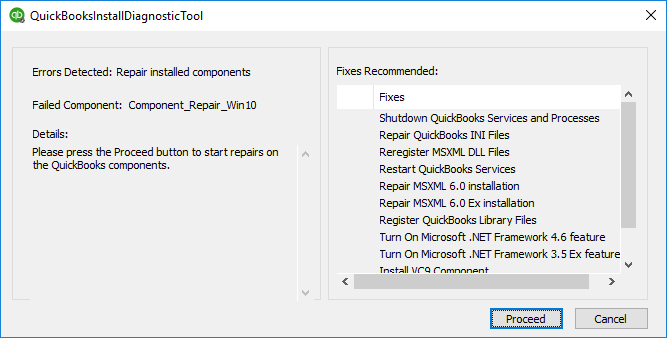
Step 2: Use the QuickBooks Desktop Install Diagnostic Tool
- Open the QuickBooks Tool Hub.
- In the Tool Hub, select the Installation Issues.
- Select the QuickBooks Desktop Install Diagnostic Tool. Let the tool run. It can take up to 20 minutes.
- When the tool finishes, restart your computer.
Step 3: Update Windows
Updates prevent and often fix install errors.
- Update the latest version of Windows.
- After updating restart the system again.
- If the QuickBooks is started with any error then open the company file and start the work.
- But if you don’t finish QuickBooks installation. So, install the QuickBooks Desktop again.
Still, the issue is going continuous then go for further steps:
Step 4: Manually fix Windows components
QuickBooks install tool and updates are not able to fix the errors then you need to repair Windows components manually.
But apply this step only if you are an IT professional or you have good knowledge of it. Otherwise, take help from an expert.
- Repair and reinstall Microsoft .NET Framework and Microsoft MSXML.
Other steps to solve the issue
Step 5: Use Selective Startup to install QuickBooks
The error may be created due to third-party apps. Like antivirus and antispyware programs that programs block the installation for security purposes.
Selective startup mode helps you in a smooth installation and uninstallation of the QuickBooks.
Follow given below steps to get a selective startup to install QuickBooks.
Solution 1: Prepare your data
Before working on the steps. Make the focus on these points:
⇨ Create a backup of your company file.
Create a backup of the company. Unfortunately, if you are ever in trouble then you can use this backup to restore the data. There are steps to create the backup.
Step 1: Create a backup company file
After creating a backup you can be tension-free. When you back up a company file it includes your accounting data, templates, letters, images, logos, and related files such as; QuickBooks Statement Writer, Business planners, Cash flow projectors, and loan managers. Somehow, it doesn’t return your payroll data.
There are two methods to backup your data.
A. Schedule automatic backups
Rather than backup your data manually, QuickBooks can do it automatically for you.
- Open QuickBooks, and go to the File menu, choose Switch to Single-user Mode.
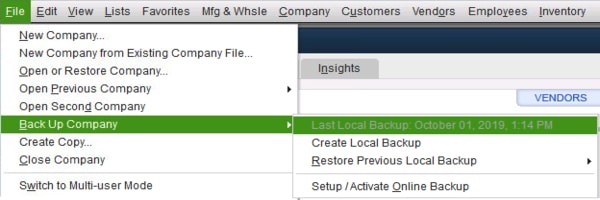
- Again go to the File menu and click Backup company file. Choose to Create Local Backup.
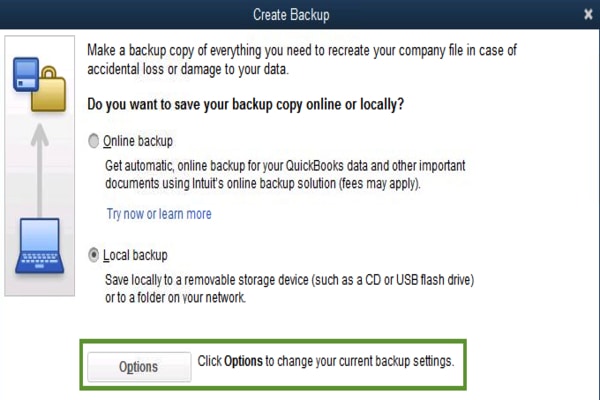
- Choose Local Backup in the Window, and select Next.
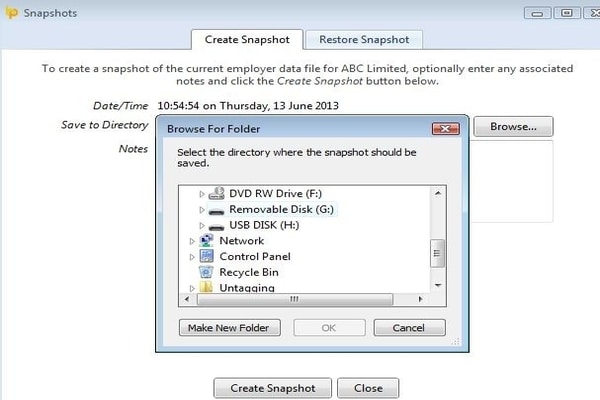
- Select Browser in the Local Backup Only section. The location where you want to save the company file.
- Then choose the number of Backups you want to keep (Optional).
Note: Set reminders
No need to remember it all the time. Select the option in the Online and Local Backup section to set backup reminders.
- In the Online and Local Backup section, select Complete verification. This check that your backup data is in good condition before going to save it.
- After completing, choose an OK option.
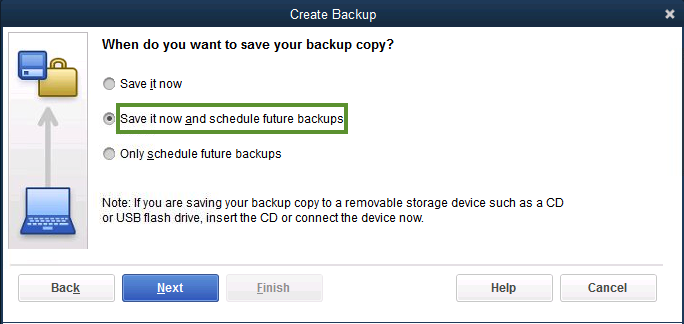
- Choose to Save it now and schedule future backups and then Next. If you don’t want to back up now, and only want to set reminders then select Only schedule future backups.
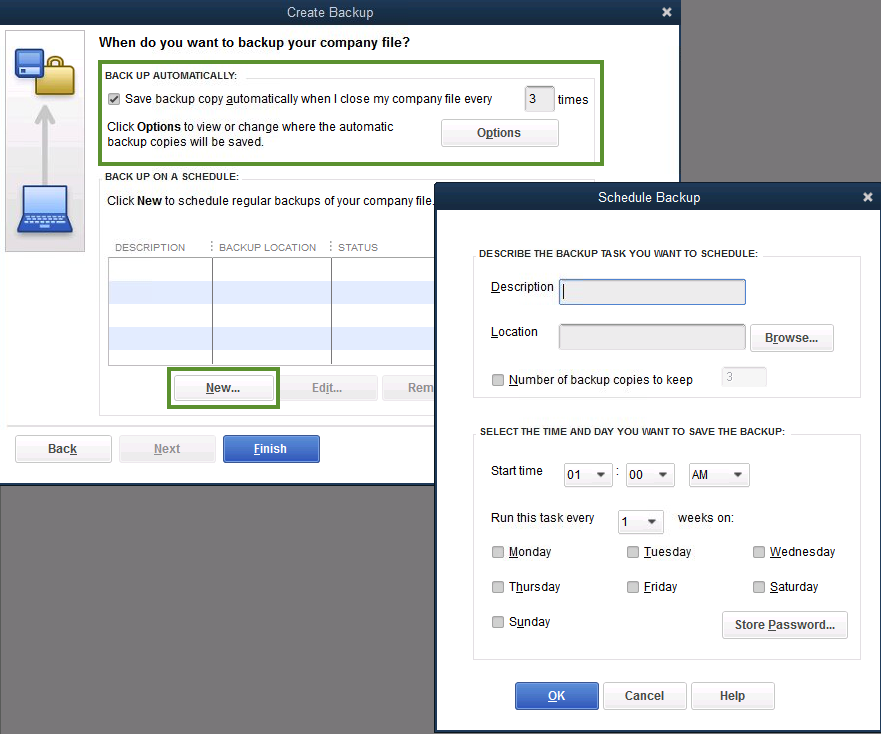
- Click on Save backup copy automatically when I close my company file checkbox. Then select backup timing.
- For creating a schedule, select New. Fill out all the fields to create a backup schedule. You can choose the time as your preference.
- After setting up a schedule click on OK. As for security QuickBooks will ask to insert your Windows sign-up password. To give permission to QuickBooks to schedule backup.
- The schedule has been set then select Finish.
QuickBooks creates a backup according to the time you set on it for your future backup. After finishing you will get a confirmation message.
B. Backup your company file manually
If you don’t want to set backup automatically then choose the backup file manually option. In this, you can create a backup according to your time schedule.
- Go to File menu to select Switch to Single-user Mode in QuickBooks.
- Select the File menu again to get Back up company option. Then click on the Create Local Backup option.
- Choose Local Backup in the Window screen and select Next to further.
- Pick the browser in the Local Backup Only list. Where you want to save the backup company file.
- Then need to choose the number of back-ups you want to set (Optional).
| Note: Set reminders No need to put a reminder in the calendar or another location. And no need to remember all the time. Just use the option in the Online and Local Backup section to set backup reminders. |
- This is only sure that your company files are in good shape before you going to save them.
- After finishing, select the OK option.
- Choose to Save it now and Next.
QuickBooks will create a single backup company file. When it has been done, then you will receive a confirmation message.
Step 2: Adjust your backup settings
Do you know when you last backed up your company file? If no, then go to the File menu and hang on Backup Company. The time and date come at the top of the menu.
To change backup preferences:
- Choose the File and hover over Back up Company. Then click on the Create Local Backup.
- Select the options.
- And make the changes and then OK.
Step 3: Restore your backup
You have now a backup company file to restore the company file anytime. And the backup file extension is .qbb. By chance, if the system is crashed or you want to recover your recent changes in your system. This is the best method to recover your company file.
Steps to Restore a Backup Company File
When you go to restore, QuickBooks creates a copy of the backup company file (.qbb).
Note: If your company file is on an external device such as a USB or hosting service like Box, you’ll be required to move it to your local hard drive first. Then follow the further steps:
- Click the File menu in QuickBooks, and choose Open and Restore Company.
- Select Restore a backup copy and then Next.
- Choose Local Backup and then Next.
- Then browse your system to back up the company file. It seems like: (Your company name).qbb.
- Choose the folder to decide where to save your restored company file. Then Open.
Note: If you trying to open back up in the same folder in which the company file already exists, then you may overwrite the data.
To avoid overwriting, you can rename your existing company or the backup file to show a unique name. You also can store your backup file to a completely new folder.
- After finishing, choose Save. But if you see the notification possibility of overwriting data, then select the option that is best for you. Try to overwrite in data.
As you can see now you have a new company file, from which you can work.
Note: If the backup company file on an external device or a hosting service like Box, then you’ll need to move them to your local hard drive first before you restore.
⇨ Backup your payroll forms
QuickBooks doesn’t provide automatic backup of payroll forms. There are some steps to get the backup of the payroll forms. Get prints and save them to your hard drive. And if you are using QuickBooks Enhanced Payroll, then save them as PDFs.
If you require that your accountant edit the payroll tax forms that you started, then send the folder that contains all saved payroll forms.
- Go to the Windows Start menu.
- Search for File Explorer, and open it.
- Browse your system for this folder: (Your company name) Tax Forms. This folder contains all your payroll data.
- And save the folder and send to your accountant. Don’t forget to send them to your backup company file.
- The important thing to remember to the accountant that put the payroll forms folder in the same folder of the company file.
- After reviewing and completing them, ask for a copy of that form folder and make a backup. And follow the same steps in your system to open updated forms.
⇨ Keep a copy of your QuickBooks Desktop product and license information
Here are the steps to find QuickBooks Desktop product and license information including:
- Product name
- Product Number
- Version
- License Number
- Release
Obtain your product number, license number, version and release
Recover product number, license number, version and release of the QuickBooks Desktop Pro, QuickBooks Premier, or QuickBooks Enterprise.
QuickBooks Desktop (Pro, Premier, or Enterprise):
- Start, QuickBooks Desktop.
- Then press the F2 key in the keyboard.
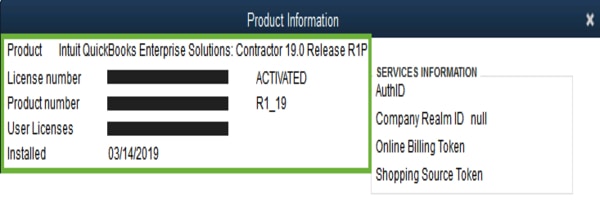
- Check out for product name, product number, and license number in the Product Information Window.
- Review for your release at the end of the product name.
Note: If you purchased a digital version of QuickBooks Desktop from the official website, your product information is the original purchase confirmation email.
But if you get QuickBooks from a retail store, then you will receive this level on the original packaging next to UPC code.
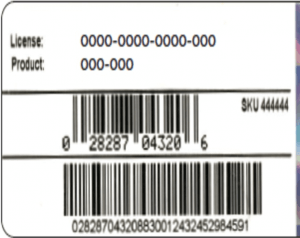
Till the time your product is registered, you always get updates and information online. Visit your account management portal (CAMPS) to get your product and license number.
On the other hand, if you didn’t register and can’t able to find your license number. Then use the License Look Up tool.
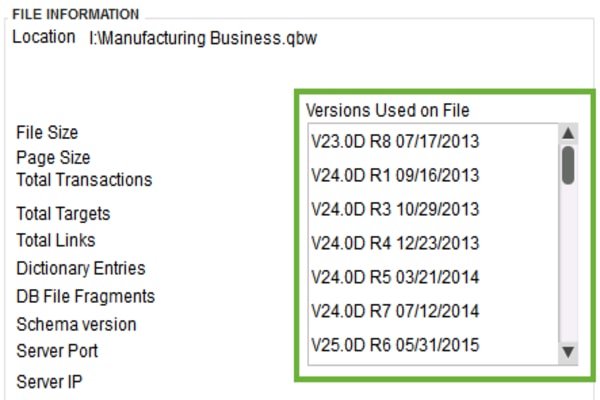
- Find your version in the Version Used on the File segment. You will see the list in sorted order oldest version at the top and the most recent or latest version at the bottom.
QuickBooks Basic and Enhanced Payroll for Desktop
- First, open QuickBooks Desktop.
- Select the Employees menu, and click on the Payroll Center.
- Choose the Payroll tab. You’ll find your version in the Subscription Statuses window.
QuickBooks Desktop for Mac
- Start QuickBooks Desktop for Mac.
- Select the Help menu, and go to Product Information.
If you haven’t download and install the QuickBooks Desktop for Mac then download, and install it, and then go to the ‘Help’ menu.
QuickBooks Merchant Services or QuickBooks Payments
There are no requirements for getting a version or release number. Updation and changes in the QuickBooks Merchant Services or QuickBooks Payments are all handled outside of the QuickBooks.
QuickBooks Point Of Sale (POS)
See all the version and release directly on your QuickBooks Point Of Sale (POS).
- Select the Help menu and select About Point of Sale.
- Review for the edition and version on the product line.
Solution 2: Start your system in Selective startup mode
Close all background apps, because hidden apps can stop your task. Then switch to selective mode. And if you are not able to do so then take help from your computer manufacturer or a window expert.

- Search MSConfig in the window, then open it ( You can also press Window+R on the keyboard to open the Run command and search MSConfig in it)
- Choose Selective Startup and Load System Services in the General tab.
- Select the Services tab, then click on Hide all Microsoft Services.
- Choose Disable all.
- Uncheck the Hide all Microsoft services checkbox.
- Assured Windows Installer checkbox is selected from the list of services. If it is not selected then select the checkbox.
- Click on the Ok option
- Choose Restart on System Configuration window.
Solution 3: Uninstall or install QuickBooks Desktop
After opening the system, Clean and install QuickBooks Desktop.
Solution 4: Switch back to Normal startup mode
After QuickBooks is installed, restore the system to its normal configuration.
- Press Window+R to open the Run command.
- And enter MSConfig in the Run command and then OK.
- Choose Normal startup, in the General tab.
- Click OK.
- On the System Configuration window, choose Restart.
We hope this article has helped you in resolving the error, however, if you are still facing the issues then you can dial our QuickBooks support number +1-844-405-0904 to get immediate help.